OpenResty XRay Agent Installation and Uninstallation
Installation
First Time Installation
The first time you log in to the console, you will see the following installation guide. You can choose between container installation or binary package installation.
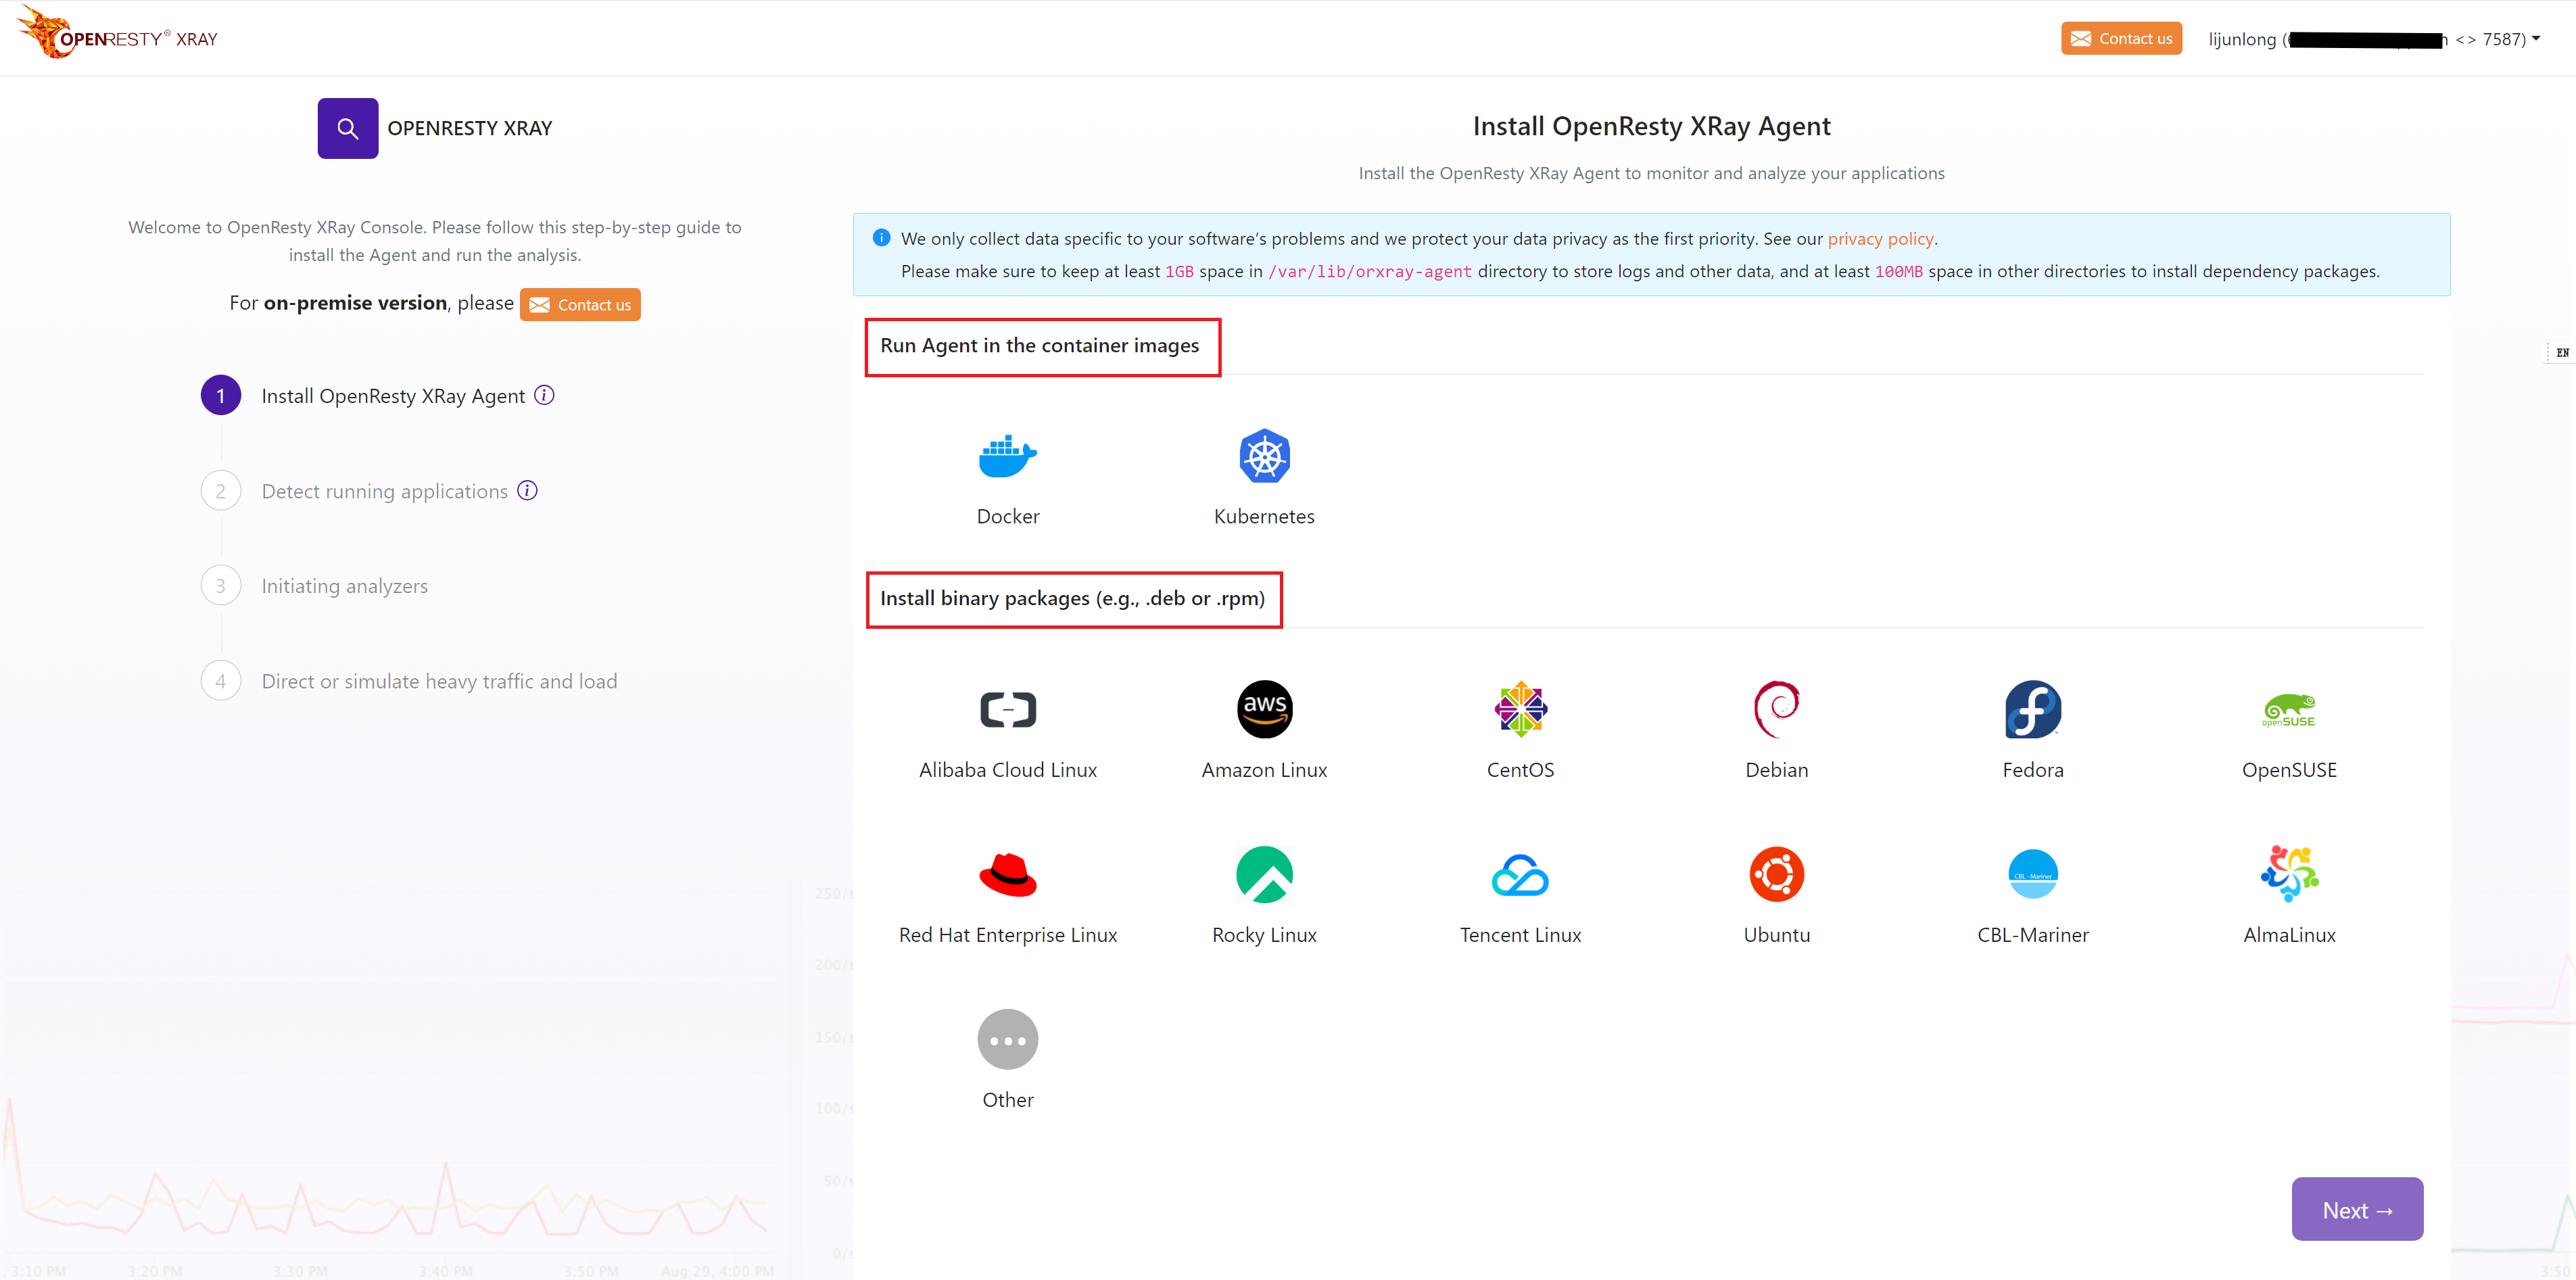
Next, you just need to follow the steps of the installation wizard to complete the installation successfully.
Install again
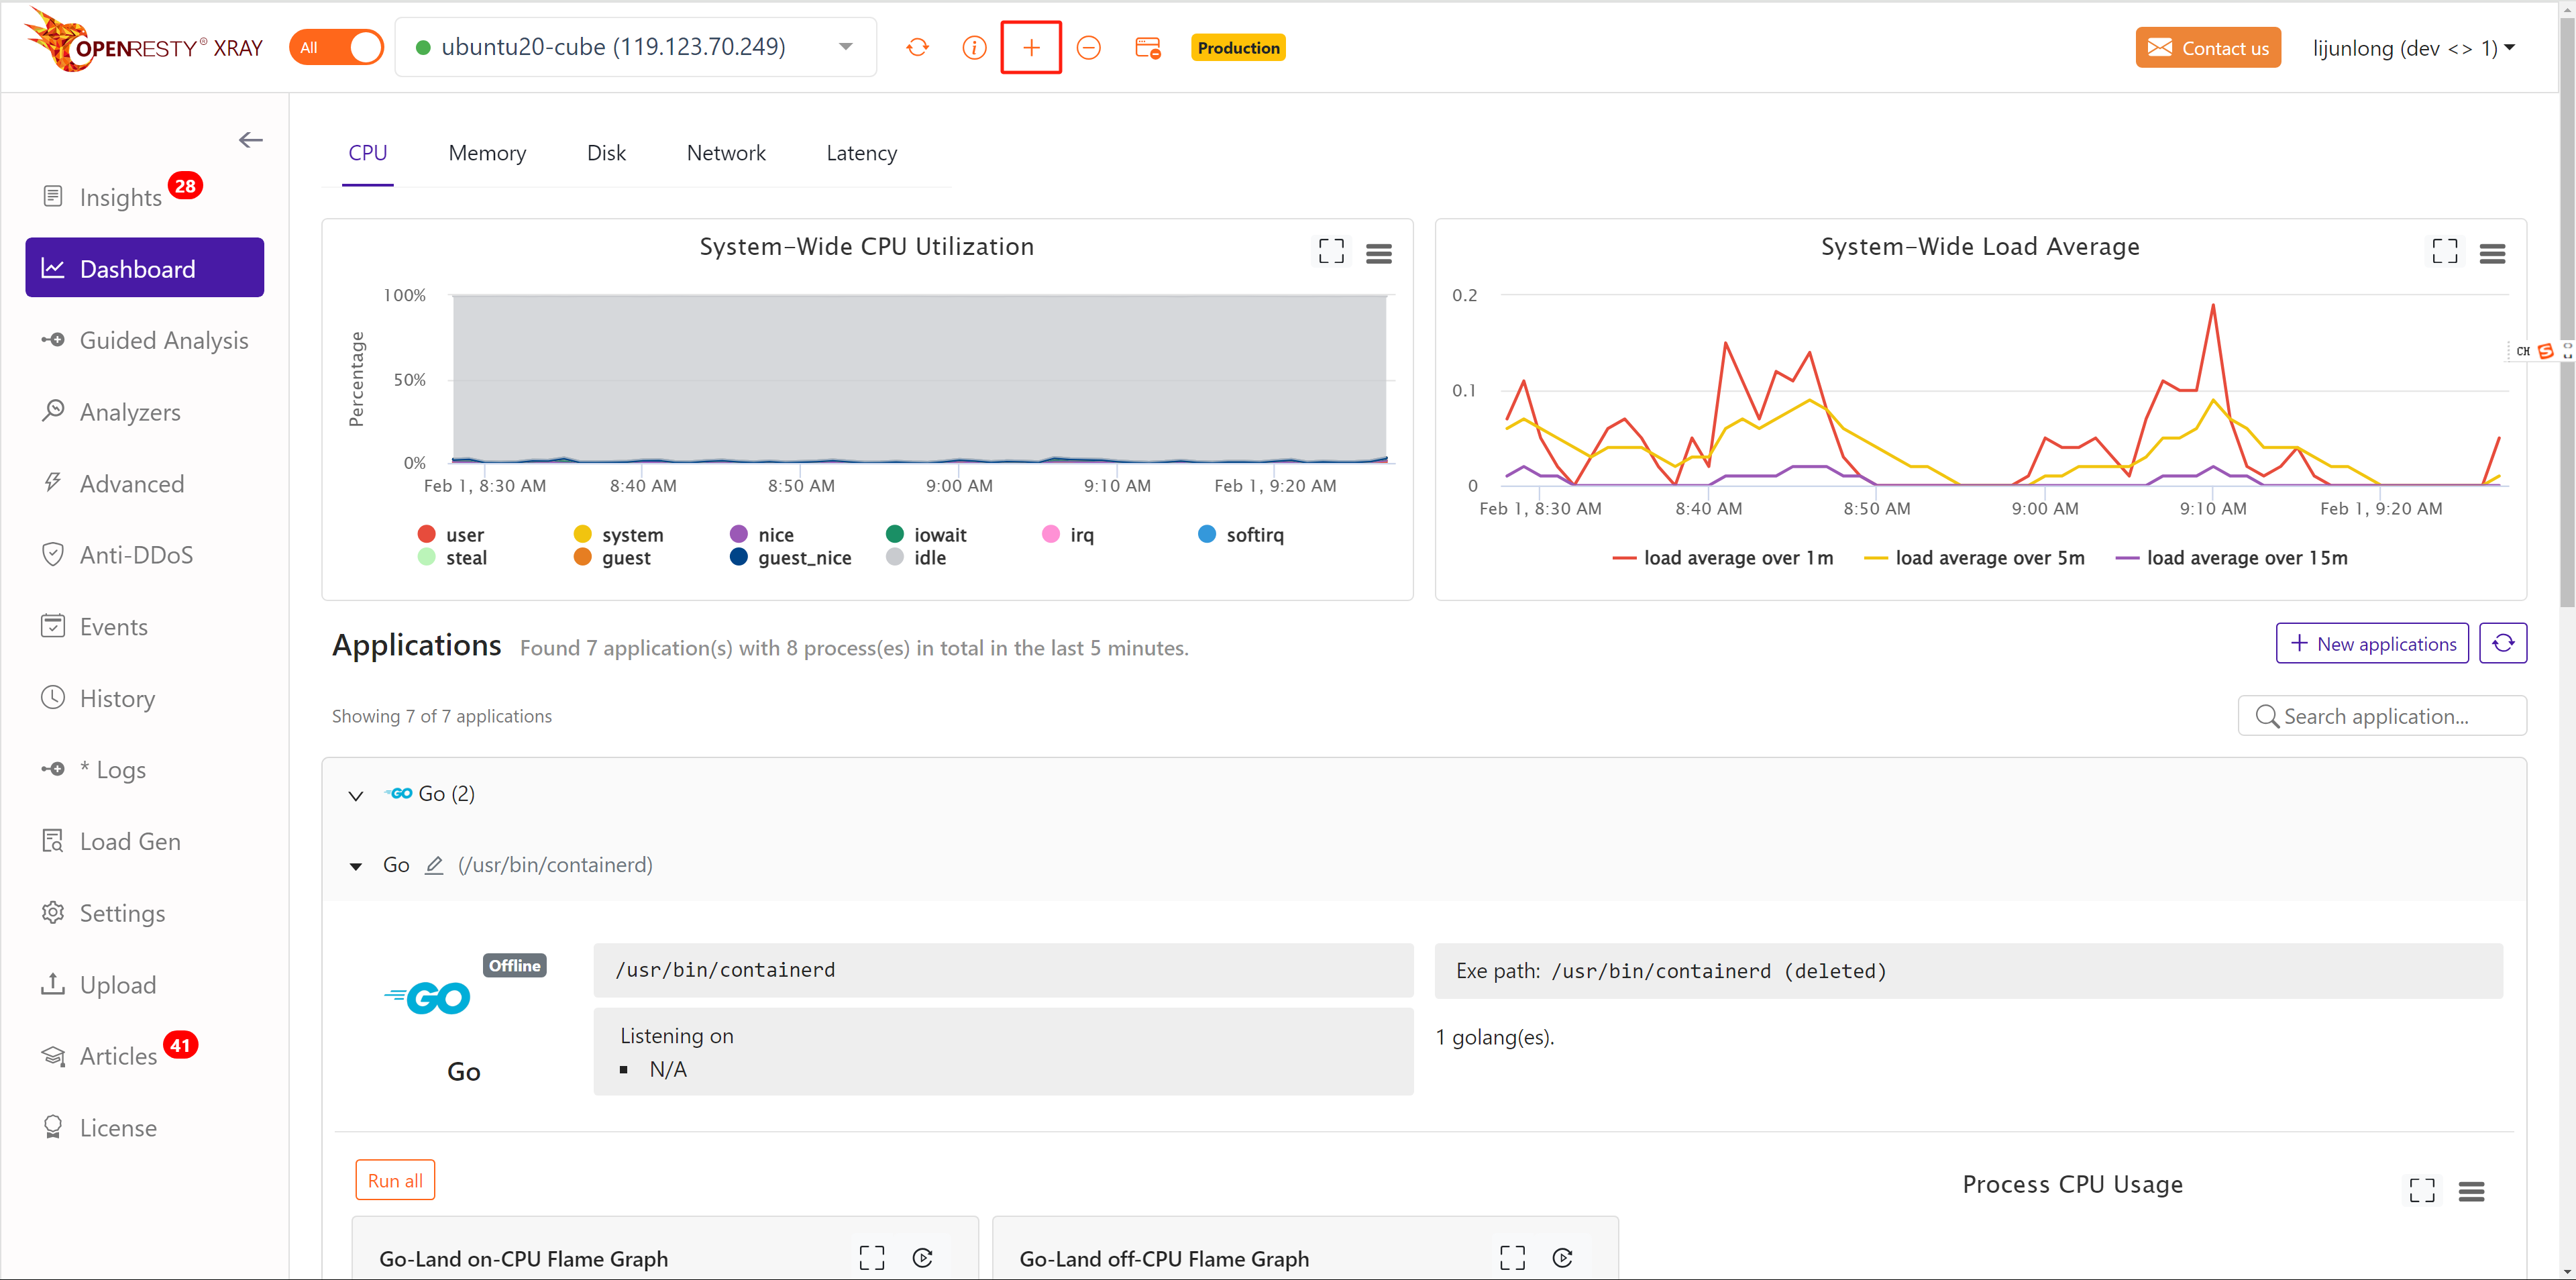
To install the OpenResty XRay Agent again, you can click the plus sign at the top of the image below.
The OpenResty XRay console remembers how you last installed the OpenResty XRay Agent, so after clicking on the plus sign you will see the following screen.
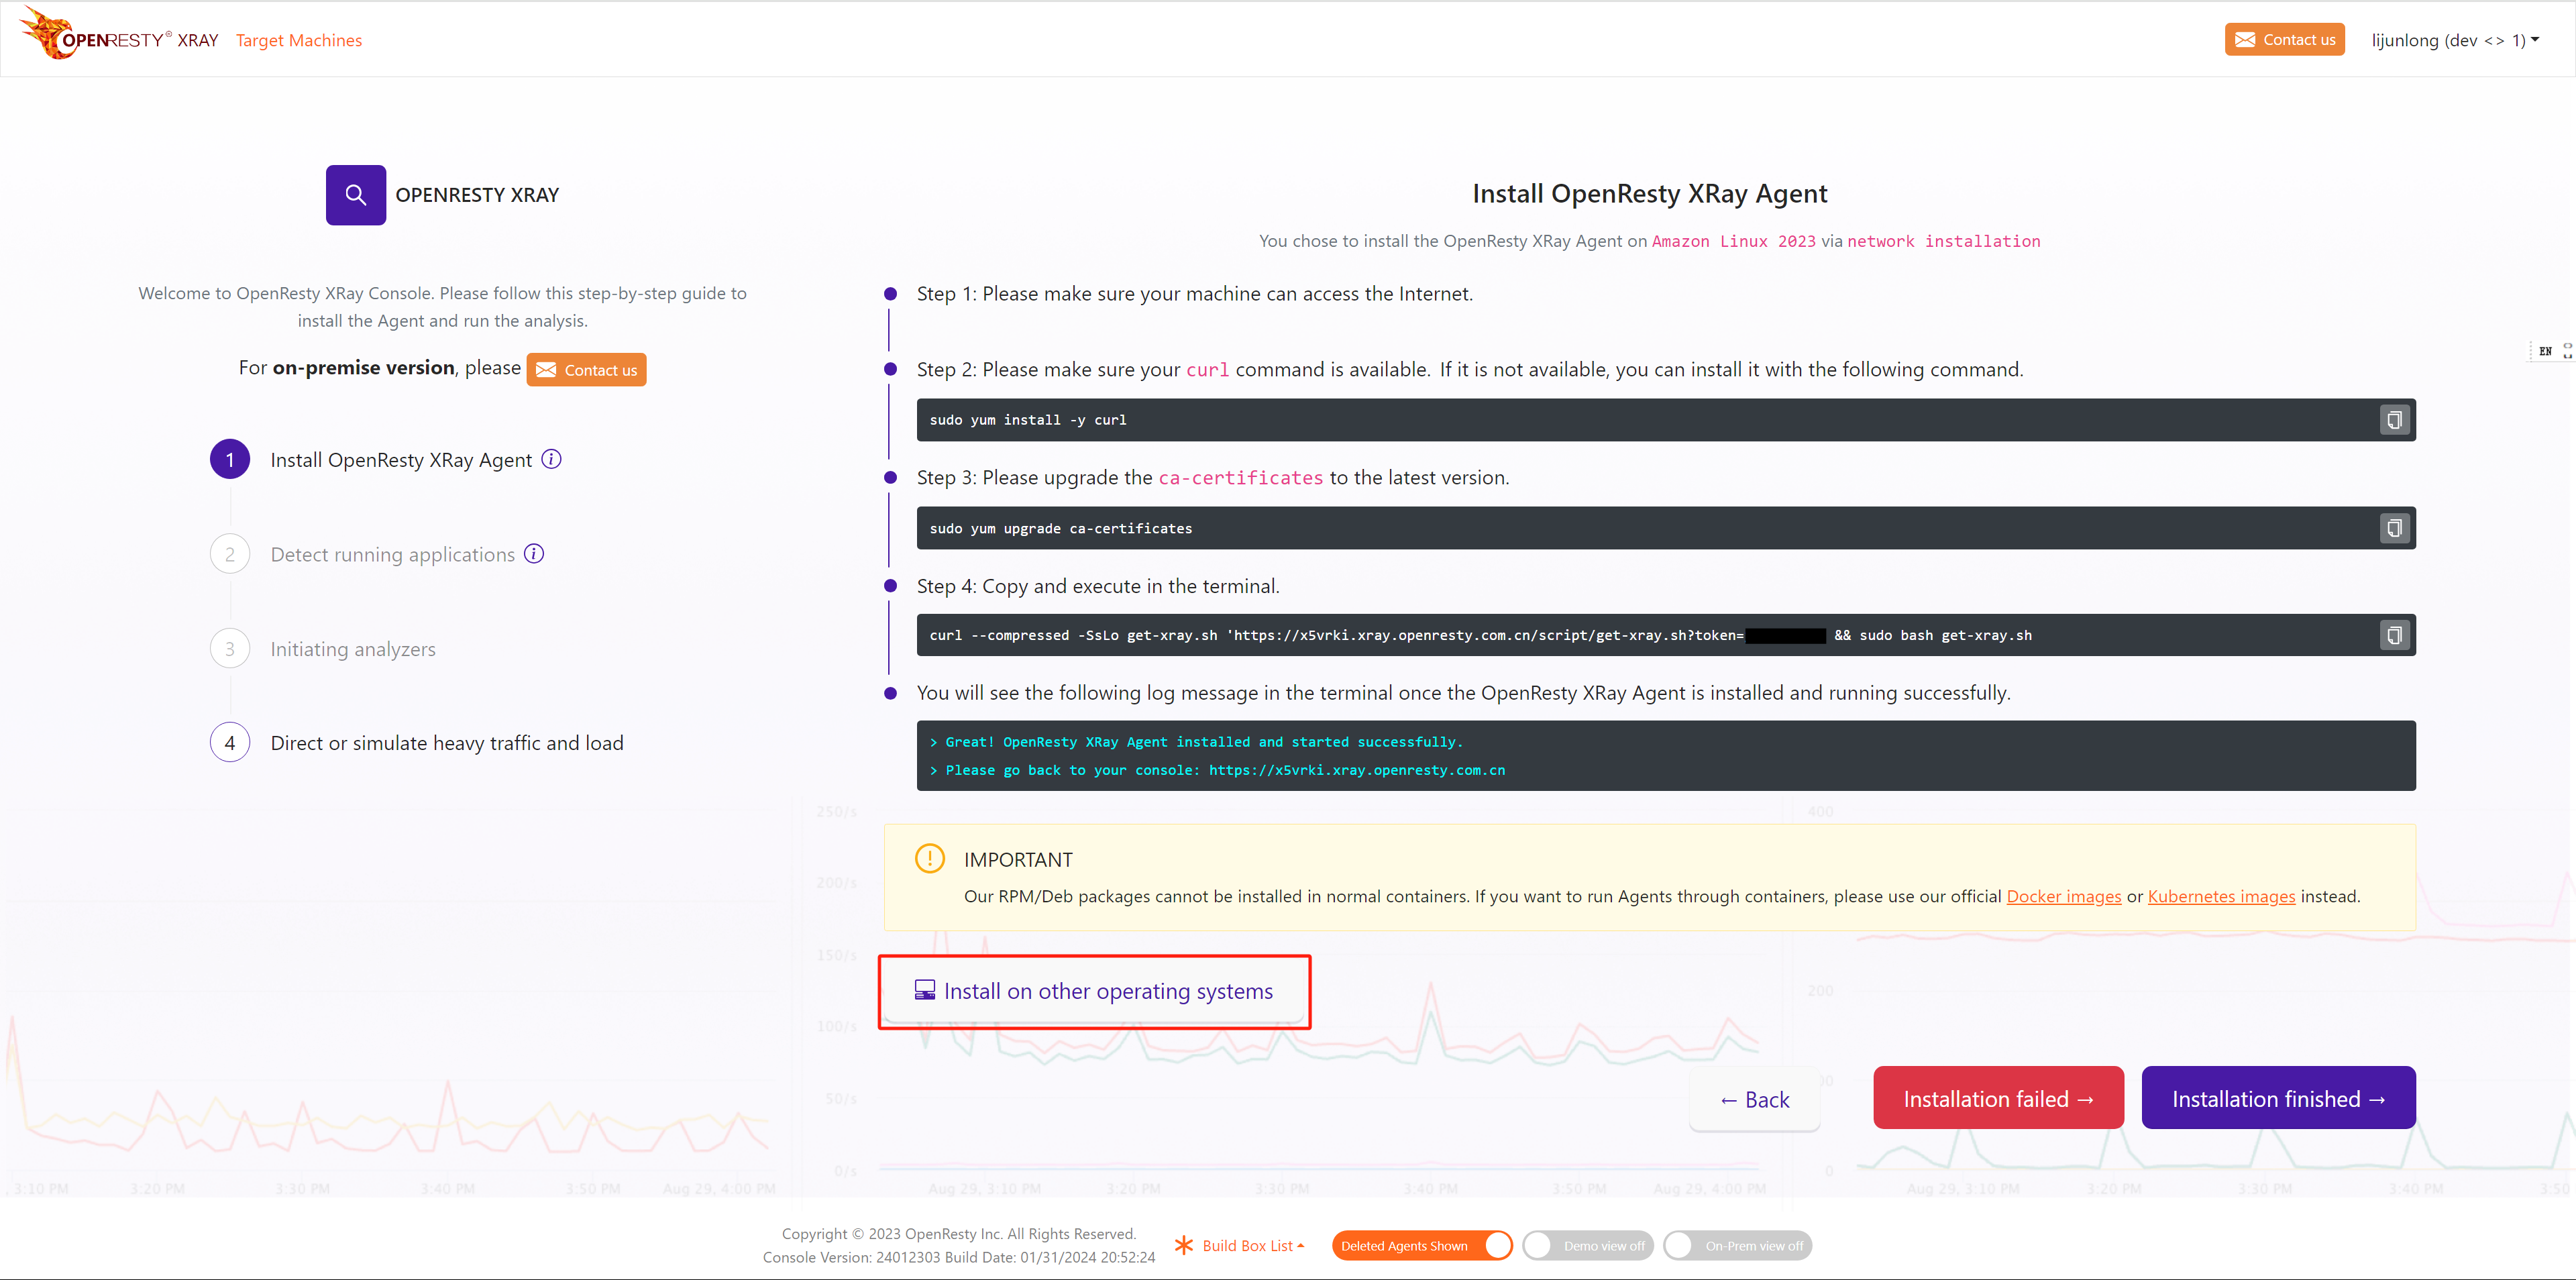
In general, you will still install the OpenResty XRay Agent in the same way, so just follow the steps in the bootstrap interface.
If you want to use a different installation method or a different operating system, then you can click on the Install on other operation systems button. This will bring you back to the same screen as the first installation.
Install on Kubernetes
If you want to install the OpenResty XRay Agent on a Kubernetes cluster, you can click on the Install on Kubernetes button.

This will bring you to the following screen.
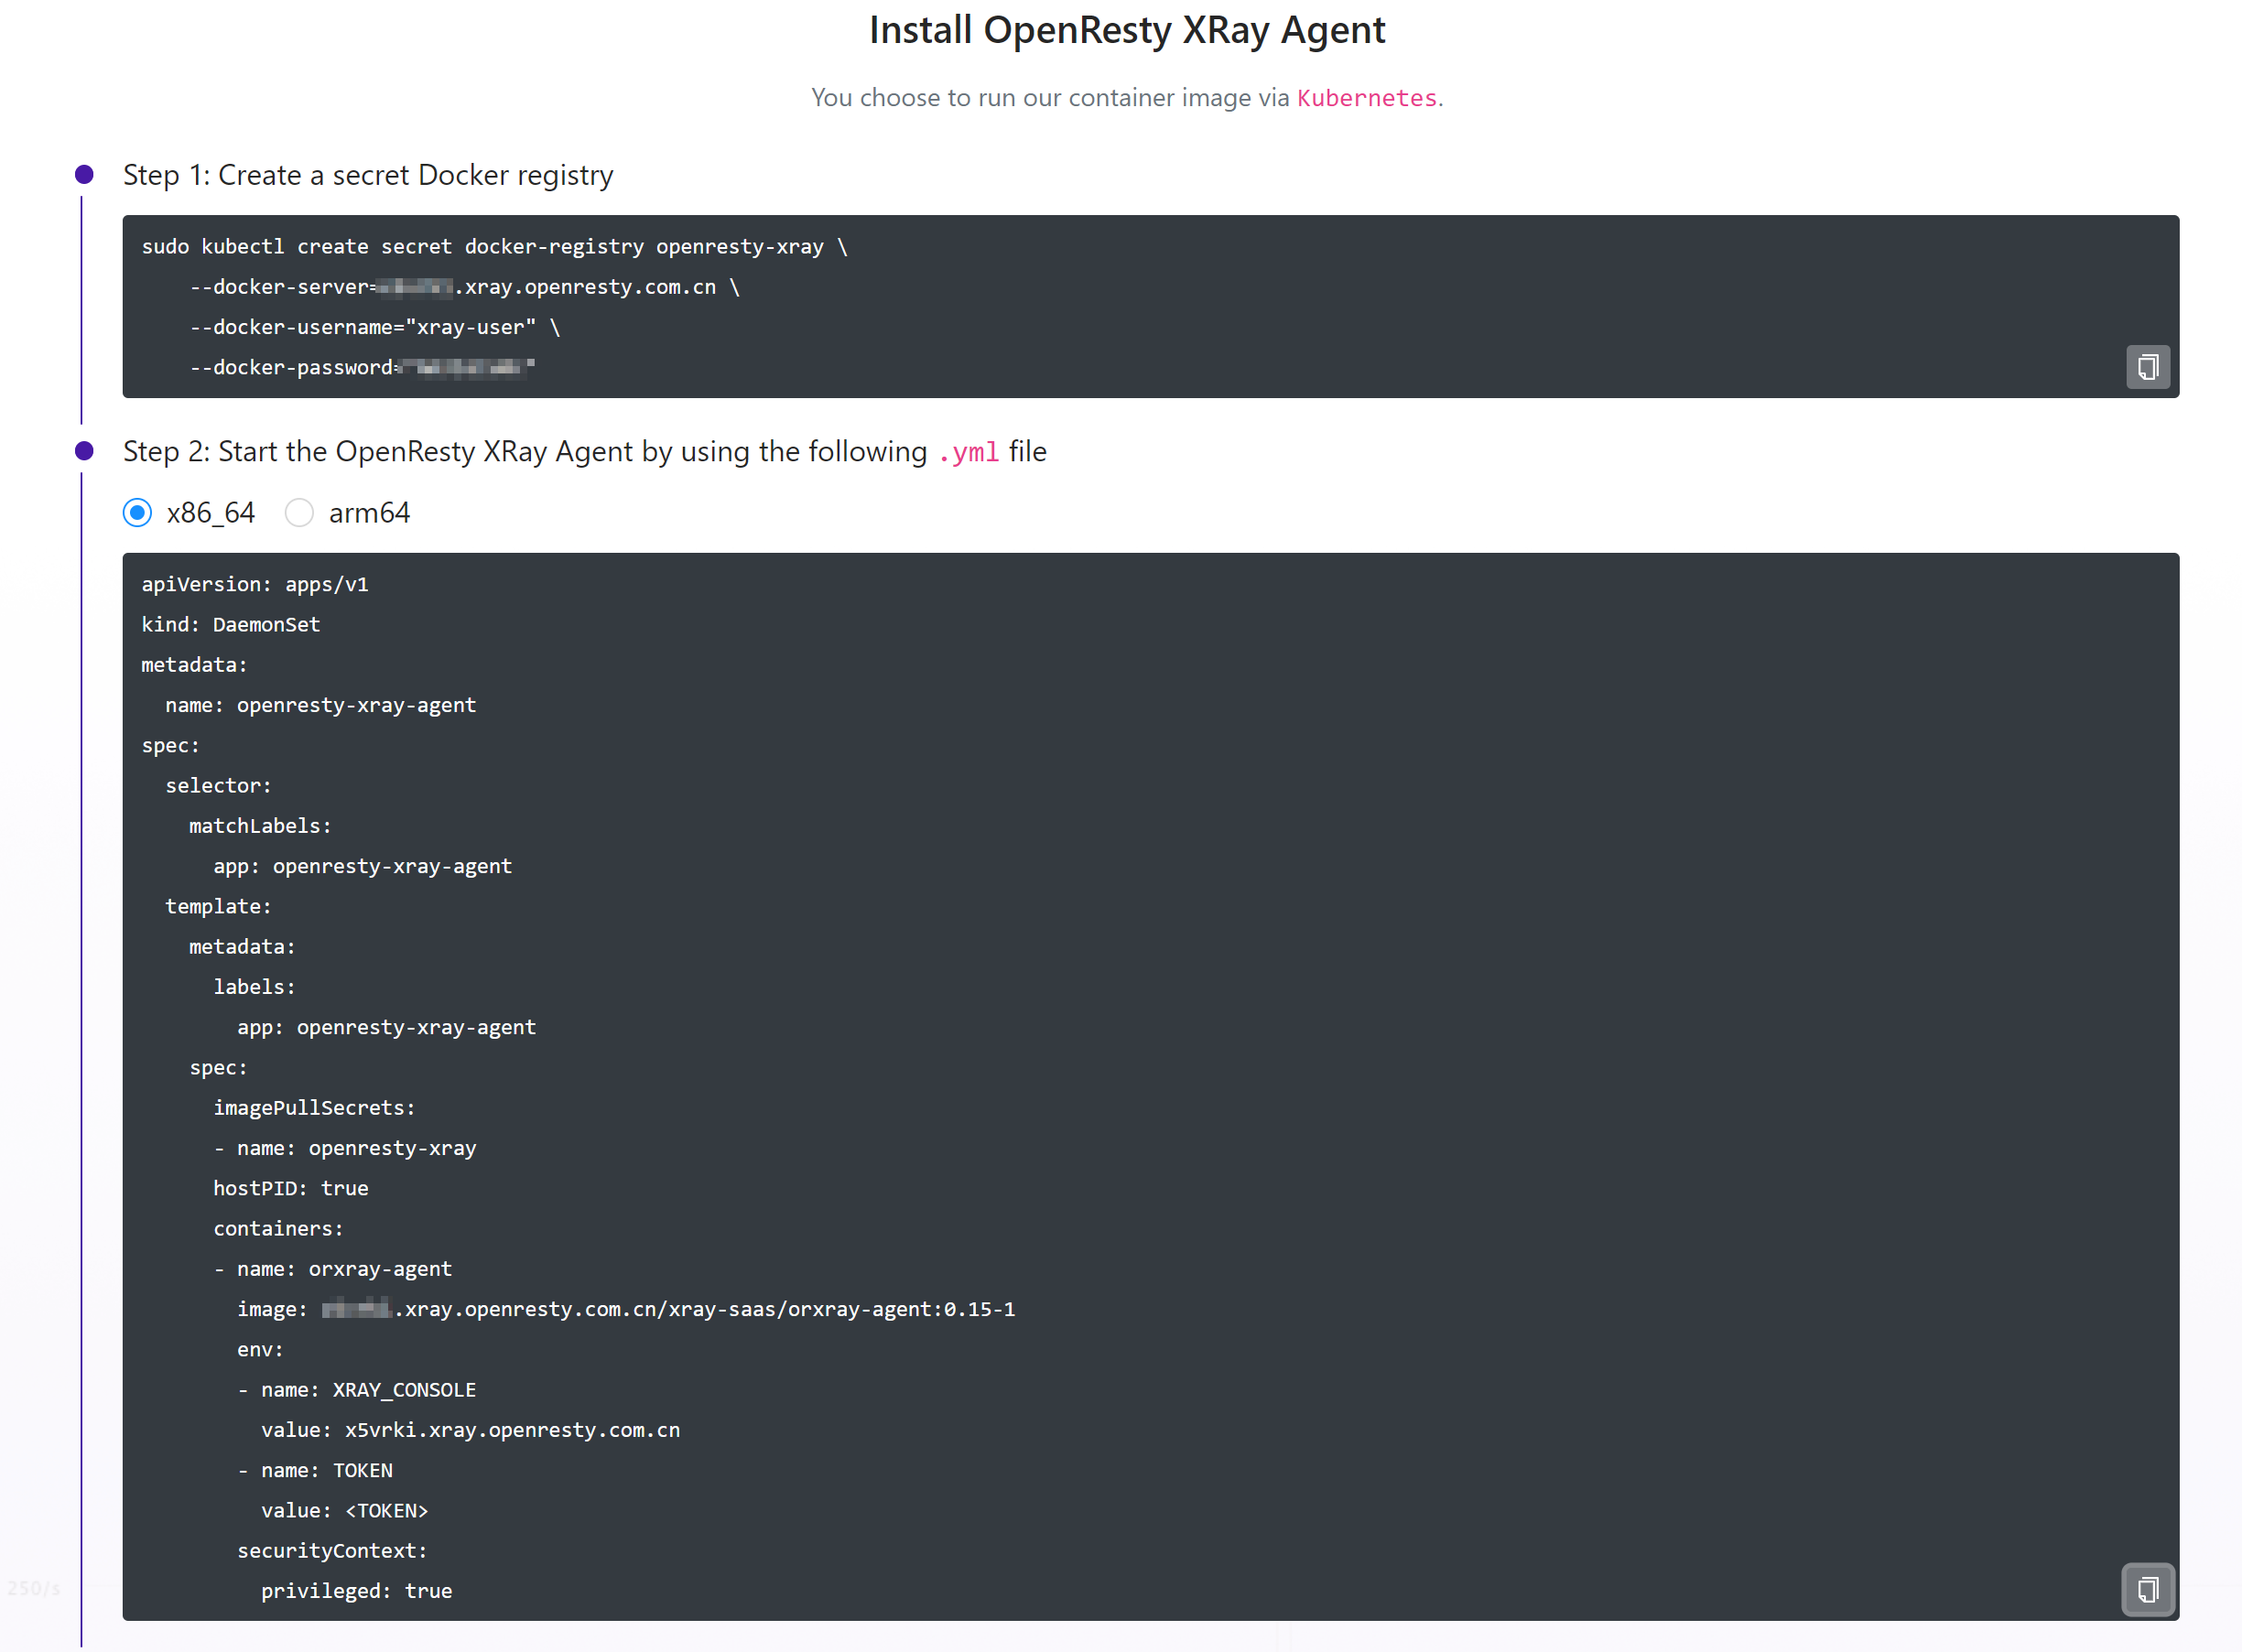
Then add secret, copy the yaml and apply it to your Kubernetes cluster, the OpenResty XRay Agent will be installed on your Kubernetes cluster as a DaemonSet.
or you can use nodeSelector to specify the node where the OpenResty XRay Agent is installed:
spec:
  template:
    spec:
      nodeSelector:
        role: monitoring
Uninstallation
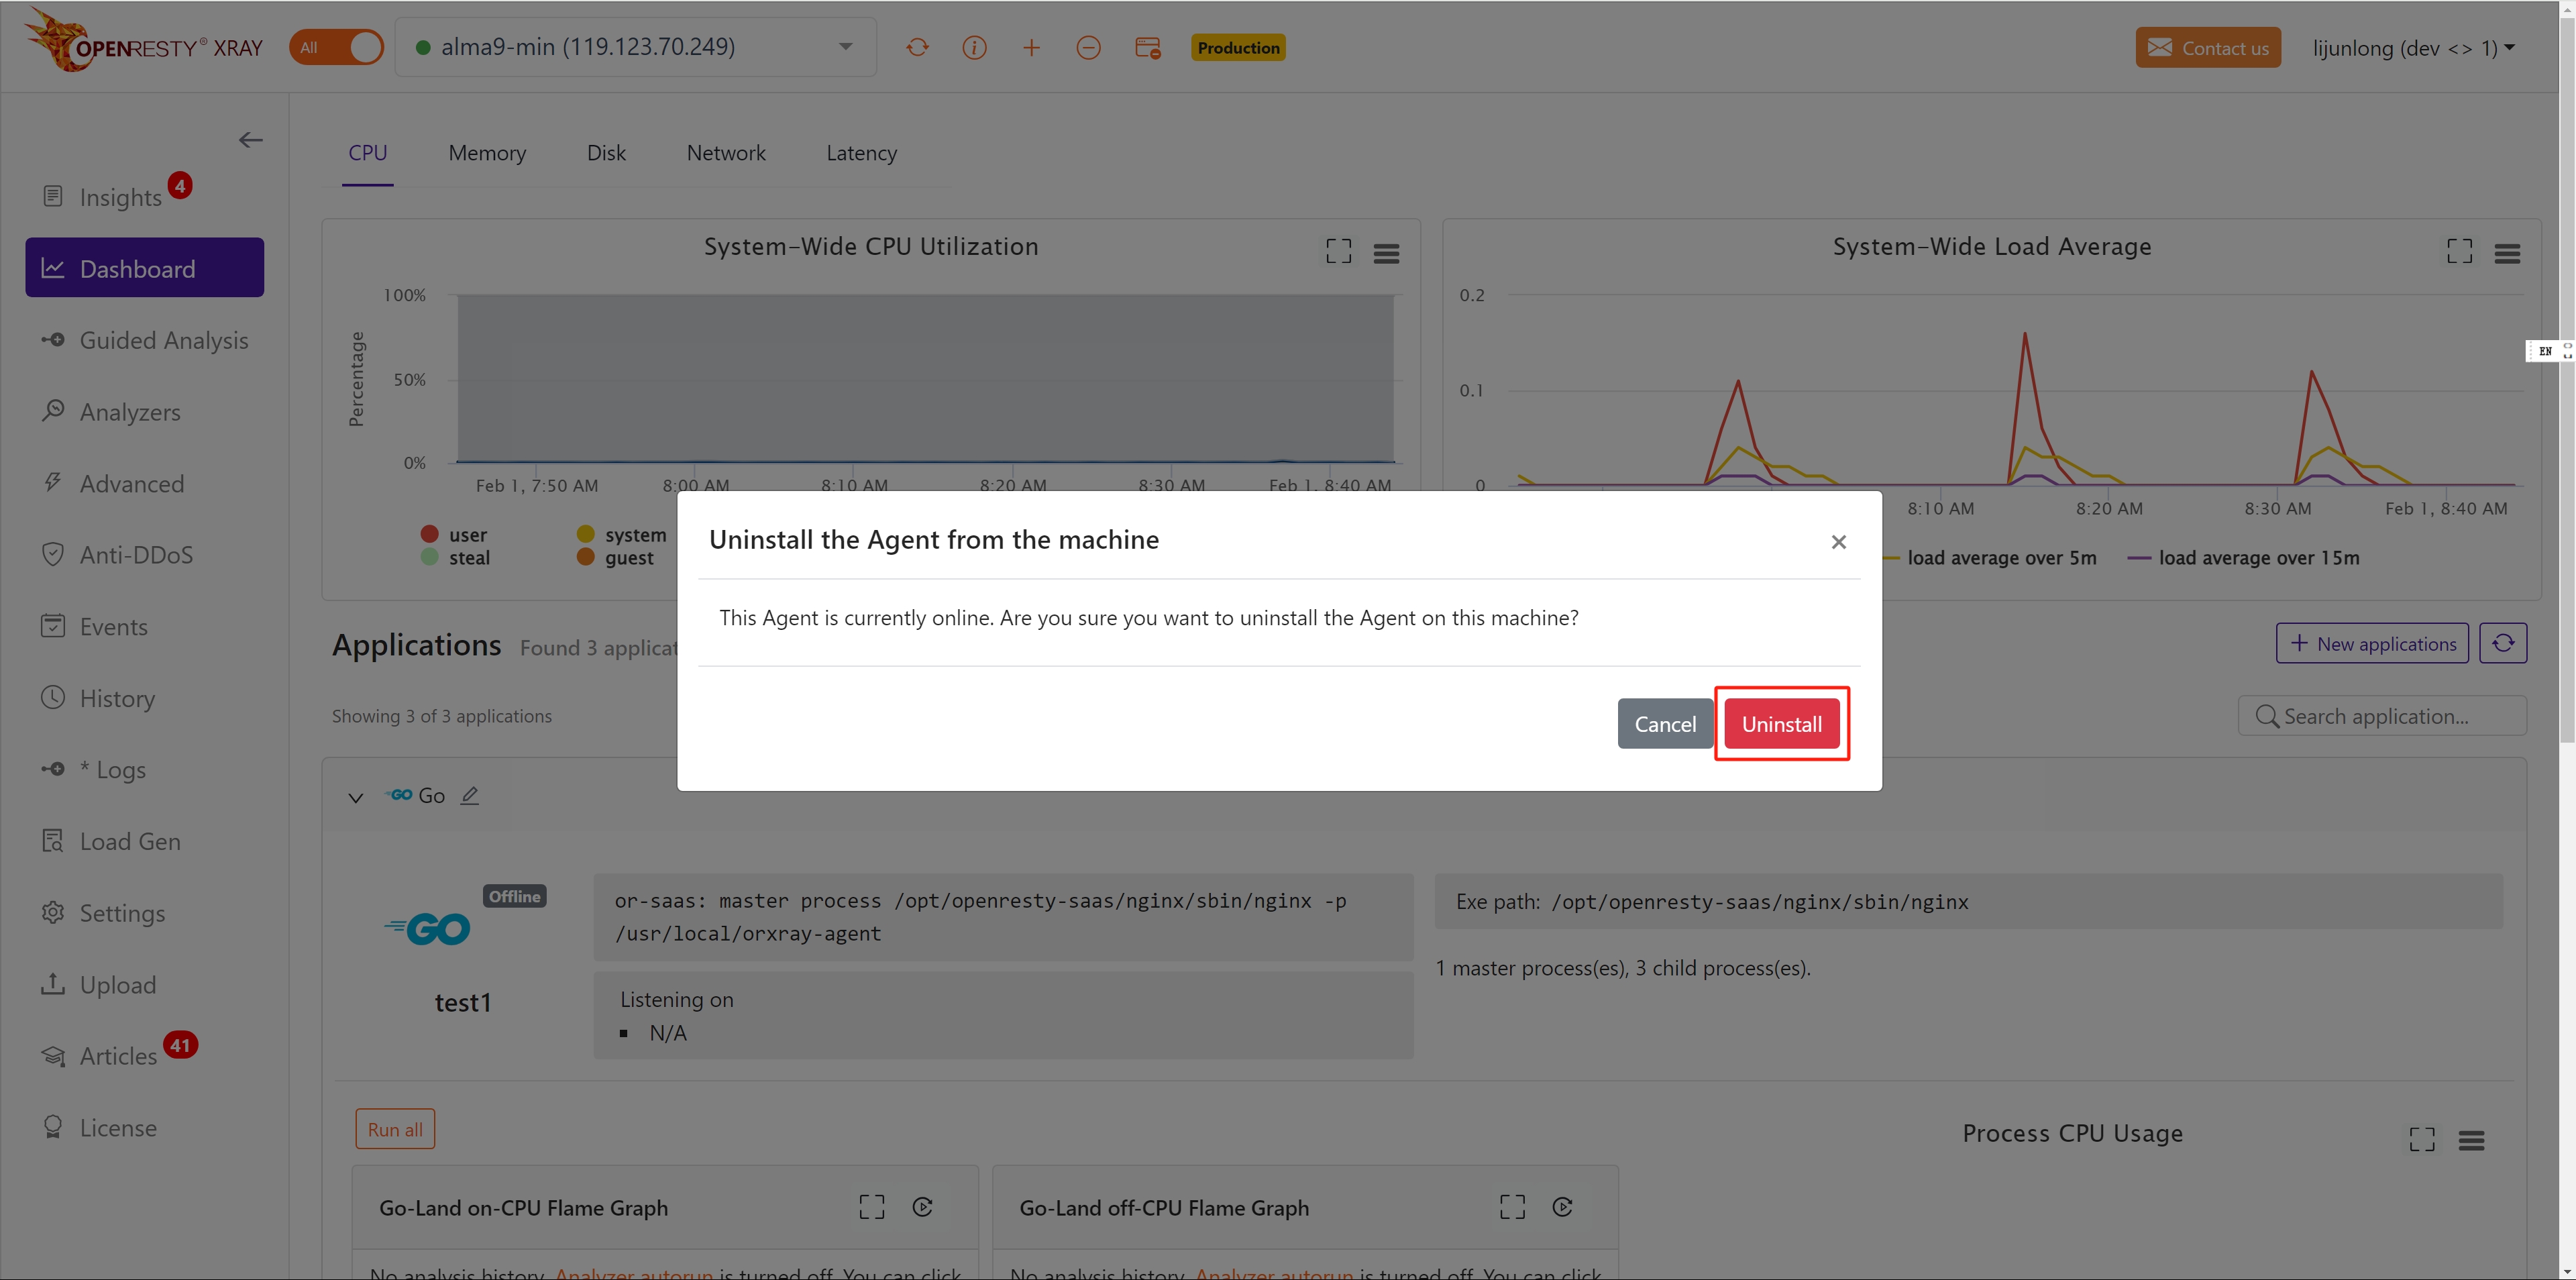
To uninstall the OpenResty Xray Agent software, click on the minus button in the top center and follow the instructions.

The OpenResty XRay console will give you an uninstall command based on how the OpenResty XRay Agent is currently installed.
For example, for an online binary package installation of the OpenResty XRay Agent, you will be prompted as follows. Simply click Uninstall to complete the uninstallation.
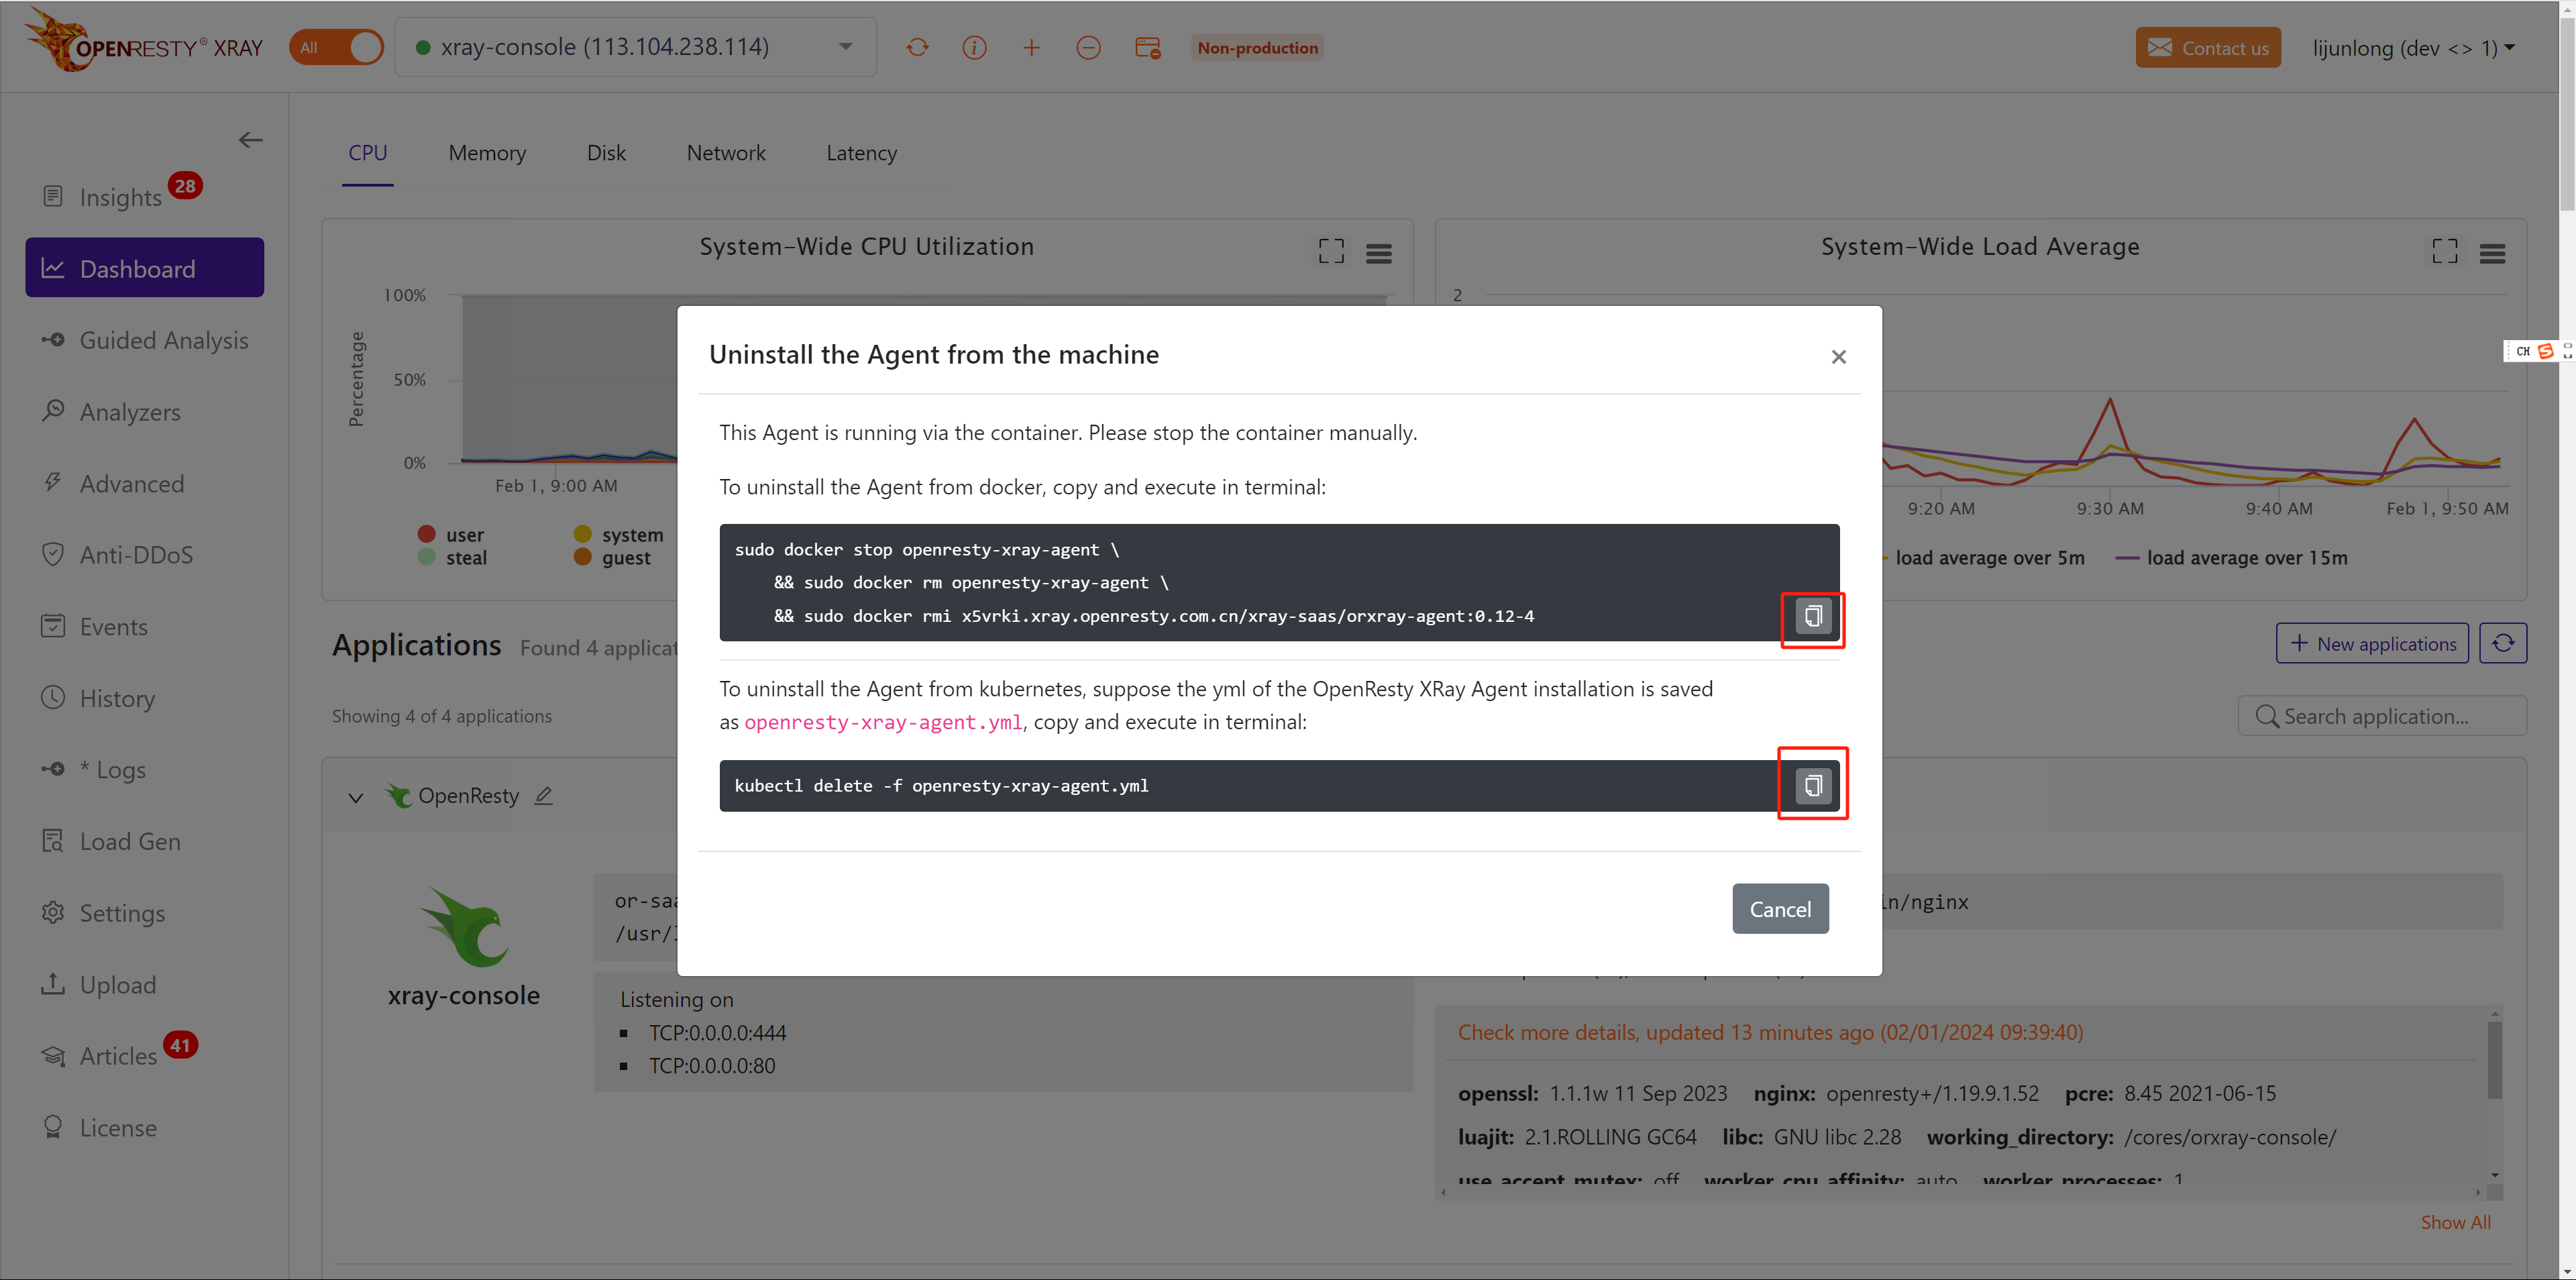
For example, for an online container installation of the OpenResty XRay Agent, you will get the following prompt.
You need to copy the uninstall command to the target machine to execute it.
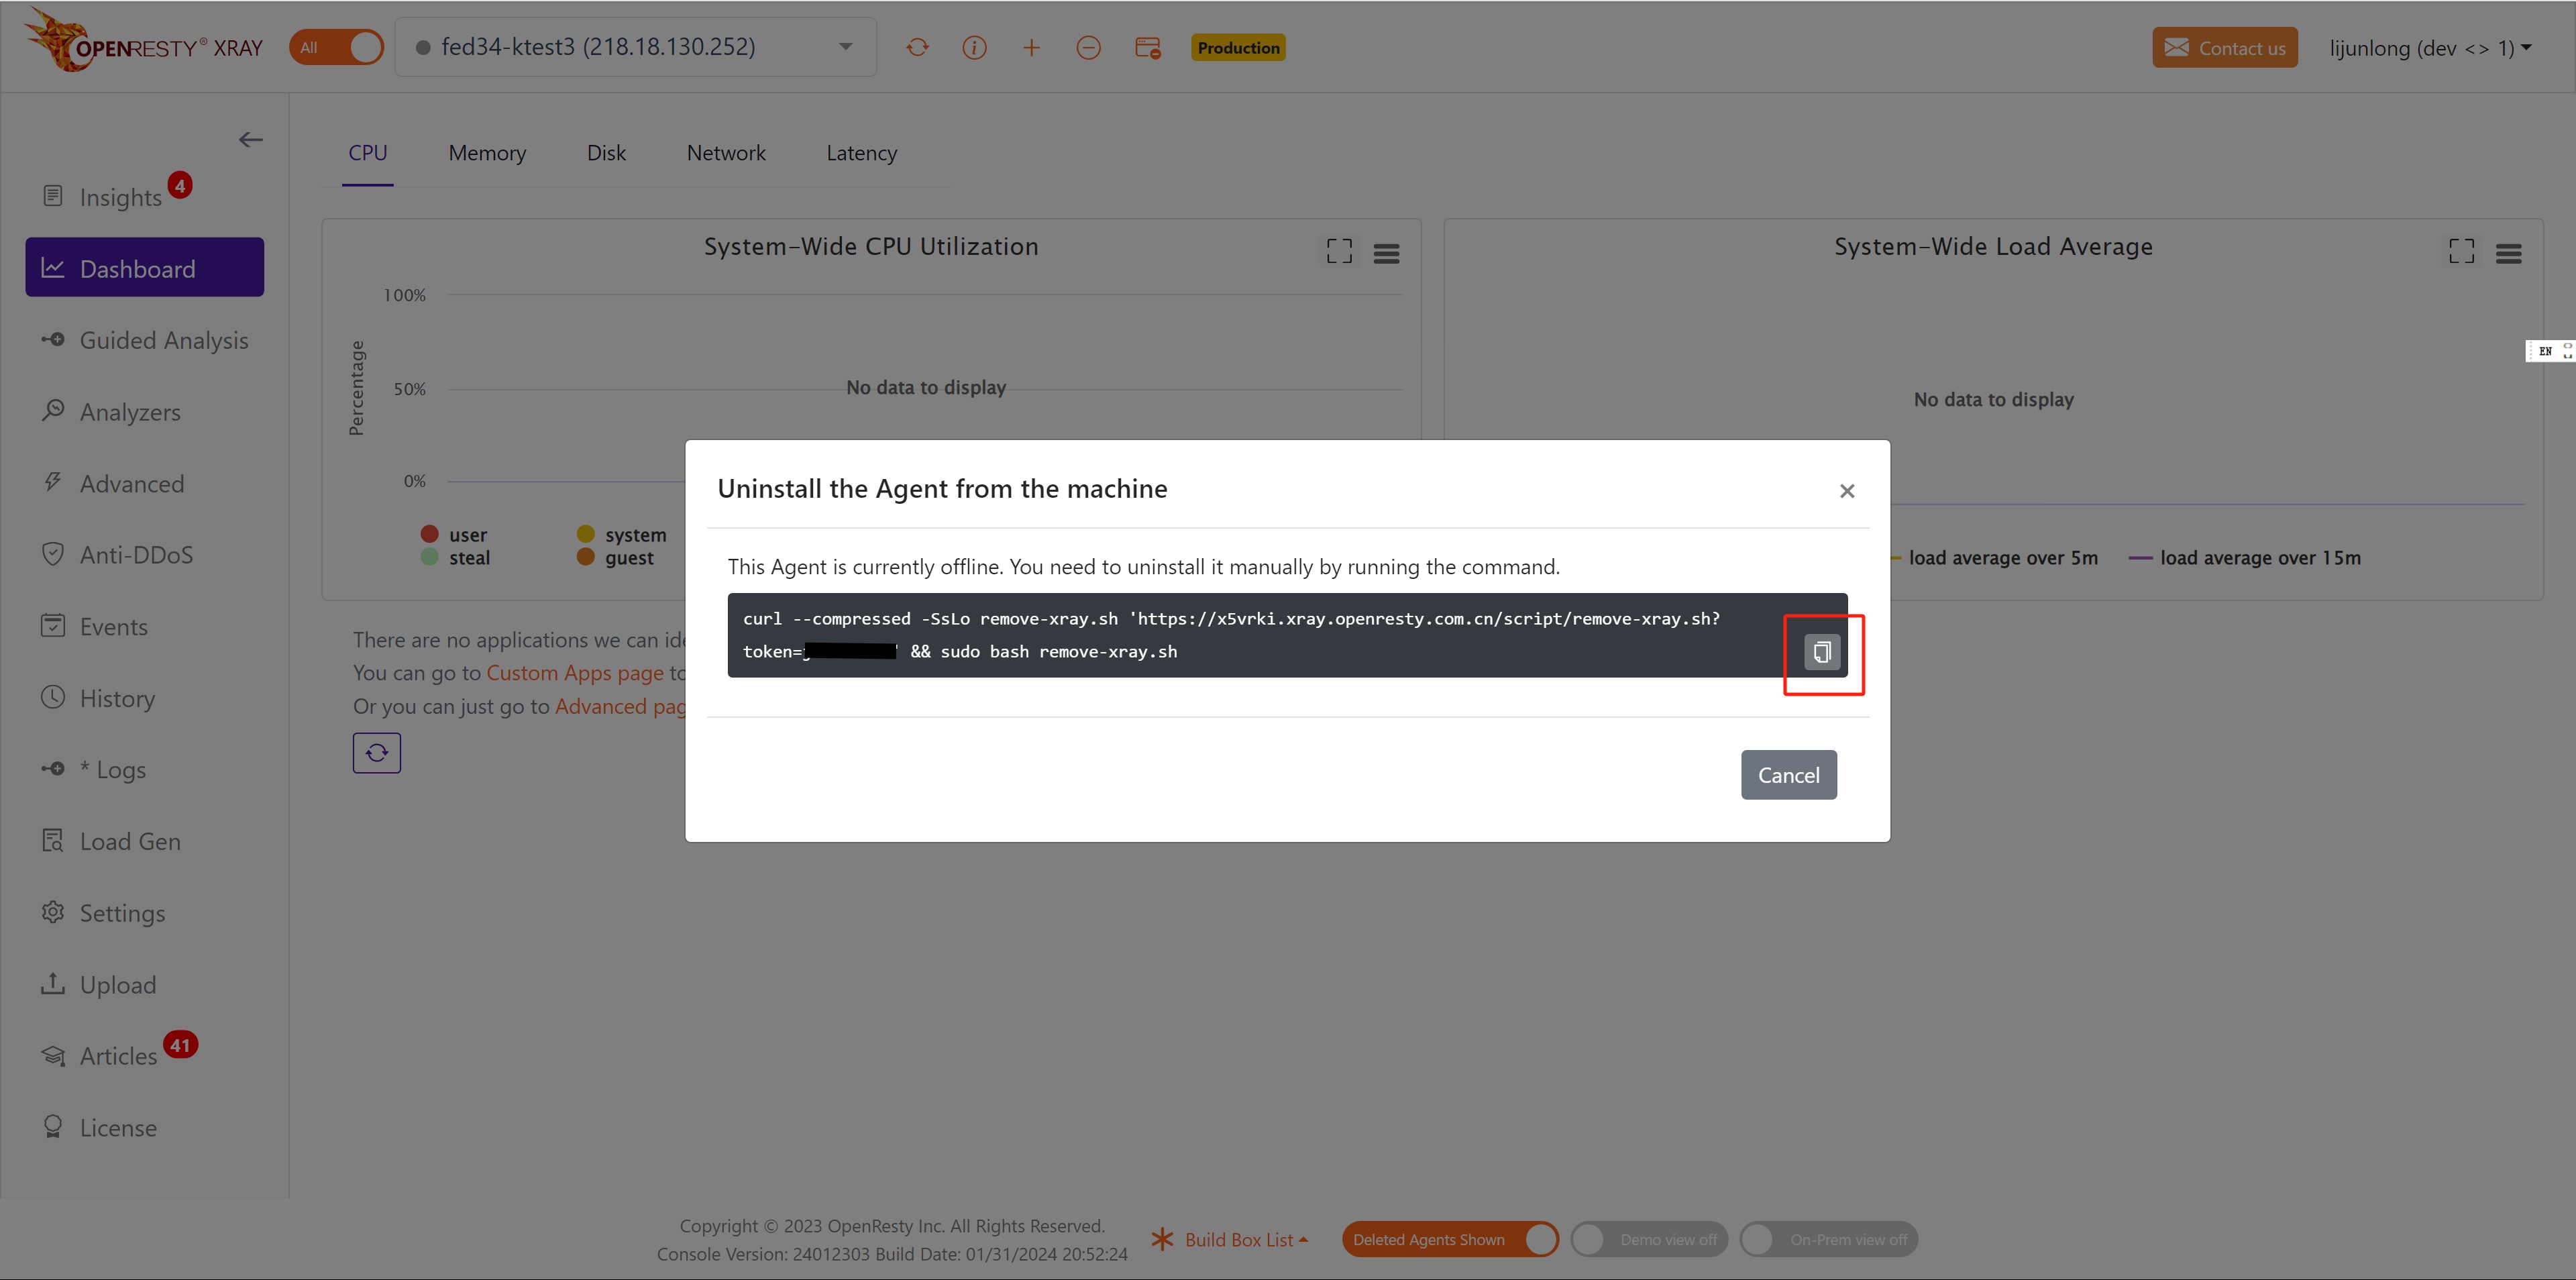
In case of OpenResty XRay Agent that is already offline, you will get the following prompt. You need to copy the uninstall command to the target machine to execute it.
If the number of machines has reached the limit of the number of licenses, but you want to analyze the problem on other new machines. You can uninstall the OpenResty XRay Agent on the machine you are no longer using, and then install the OpenResty XRay Agent on the new machine.