Enable WAF for an Application
A Web Application Firewall (WAF) can protect your website against common attacks such as SQL injection, XSS (Cross-Site Scripting), web server exploits, and malware.
This guide explains how to enable WAF for an application in the OpenResty Edge Admin console via Page Rules.
Step 1: Go to Page Rules
In the left sidebar of your application, click Page Rules to open the rules list. If no rules have been created yet, the list will show “You don’t seem to have any form rules created on this page.”
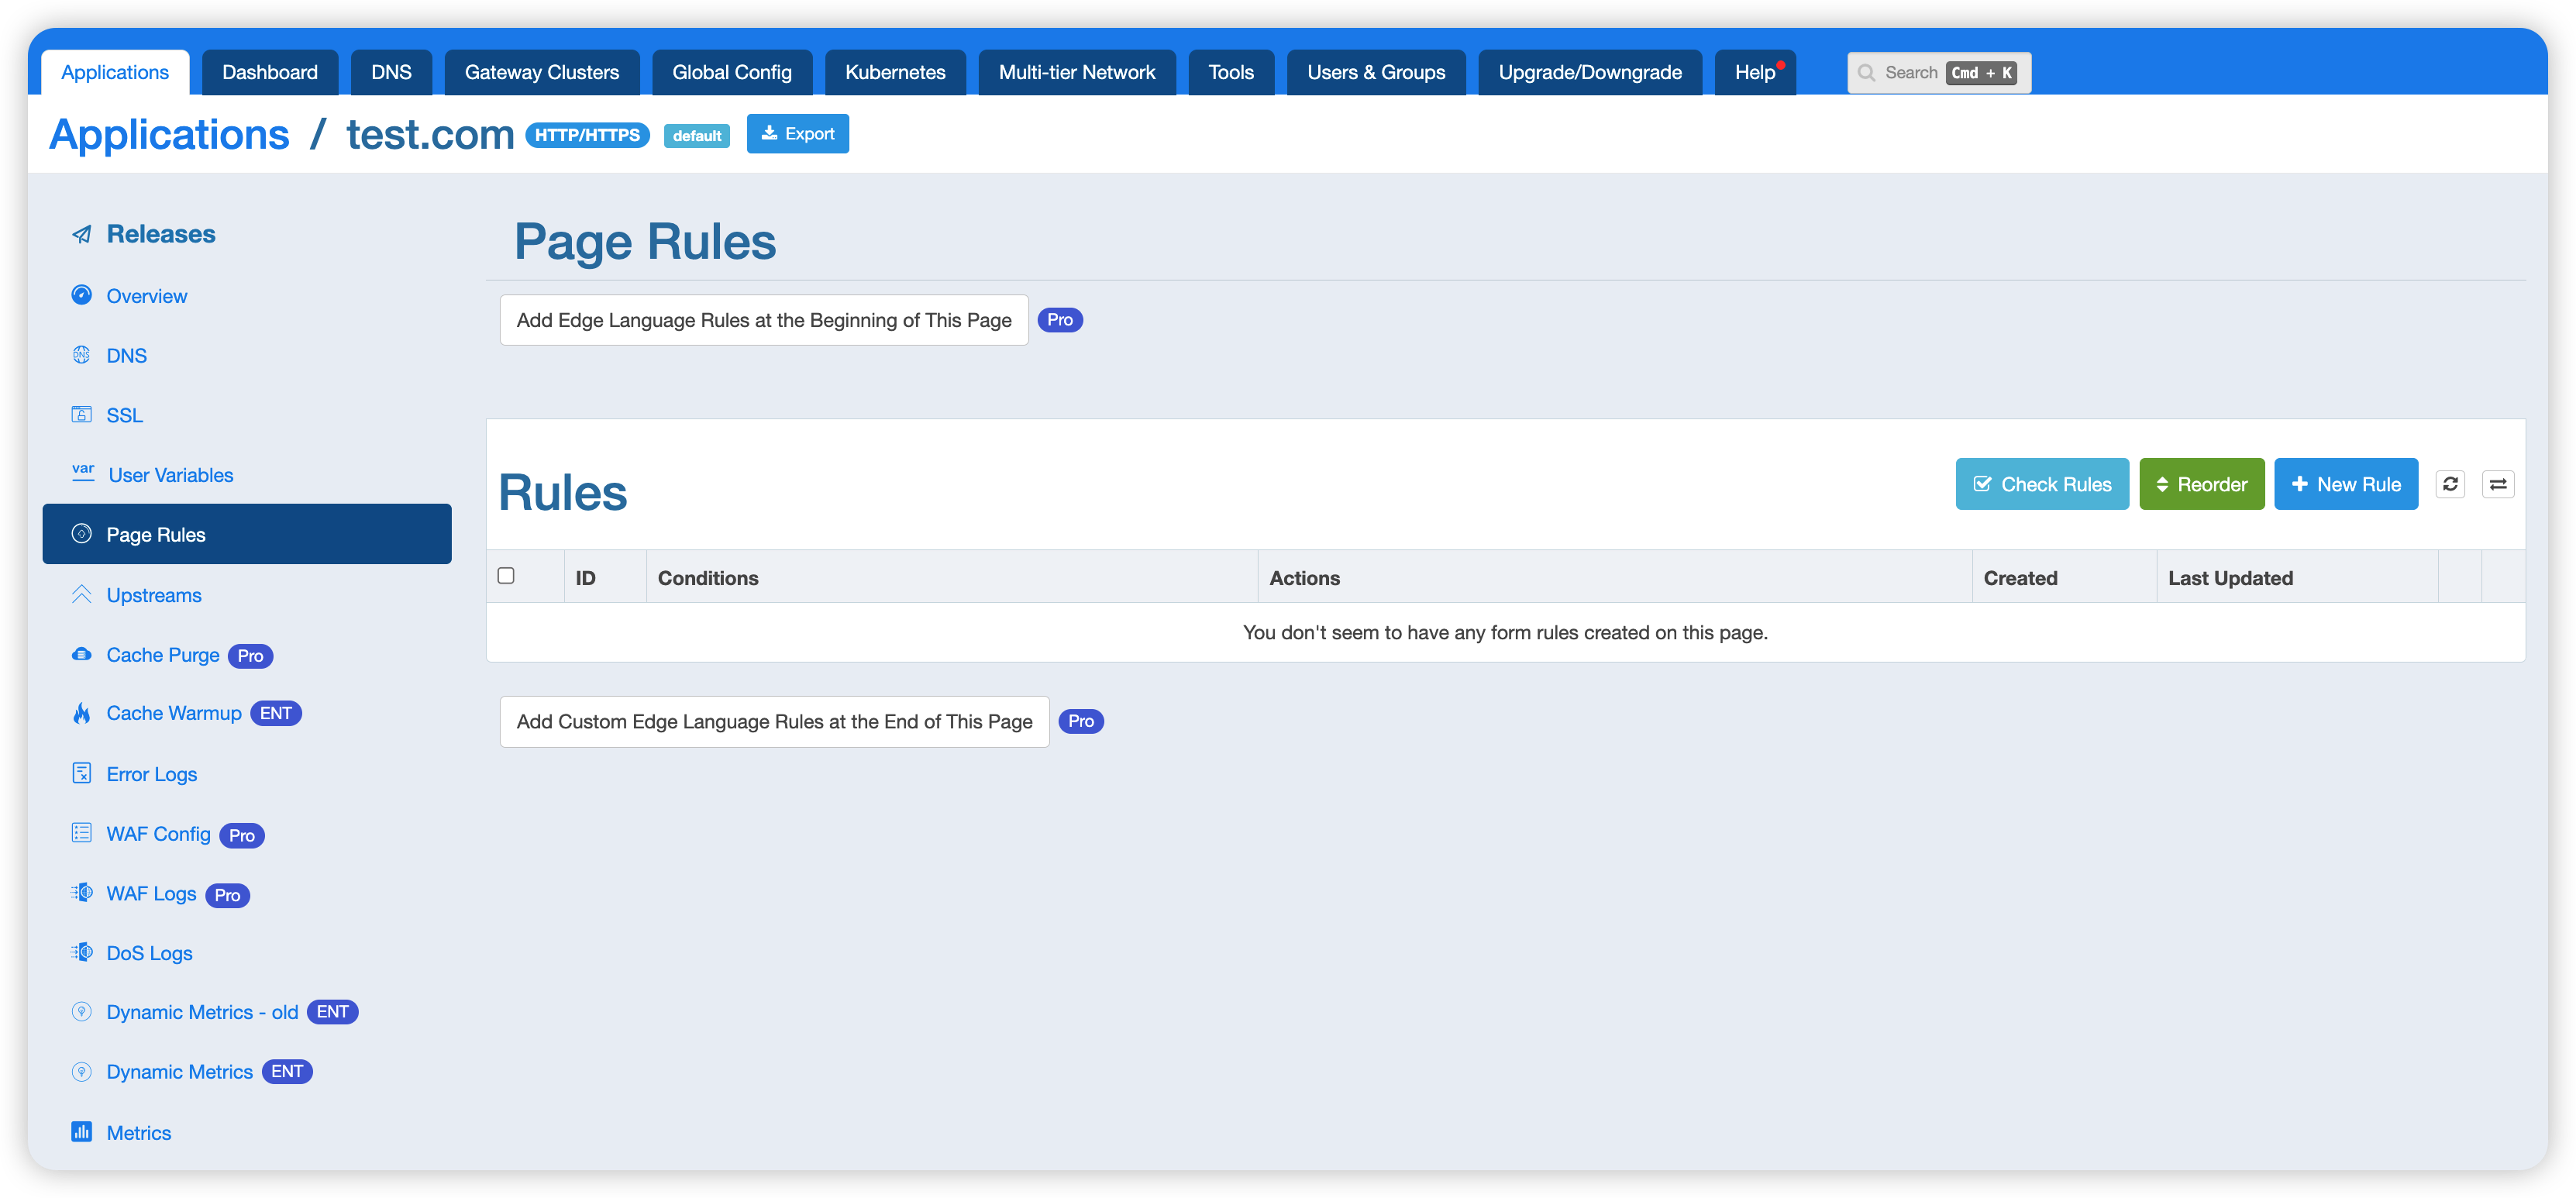
Click the + New Rule button in the top-right corner to open the rule configuration panel.
Step 2: Configure the WAF Module
The new rule panel contains several sections: Enable when, Action, WAF, Proxy, Cache, Content, and more.
The WAF module is disabled by default. Toggle the switch on the right to enable it:
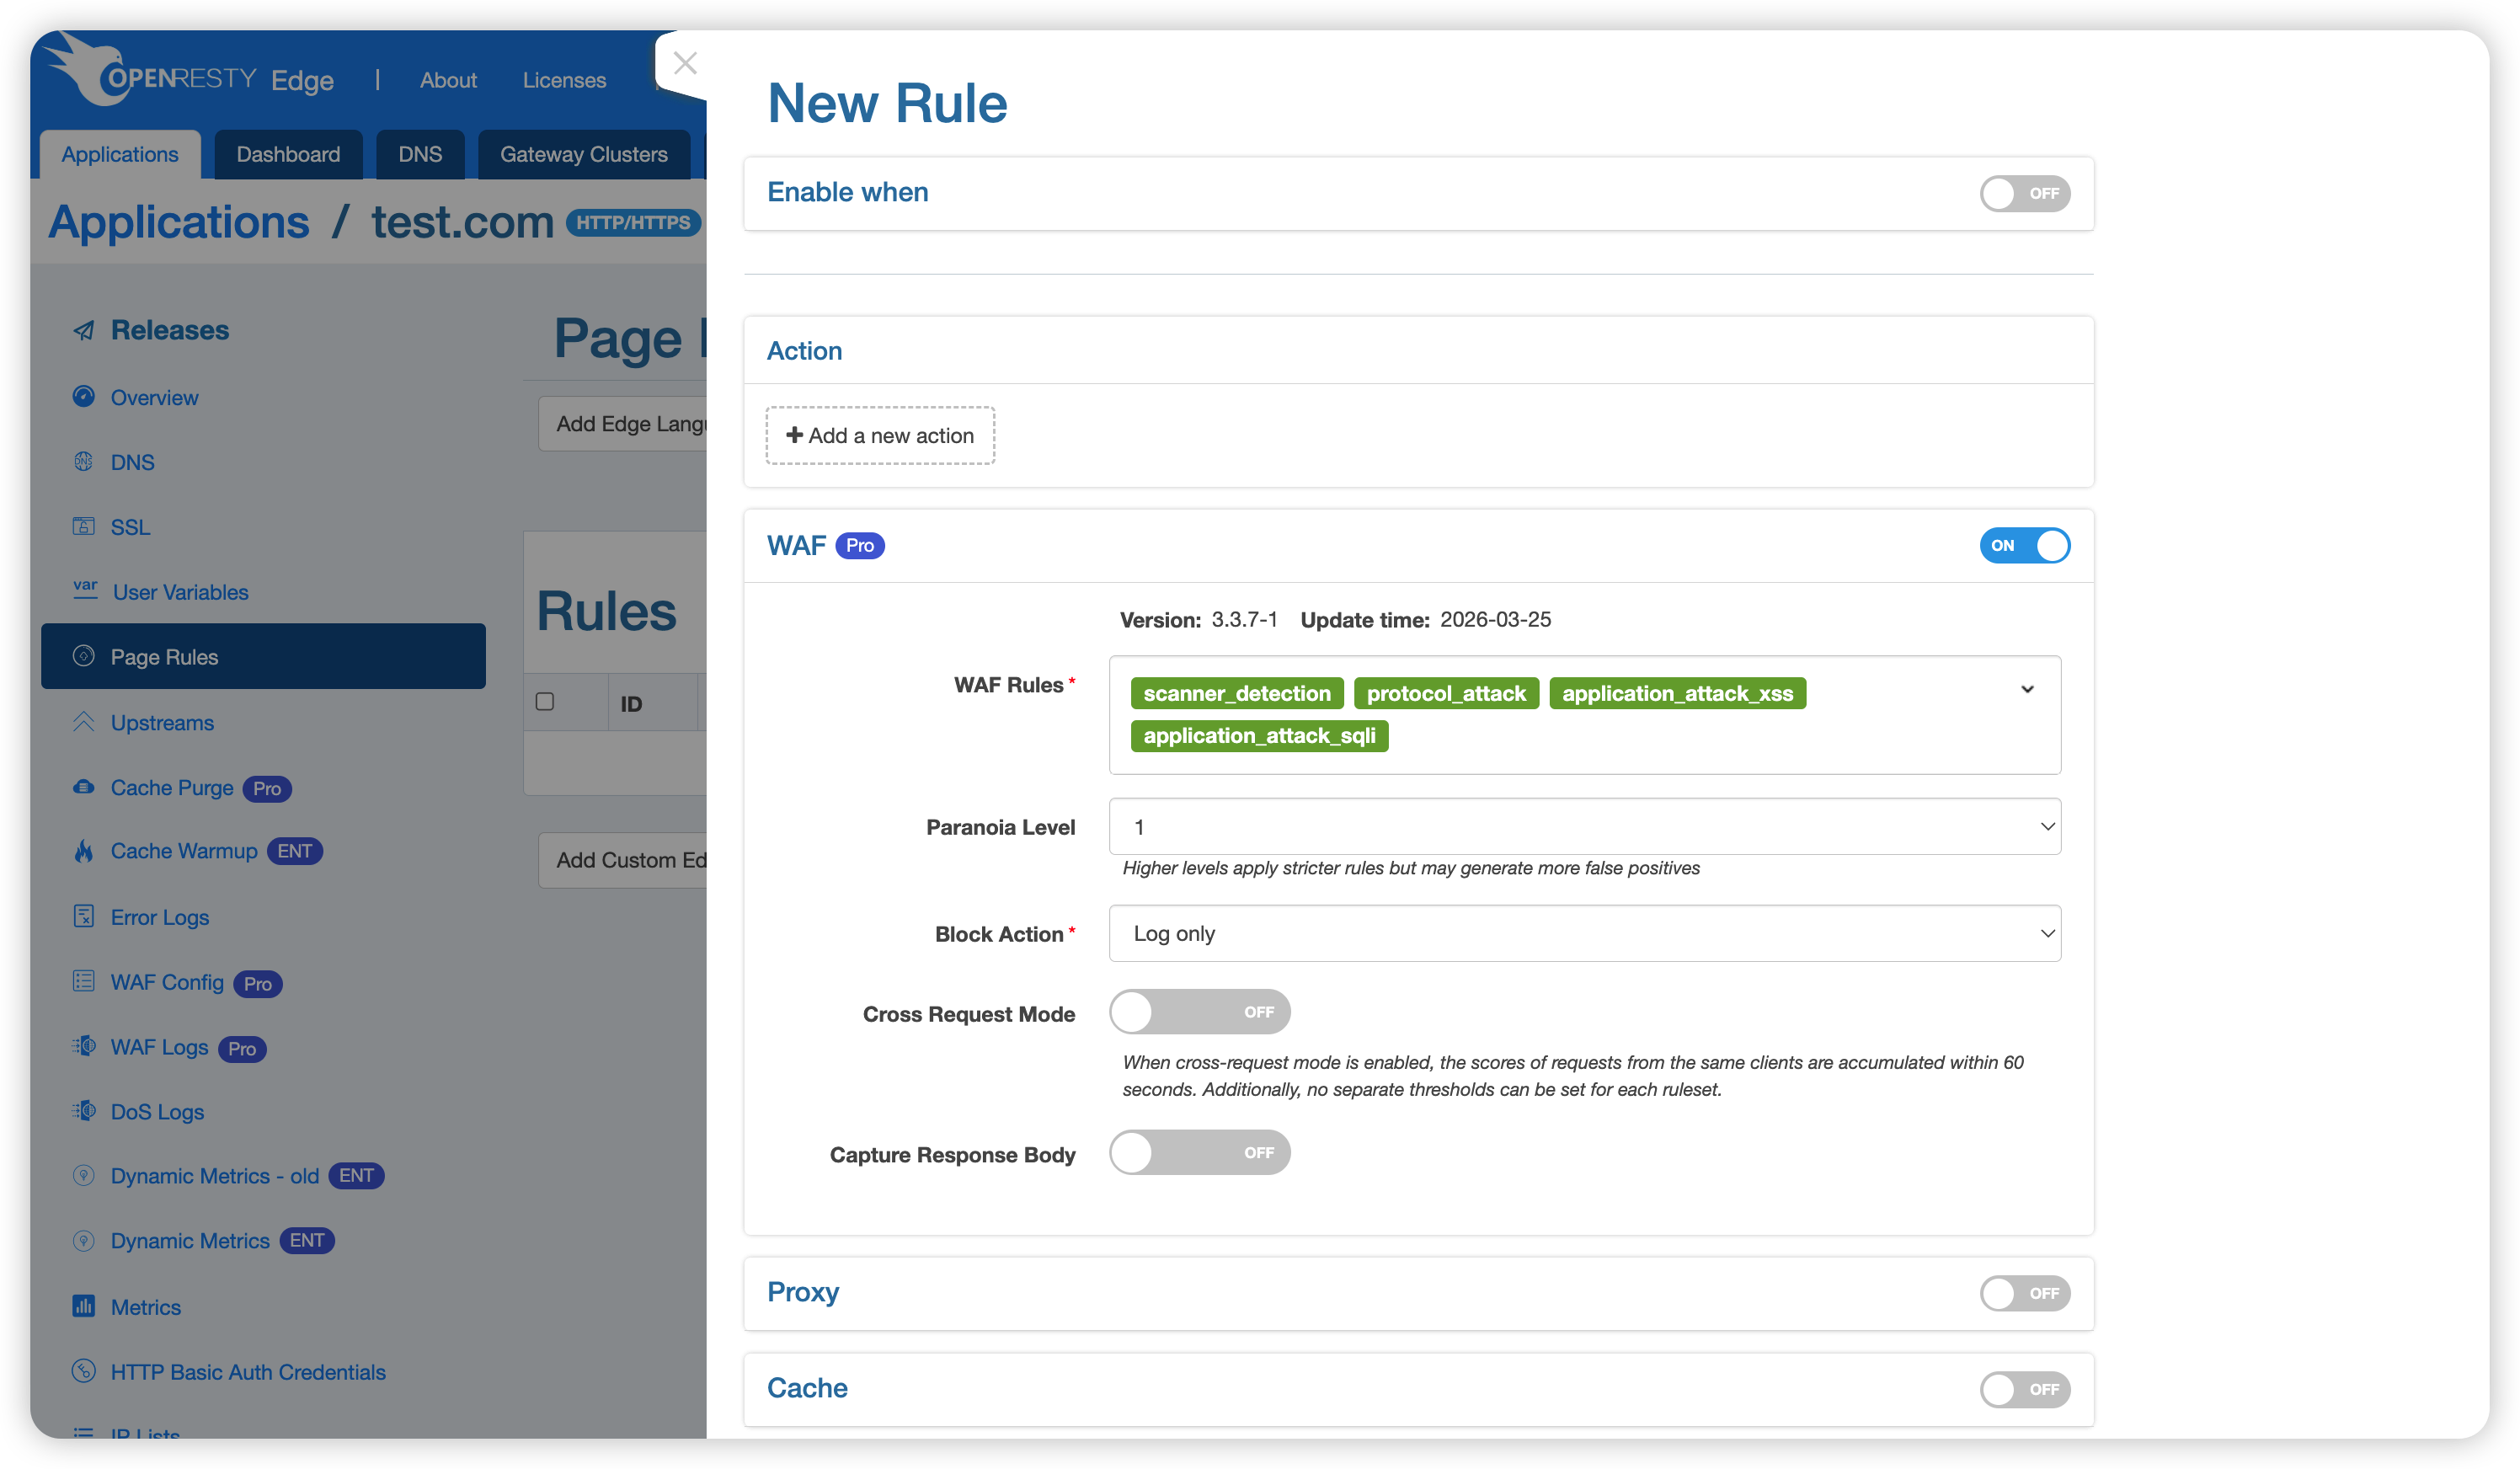
WAF Rules
The WAF module includes the following built-in rulesets:
| Ruleset | Description |
|---|---|
scanner_detection | Detects and blocks common vulnerability scanners and malicious crawlers |
protocol_enforcement | Enforces HTTP protocol standards and blocks non-compliant requests |
protocol_attack | Defends against protocol-level attacks such as HTTP request smuggling and response splitting |
application_attack_lfi | Local File Inclusion (LFI) — prevents attackers from reading sensitive files on the server |
application_attack_rfi | Remote File Inclusion (RFI) — prevents attackers from including and executing remote malicious files |
application_attack_rce | Remote Code Execution (RCE) — blocks requests attempting to execute arbitrary commands on the server |
application_attack_php | PHP code injection — defends against code injection attacks targeting PHP applications |
application_attack_nodejs | Node.js injection — defends against injection attacks targeting Node.js applications |
application_attack_xss | Cross-Site Scripting (XSS) — blocks malicious script injection requests |
application_attack_sqli | SQL Injection — prevents attackers from manipulating databases via crafted SQL statements |
application_attack_session_fixation | Session Fixation — prevents attackers from hijacking user sessions |
application_attack_java | Java code injection — defends against deserialization and code injection attacks targeting Java applications (e.g., Log4Shell) |
You can select only the rulesets you need. You can also add custom rulesets and configure WAF allowlists — these will be covered separately.
Paranoia Level
The Paranoia Level defaults to 1. Higher levels apply stricter detection rules but may generate more false positives. Adjust this based on your application’s needs.
Block Action
When a WAF rule is triggered, you can configure one of the following actions:
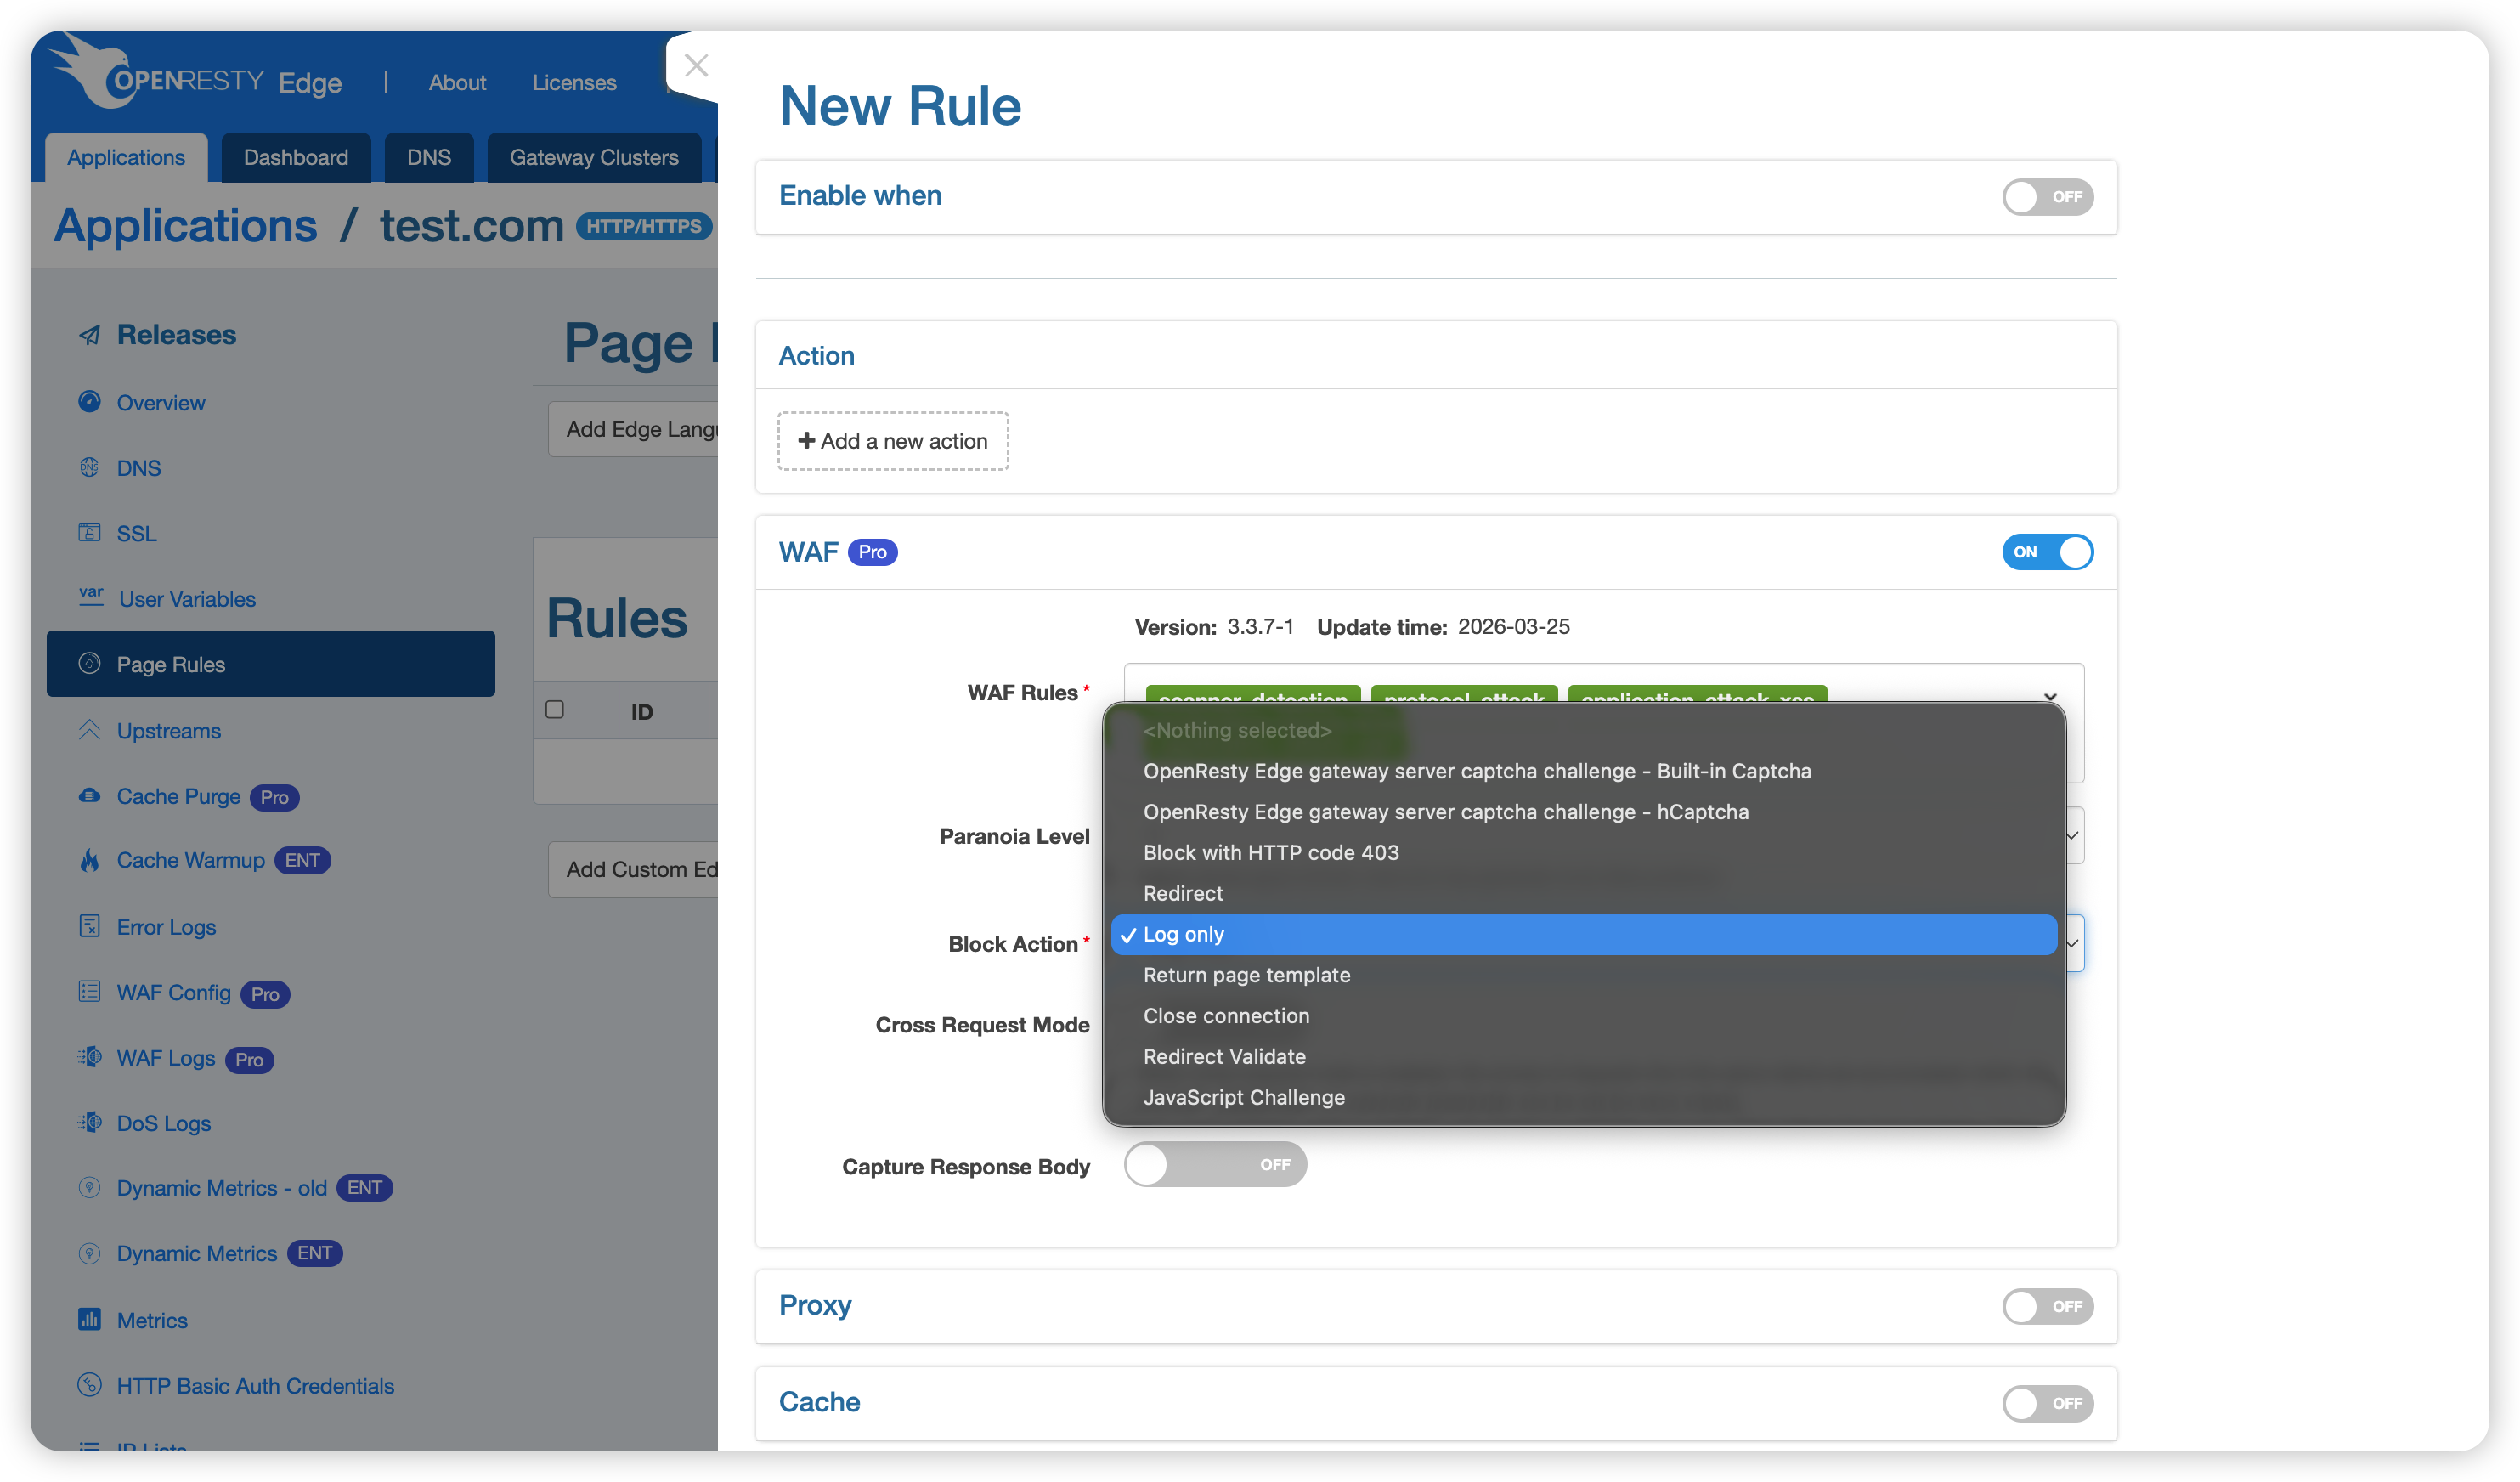
- Log only (default): Records the match in logs without blocking or redirecting the request.
- OpenResty Edge gateway server captcha challenge - Built-in Captcha: Redirects the client to a captcha page. Once the captcha is solved correctly, requests from that client are allowed through for a period of time.
- OpenResty Edge gateway server captcha challenge - hCaptcha: Same as above, but uses hCaptcha for verification.
- Block with HTTP code 403: Rejects the request immediately and returns a 403 status code.
- Redirect: Redirects the request to a specified URL.
- Return page template: Returns a custom page template.
- Close connection: Closes the TCP connection directly.
- Redirect Validate: Redirects to a validation page for identity confirmation.
- JavaScript Challenge: Presents a JavaScript challenge to verify whether the request originates from a real browser.
Other Options
- Cross Request Mode: When enabled, request scores from the same client are accumulated within a 60-second window. Note that when this mode is on, separate thresholds cannot be set for individual rulesets.
- Capture Response Body: When enabled, response bodies are captured for further analysis.
Step 3: Configure Enable Conditions (Optional)
To apply WAF only to specific requests, expand the Enable when section at the top and define your conditions. For example, you can target a specific URL path, request header, or client IP.
If no conditions are set, the rule applies to all requests.
Managing Multiple WAF Rules
You can create multiple page rules to apply different WAF rulesets to different request paths.
If two rules have overlapping conditions, the rule that appears later in the list (applied last) takes precedence over earlier ones. Use the Reorder button to adjust the rule order, and the Check Rules button to validate your configuration.