General
1. Modify configuration
On Global Config page, you can deploy the default configurations of gateway
nodes.

Click General, main categories are listed on the right side of General page. Click one
category to quickly enter the setting options section.
Categories now include: Worker, SSL, Proxy, Client Request, File Buffer, Log, DNS, Gzip, Port, and Others.
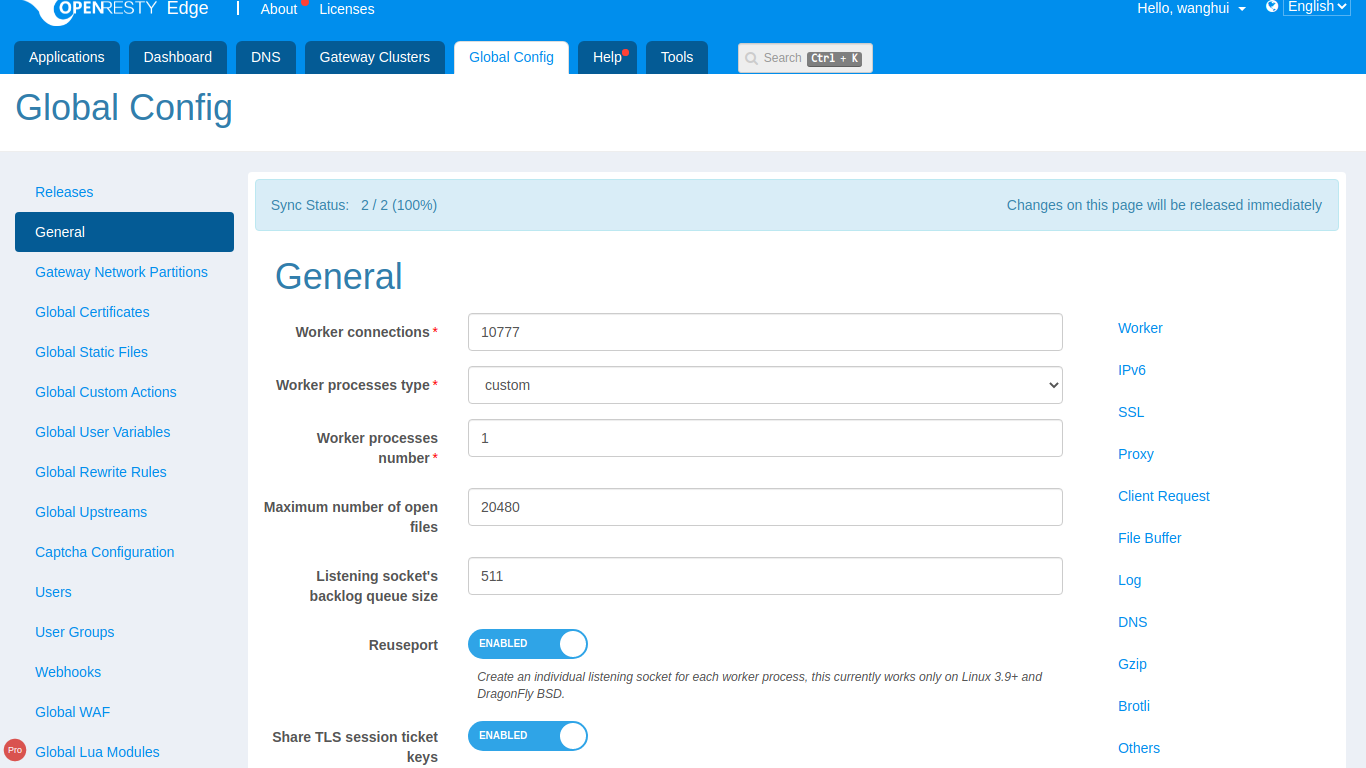
Worker connections
For example, Worker connections can be used to control the maximum
default connections for each work process.
Change the number to 10777 and click the Save button on the right
side.
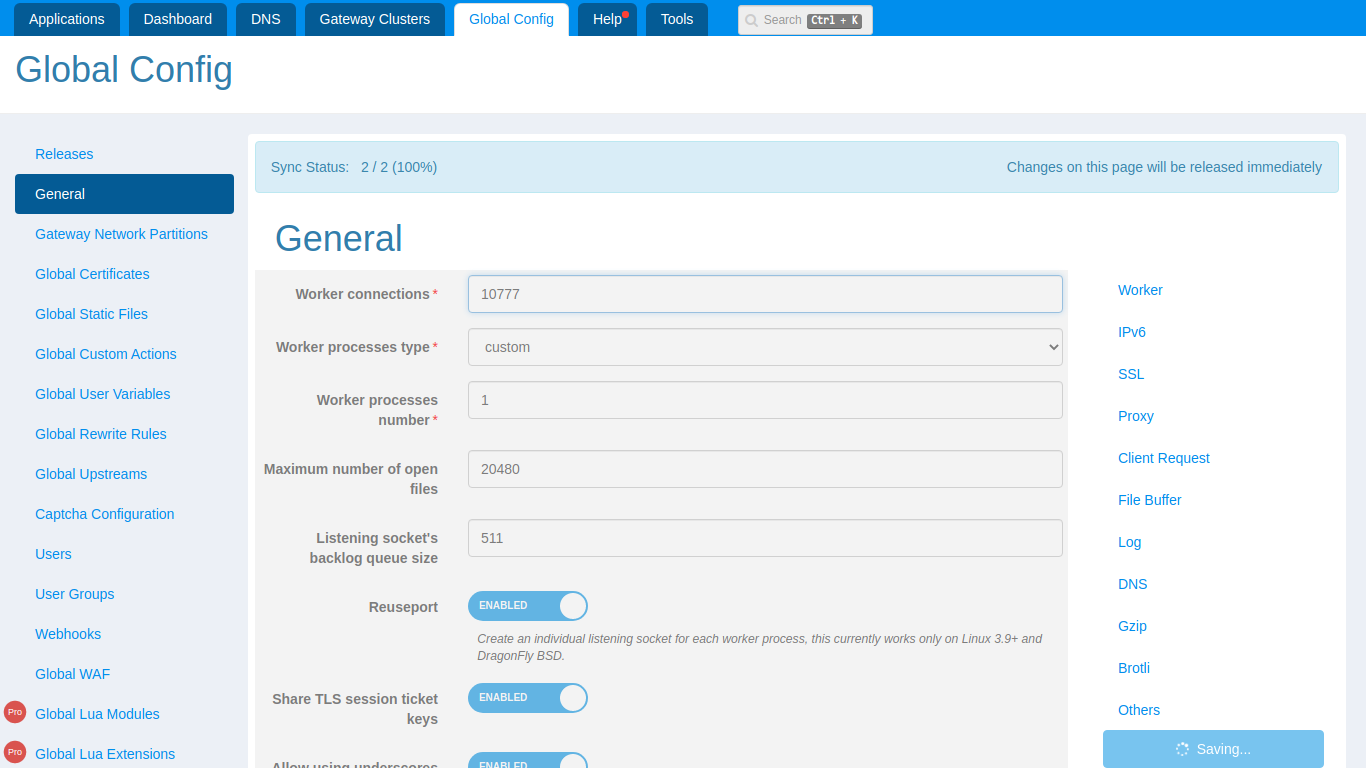
If saved successfully, the change will be automatically synchronized to all gateway nodes in the corresponding partition.
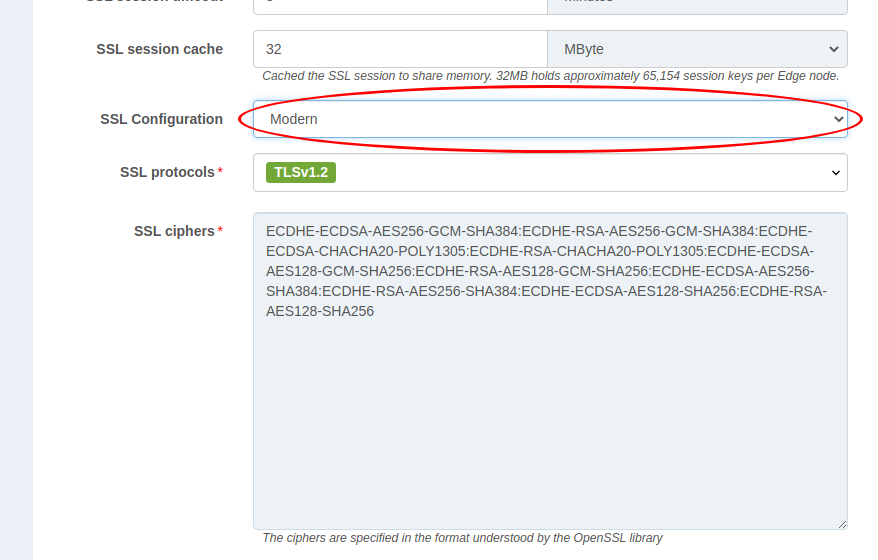
SSL
For SSL ciphers and SSL protocols , four default options are
provided.
Modern: Suitable for modern client sides.
Intermediate: Intermediate version, the default recommended option.
Old: Suitable for old client sides.
Custom: Customize when the above three default options fail to meet your needs.
Proxy
In the Proxy category, various proxy-related configuration options can be set, including Proxy Cache Zone, Proxy Buffer, Proxy Temporary Path, etc.

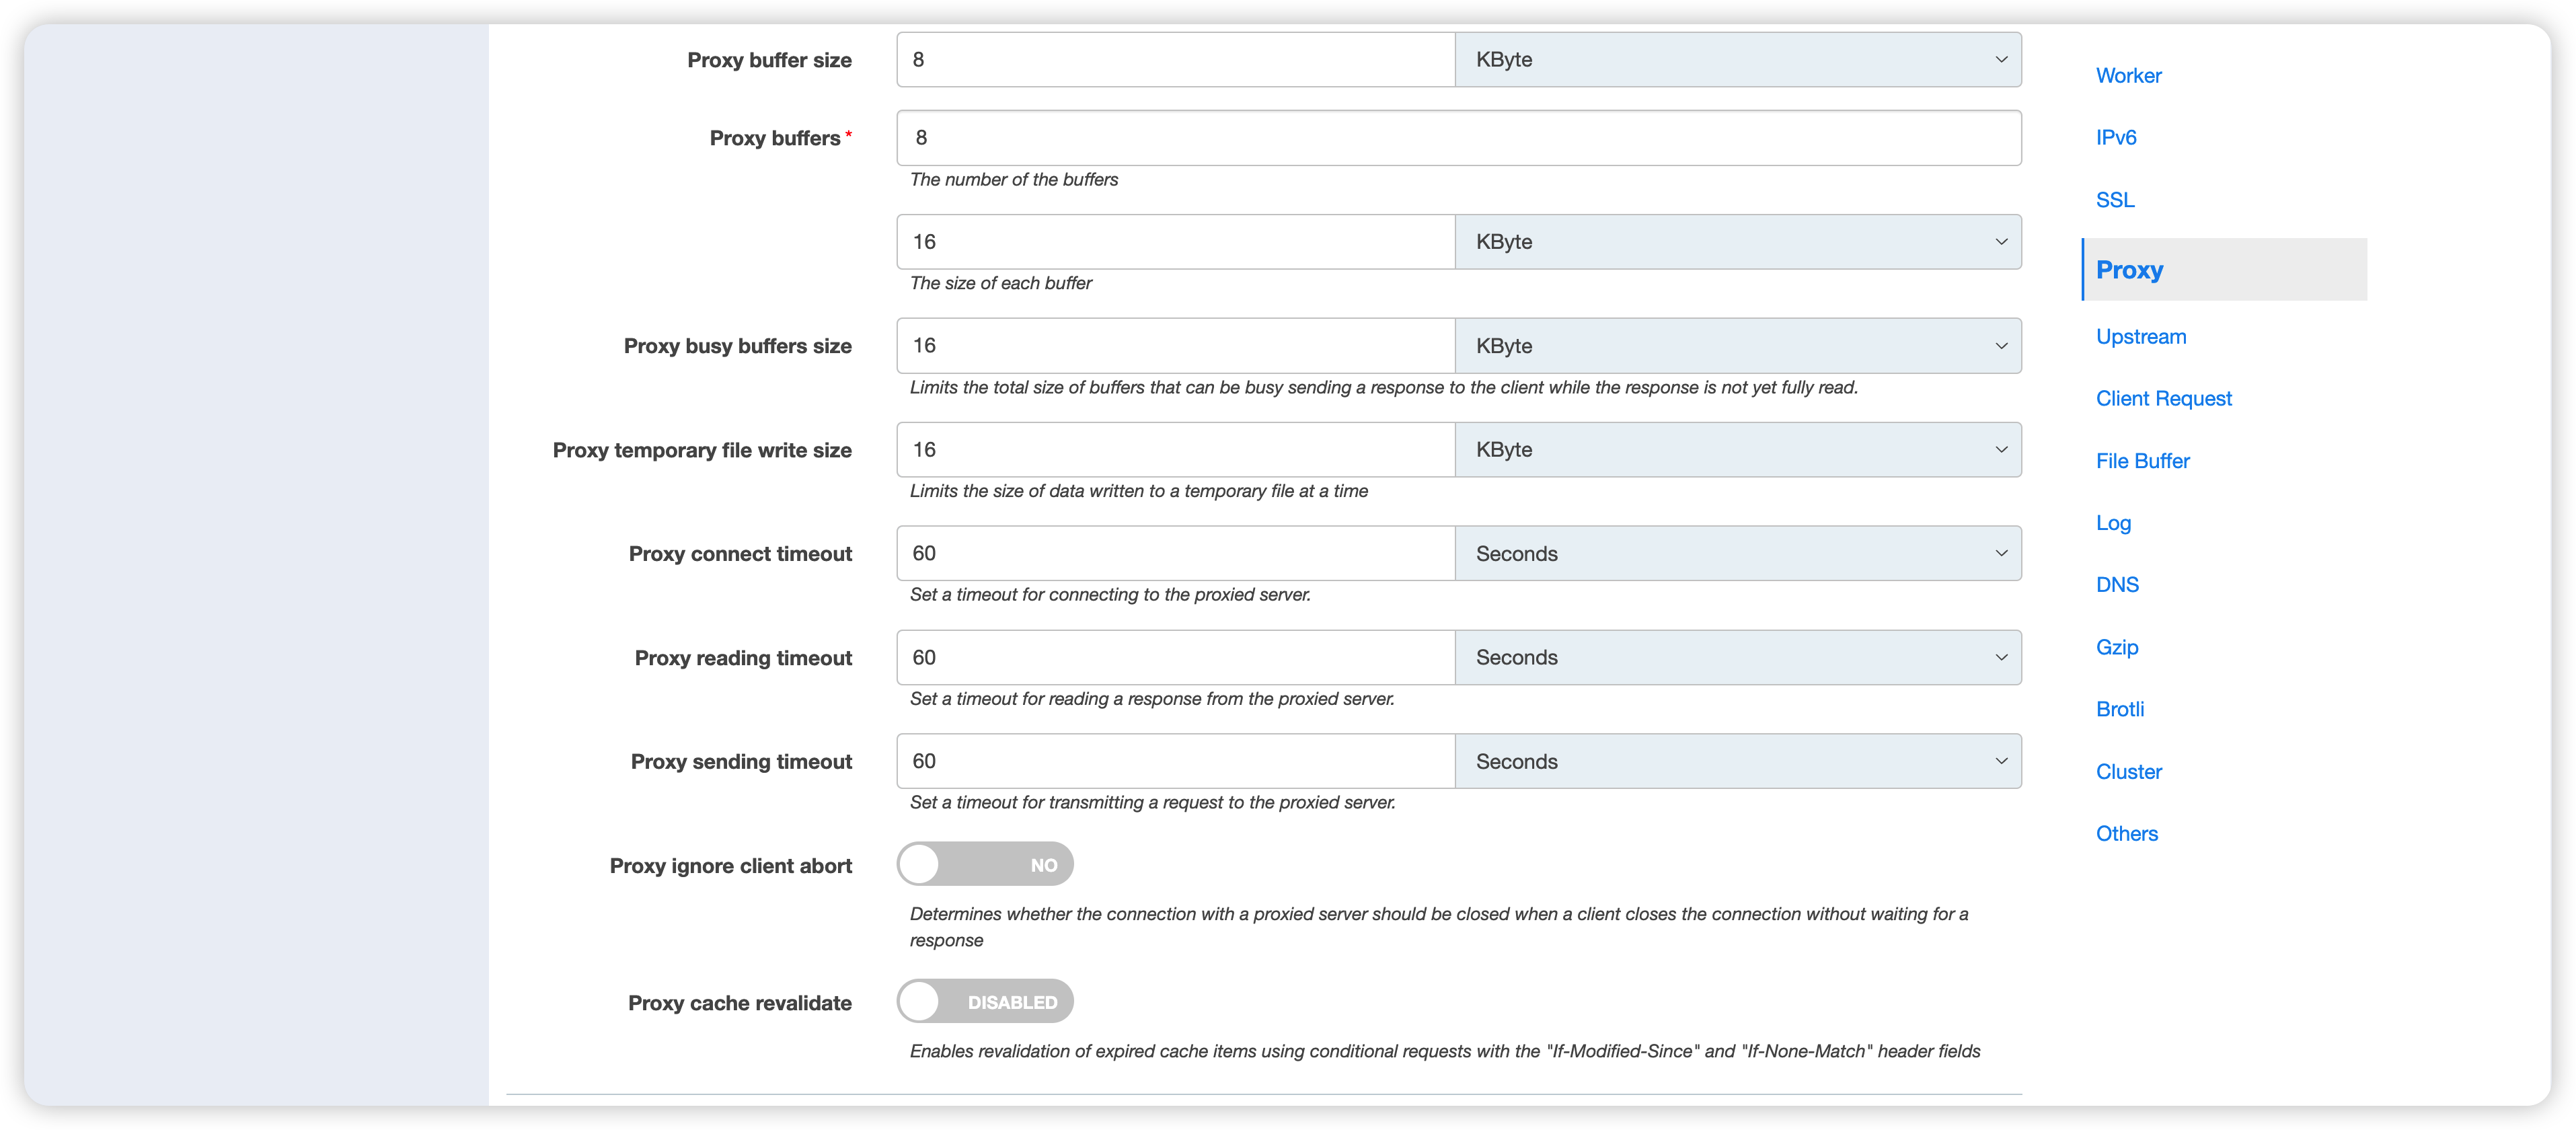
Use stale proxy cache: Allows a stale cache to respond if no proxied server can handle the request.Proxy Cache Zone: If there are multiple disks available, setting up multiple Proxy Cache Zones can improve performance by distributing the cache to different physical disks.Proxy Temporary Path: Custom path for storing temporary files returned by the proxied server.Intercept the origin site's error pages: Determines whether OpenResty Edge intercepts and handles error pages with status codes >=300. This option is not enabled by default.Proxy buffer size: Sets the buffer size for reading the first part of the response received from the proxied server.Proxy buffers: Sets the number and size of the buffers used to read responses from the proxied server for a single connection. If the complete response cannot be cached, it may be written to temporary files.Proxy busy buffers size: Limits the total size of the buffers that may be busy sending responses to the client before the response has been fully read.Proxy temporary file write size: Limits the size of each individual write to the temporary file.Proxy connect timeout: Sets the timeout for establishing a connection with the proxied server. This timeout usually cannot exceed 75 seconds.Proxy reading timeout: Sets the timeout for reading the response from the proxied server. The timeout is set between two consecutive read operations, rather than for the entire transmission of the response.Proxy sending timeout: Sets the timeout for transmitting the request to the proxied server. The timeout is set between two consecutive write operations, rather than for the entire transmission of the request.Proxy ignore client abort: Determines whether the connection with the proxied server should be closed when the client closes the connection without waiting for a response.- Without this configuration enabled, if the client closes the connection early, the connection between the Edge Node and the proxied server is also closed. This makes it impossible to reuse the long connection between the Edge Node and the proxied server.
Proxy cache revalidate: Enables the revalidation of expired cached content for conditional requests with “If-Modified-Since” and “If-None-Match” headers.
HTTP client request
HTTP client request configuration items:
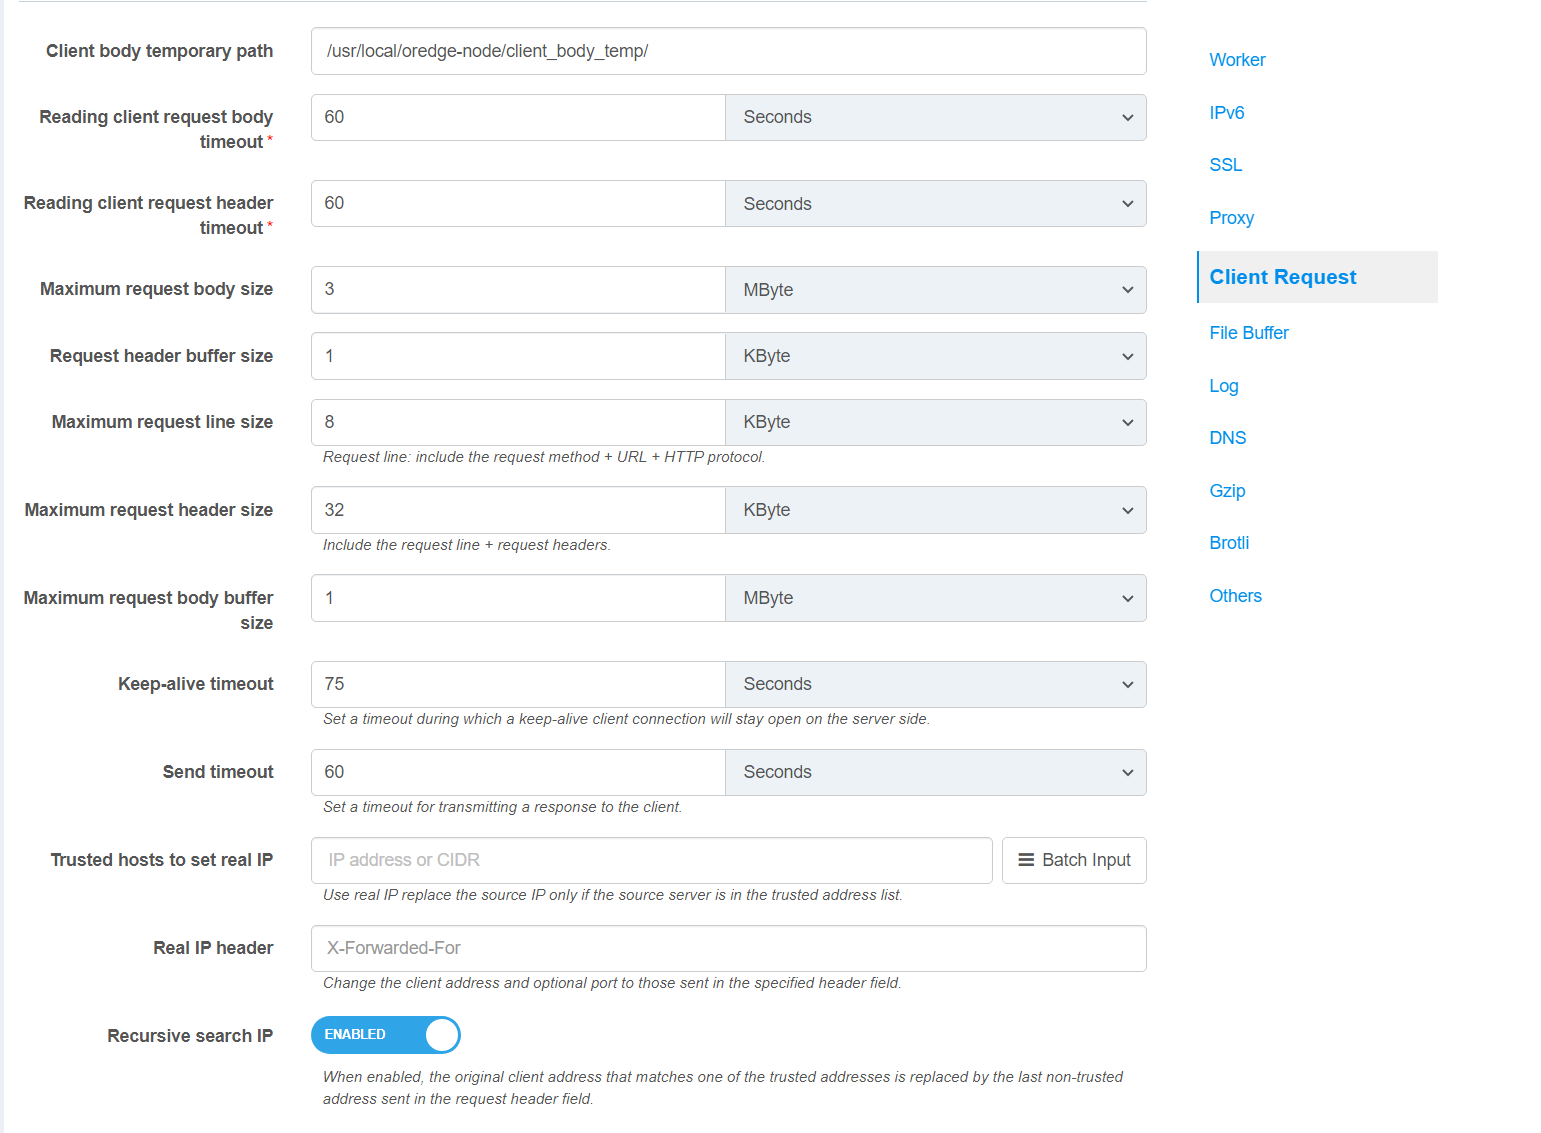
Client body temporary path
Defines a directory for storing temporary files holding client request bodies.
Default: /usr/local/oredge-node/client_body_temp/
Reading client request body timeout
This configuration item defines the timeout for reading the client request body. The timeout is only for the period between two consecutive read operations, not for the entire request body transmission time. If the client does not transmit anything during this time, the request will be terminated with a 408 (request timeout) error.
In general, the default timeout of 60 seconds is sufficient. If you wish to reduce the timeout to defend against attacks, you can modify this configuration item. You can also extend this timeout if you need to use a longer timeout in some cases.
Default: 60 Secs
Reading client request header timeout
Defines a timeout for reading the client request header. If a client does not transmit the entire header within this time, the request is terminated with the 408 (Request Time-out) error.
Default: 60 Secs
Maximum request body size
Sets the maximum allowed size of the client request body. If the size of a request exceeds the configured value, the 413 (Request Entity Too Large) error is returned to the client. Please be aware that browsers cannot correctly display this error. Setting the size to 0 disables checking of client request body size.
Default: 1 MByte
Request header buffer size
Sets buffer size for reading client request header. For most requests, a buffer of 1K bytes is enough. However, if a request includes long cookies, or comes from a WAP client, it may not fit into 1K.
Default: 1 KByte
Maximum request body buffer size
Sets buffer size for reading client request body. In case the request body is larger than the buffer, the whole body or only its part is written to a temporary file. By default, the buffer size is equal to two memory pages.
Default: 8 KByte
Keep-alive timeout
The first parameter sets a timeout during which a keep-alive client connection will stay open on the server side. The zero value disables keep-alive client connections.
Default: 75 Secs
Send timeout
Sets a timeout for transmitting a response to the client. The timeout is set only between two successive write operations, not for the transmission of the whole response. If the client does not receive anything within this time, the connection is closed.
Default: 60 Secs
Trusted hosts to set real IP
Use the Real IP header to modify the source IP only when the client IP of the TCP connection is in this list of trusted addresses.
Default: -
Client IP Source
X-Forwarded-For
Obtain the real client IP and port from the X-Forwarded-For HTTP header.
Proxy Protocol
Obtain the real client IP and port from the Proxy Protocol header. Please ensure that proxy protocol is enabled for the port in
Gateway Cluster > Gateway Partition. For details, please refer to Proxy ProtocolX-Real-IP
Obtain the real client IP and port from the X-Real-IP HTTP header.
Custom Header
Obtain the real client IP and port from a custom HTTP header field.
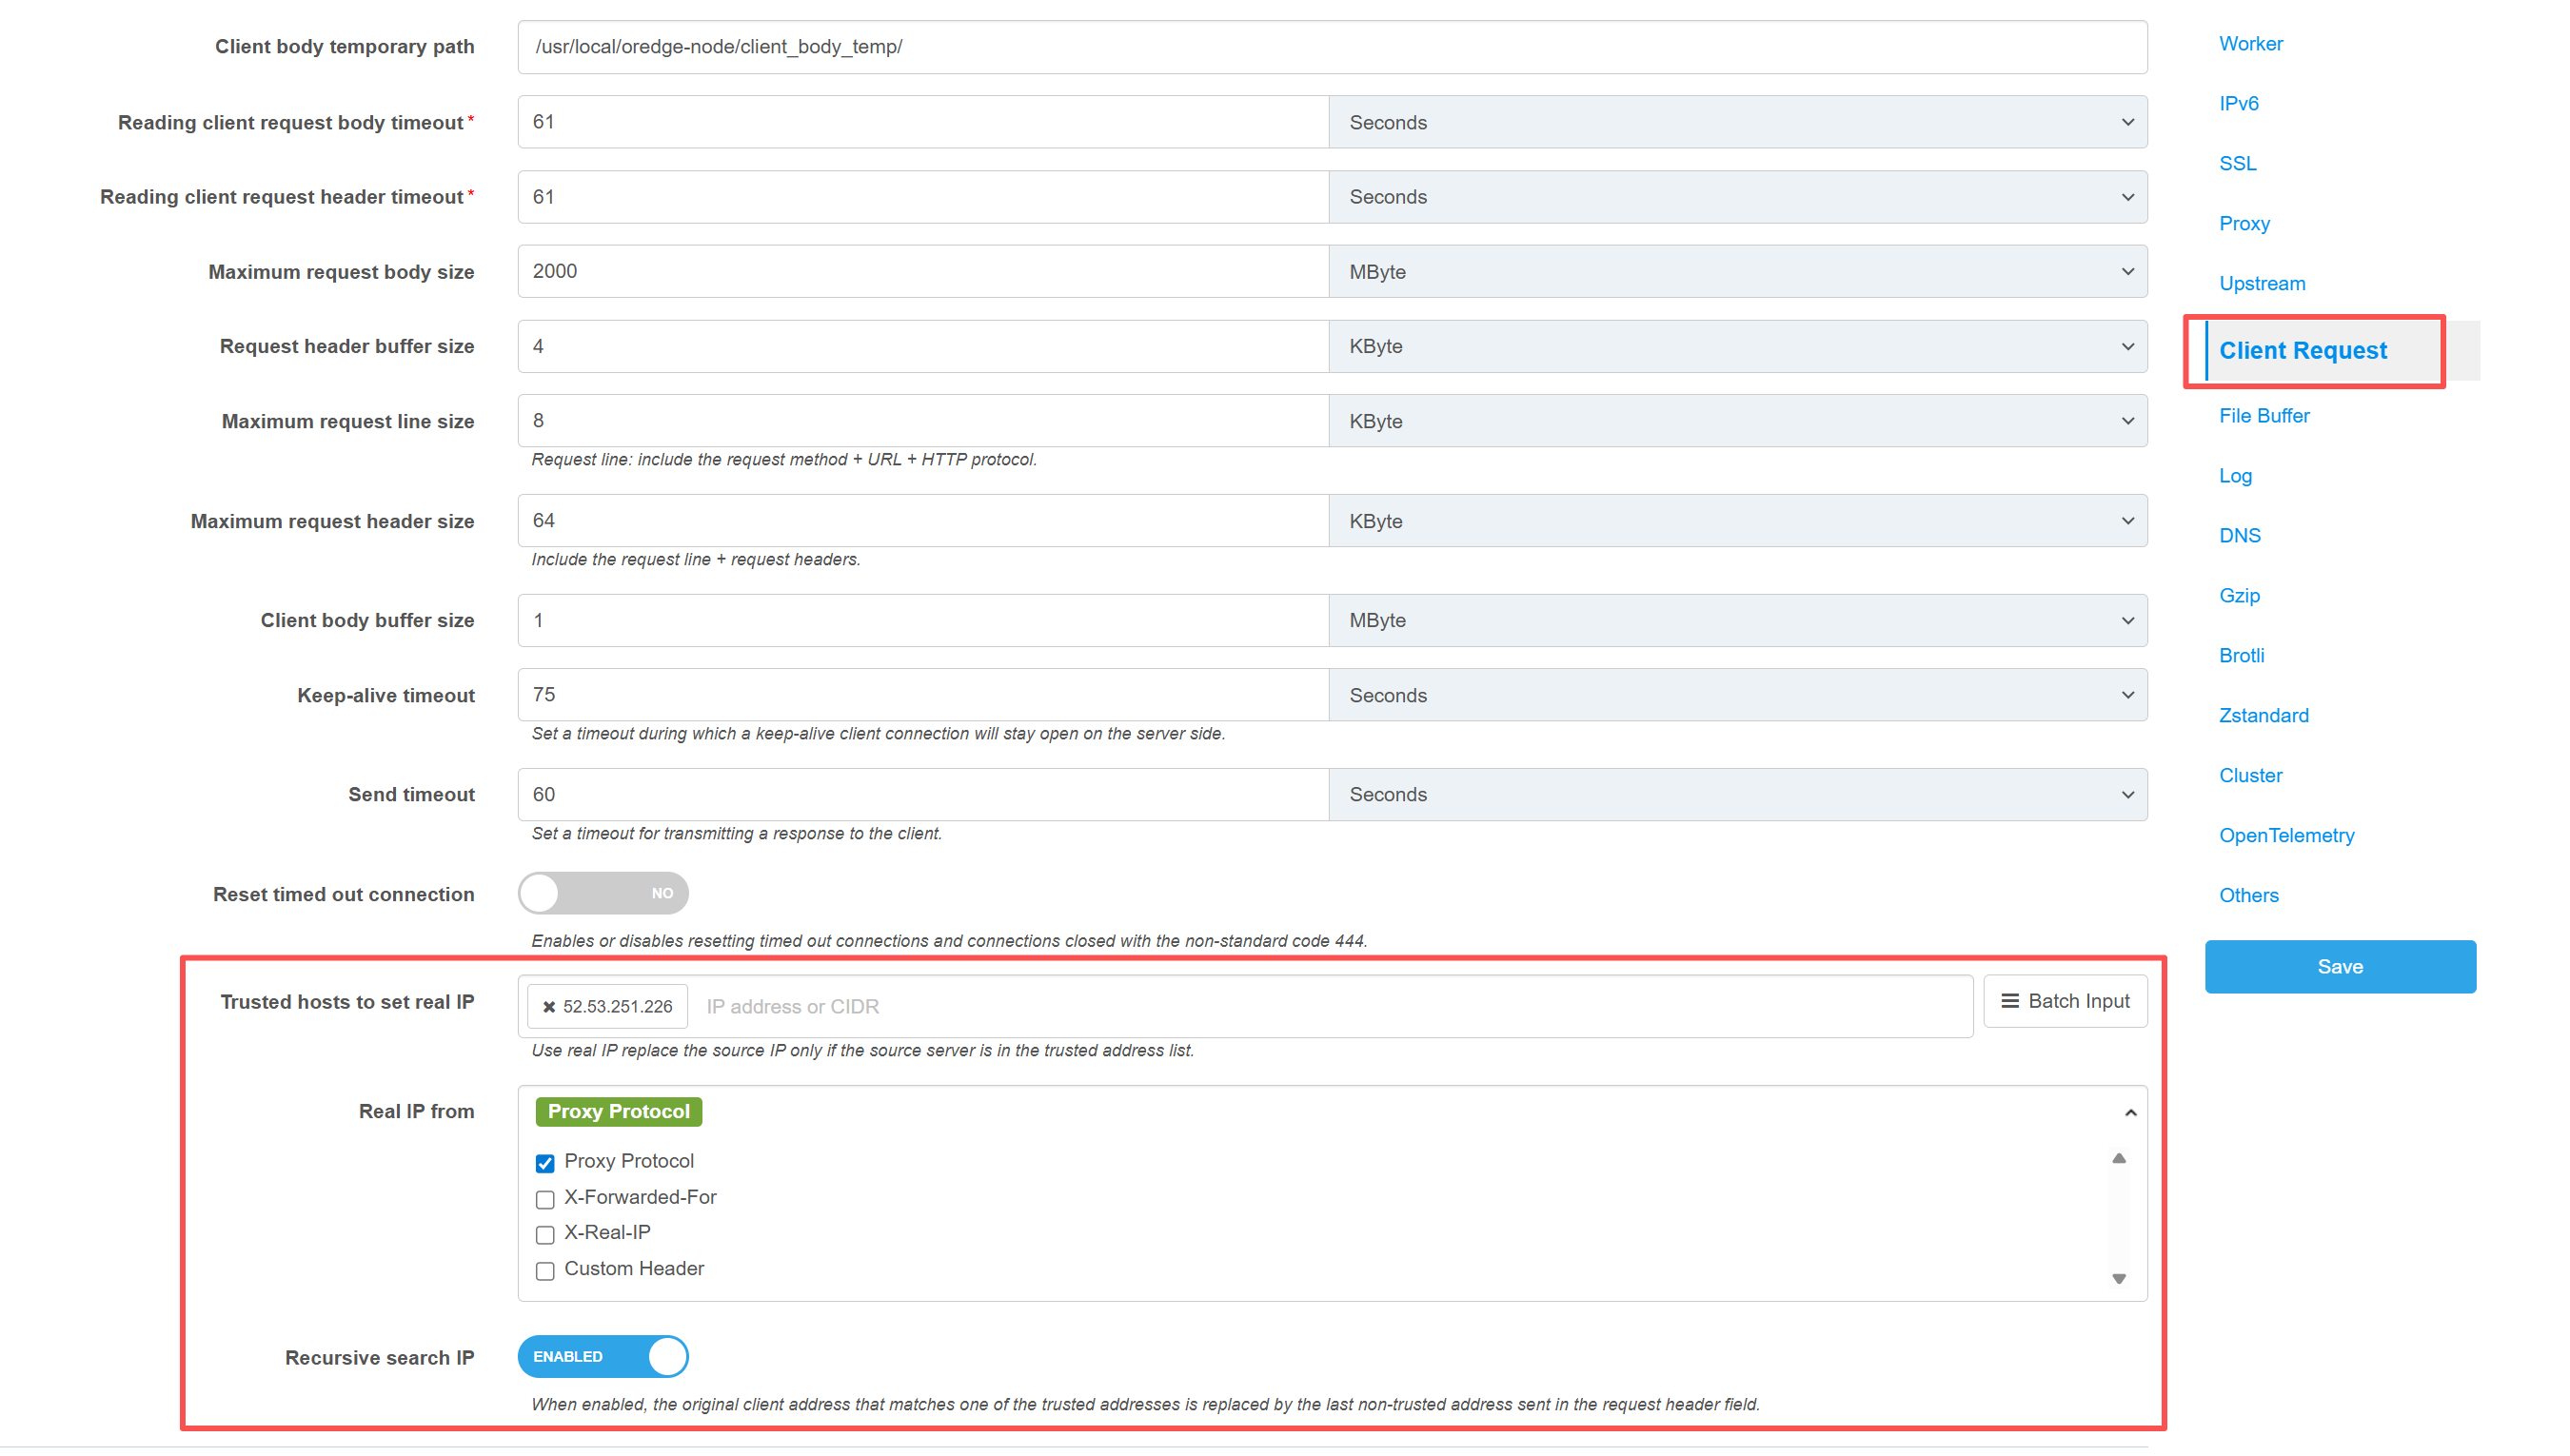
Recursive search IP
When multiple IP addresses exist in the Real IP header field, the first untrusted address is looked up from back to front as the client’s real client IP.
Default: True
Log
In the Log category, you can exercise customized control over error log and access log outputs.
Error log
Avoid generating error logs: it is inDISABLEstatus by default, and enabling it means not outputting any error logs.Logs Path: Output path of error logs.Error log level: Output level of error logs.Maximum number of log files to keep: Maximum number of logs to keep,
error log and access log will rotate every hour to save disk space
by only keeping last updated log files.
Access log
To increase the speed of writing access logs, Buffer Zone is enabled by default. The size of the buffer zone can be adjusted to an appropriate value falling somewhere between performance and resource usage.
Just set the buffer zone size at 0 if you don’t want to enable it.

Gzip Compression
For details, see Gzip Compression
Brotli Compression
For details, see Brotli Compression
zstd Compression
For details, see Zstandard (zstd) Compression
OpenTelemetry
To enable OpenTelemetry in page rules, you first need to enable the OpenTelemetry feature in the global configuration.
The following configuration items exist in the OpenTelemetry category:
- Enable OpenTelemetry: The activation switch, which is off by default.
- OpenTelemetry Service Name: Used to set the “service.name” attribute of OTel resources. It’s used to identify and distinguish different services or applications. Providing a unique name for each service helps identify specific services in a distributed system.
- OpenTelemetry Trace Context: Specifies how to propagate traceparent/tracestate headers.
- OpenTelemetry Exporter Endpoint: The address of the OTLP endpoint that receives OpenTelemetry telemetry data.
- OpenTelemetry Exporter Interval: The maximum interval between two data exports, default is 5s.
- OpenTelemetry Exporter Batch Size: The maximum number of spans sent in a batch by each worker process (nginx worker), with a default value of 512.
- OpenTelemetry Exporter Batch Count: The number of pending batches for each worker process. Spans exceeding this limit will be discarded, with a default value of 4.

Collecting Data with otelcol-contrib
Installing otelcol-contrib
To install otelcol-contrib, see collector installation.
Configure otelcol-contrib
The following is an example file that collects access logs, error logs, connection metrics, and trace information.
The collected data will be output to the terminal, so please adjust the exporters section as needed. The configuration of exporters can be found in collector exporters. exporters configuration can be found in collector exporters.
receivers:
  filelog/access:
    include:
      - /usr/local/oredge-node/logs/access.log
    operators:
      - type: json_parser
        include_file_name: false

  filelog/error:
    include:
      - /usr/local/oredge-node/logs/error.log
    multiline:
      line_start_pattern: ^\d{4}/\d{2}/\d{2} \d{2}:\d{2}:\d{2}
    operators:
      - type: regex_parser
        regex: '(?s)(?P<time>\d{4}/\d{2}/\d{2} \d{2}:\d{2}:\d{2}) \[(?P<level>\w+)\] (?P<pid>\d+)#(?P<tid>\d+): \*(?P<connection_id>\d+) (?P<message>.*?), (?:client: (?P<client>[0-9a-f.]+), server: (?P<server>[^ ]+), request: "(?P<request>.*?)", host: "(?P<host>[0-9a-f:.]+)"|context: (?P<context>[\w.*]+))'
        timestamp:
          parse_from: attributes.time
          layout: '%Y/%m/%d %H:%M:%S'
        severity:
          parse_from: attributes.level
          preset: none
          mapping:
            debug: debug
            info: info
            info1: notice
            warn: warn
            error: error
            fatal: crit
            fatal2: alert
            fatal3: emerg

  otlp:
    protocols:
      grpc:
        endpoint: 0.0.0.0:4317

  nginx:
    endpoint: "http://127.0.0.1:8091/basic_status"
    collection_interval: 5s

processors:
  batch:

exporters:
  debug:
    verbosity: detailed

service:
  pipelines:
    logs/access:
      receivers: [filelog/access]
      processors: [batch]
      exporters: [debug]

    logs/error:
      receivers: [filelog/error]
      processors: [batch]
      exporters: [debug]

    metrics:
      receivers: [nginx]
      processors: [batch]
      exporters: [debug]

    traces:
      receivers: [otlp]
      processors: [batch]
      exporters: [debug]
Starting otelcol-contrib collection Take the rpm package as an example, the configuration file is in /etc/otelcol-contrib/conrig.yaml after installation.
Update the configuration of this file, and then use the following command to start the data collection.
Note that the example file above outputs to the terminal, so you will need to change the exporters configuration to the desired background service when acting as a background service.
sudo systemctl enable otelcol-contrib
sudo systemctl start otelcol-contrib
If the configuration has been modified, otelcol-contrib needs to be restarted, using the following command
sudo systemctl restart otelcol-contrib
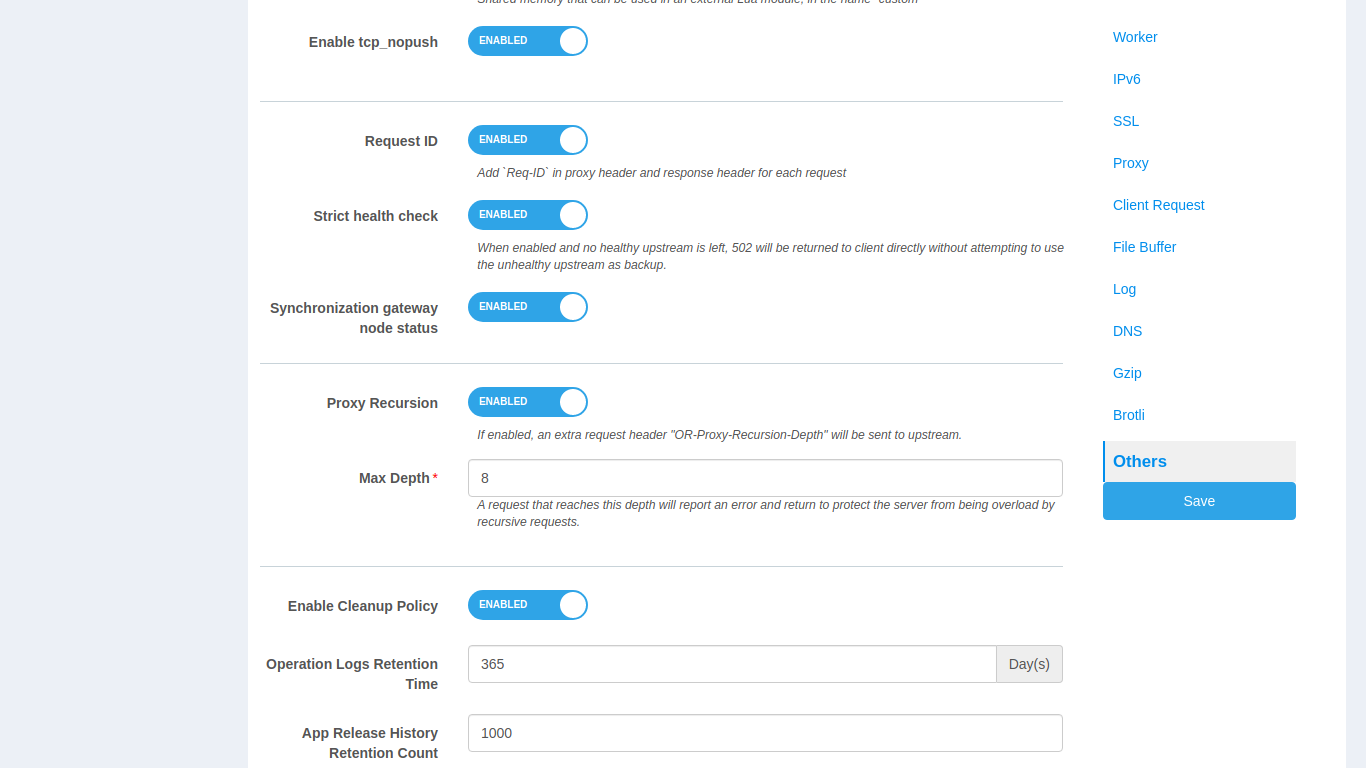
Others
In the Others category, you can set the cleanup policy for
operation logs and application release history.
2. Sync option
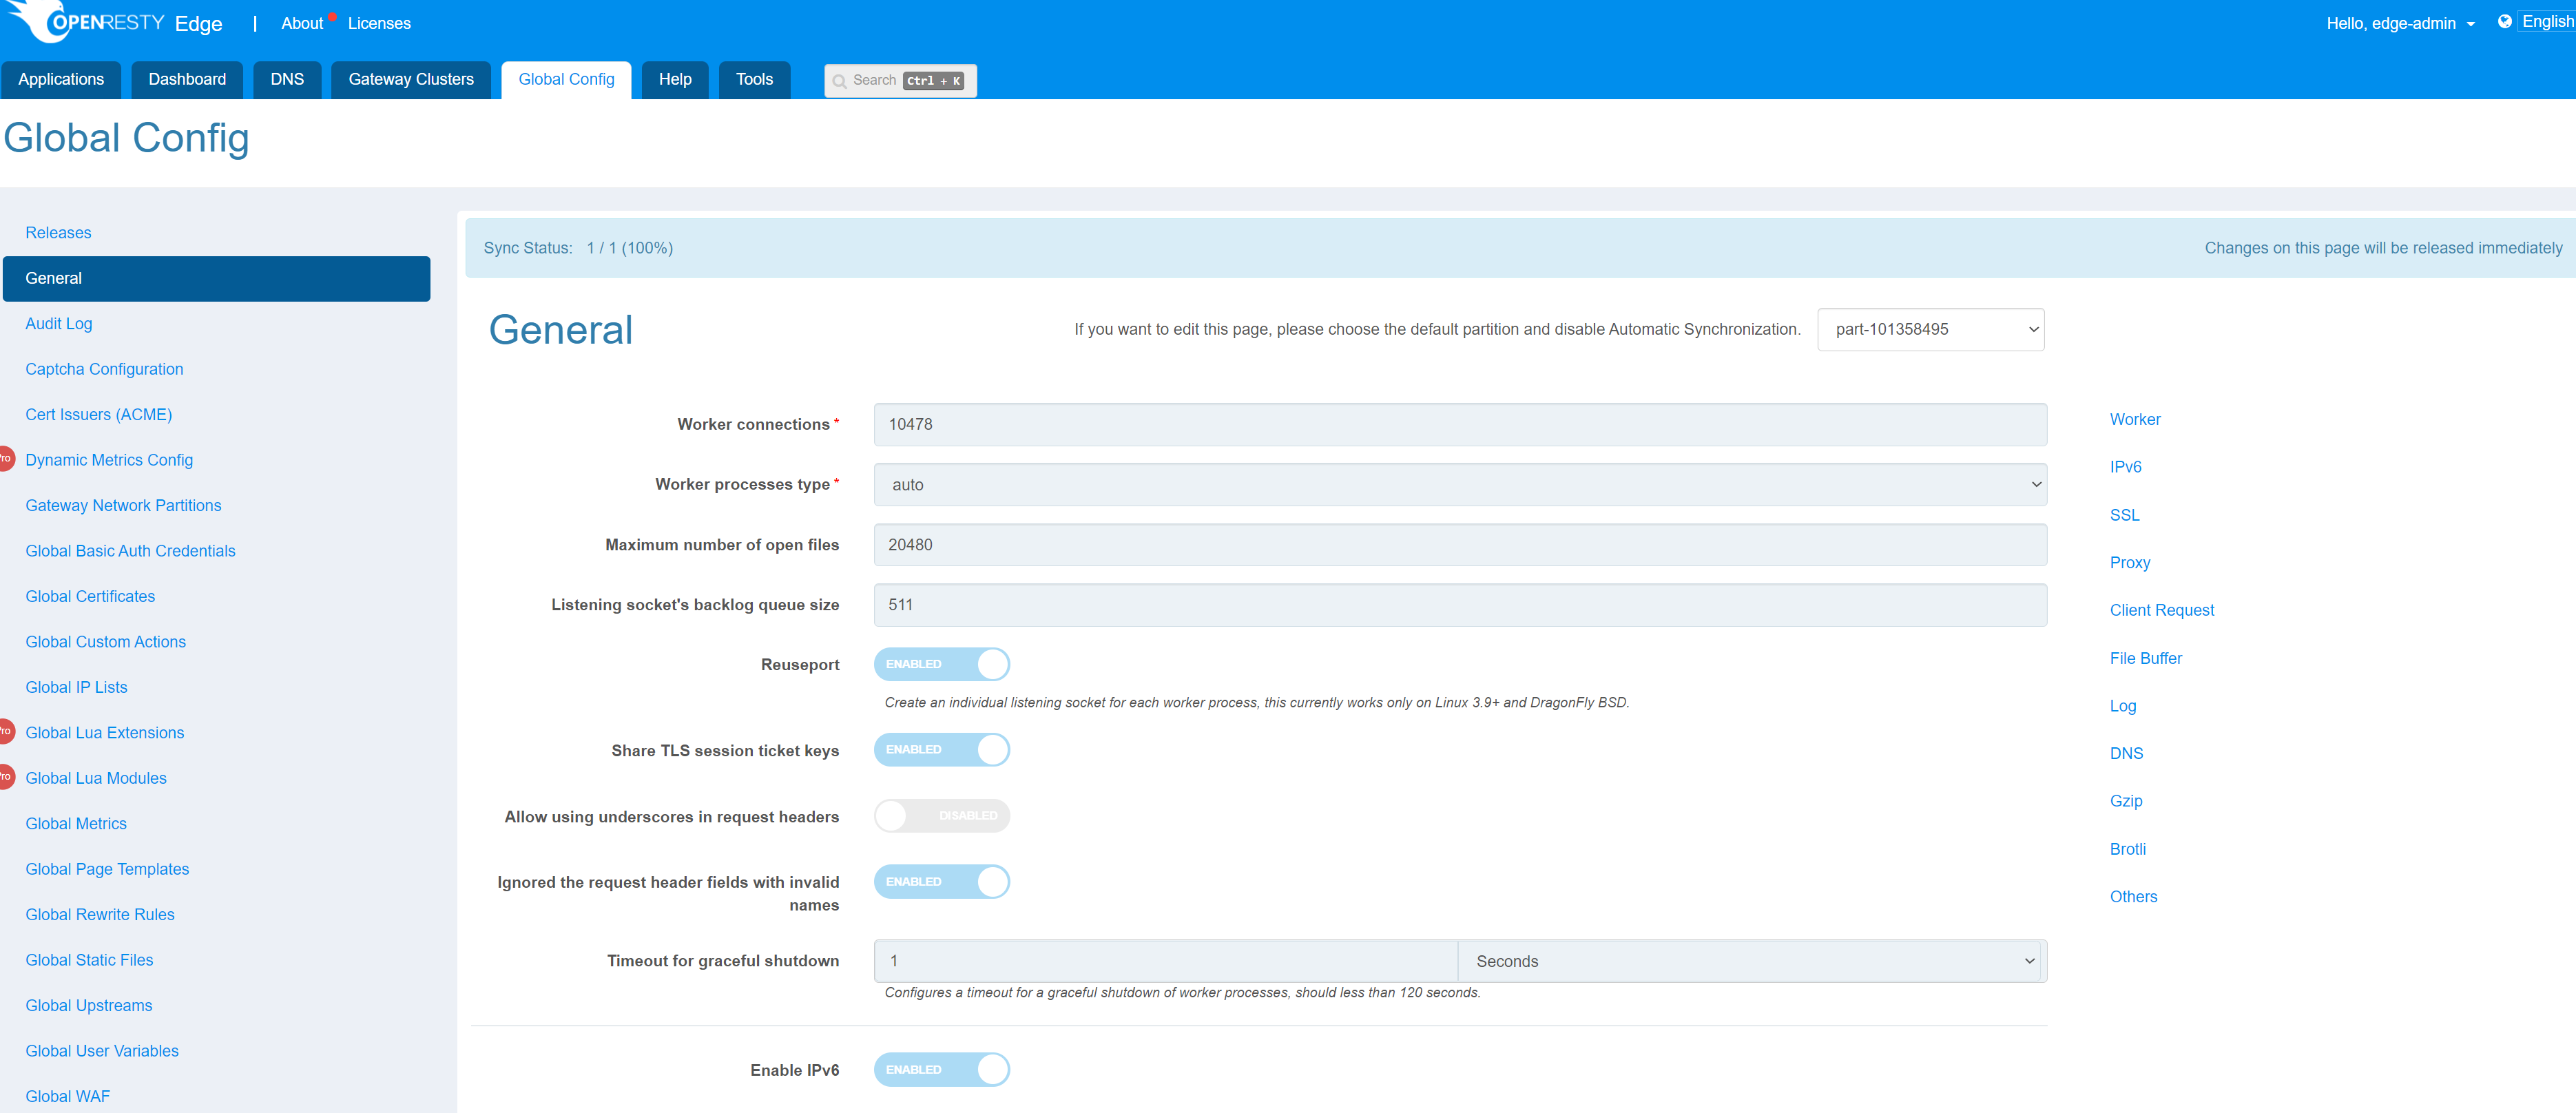
The Sync option is displayed above the General page, and the default partition is displayed by default. The option Automatic Synchronization indicates that all configurations of the current partition will automatically overwrite the configurations of all other partitions.
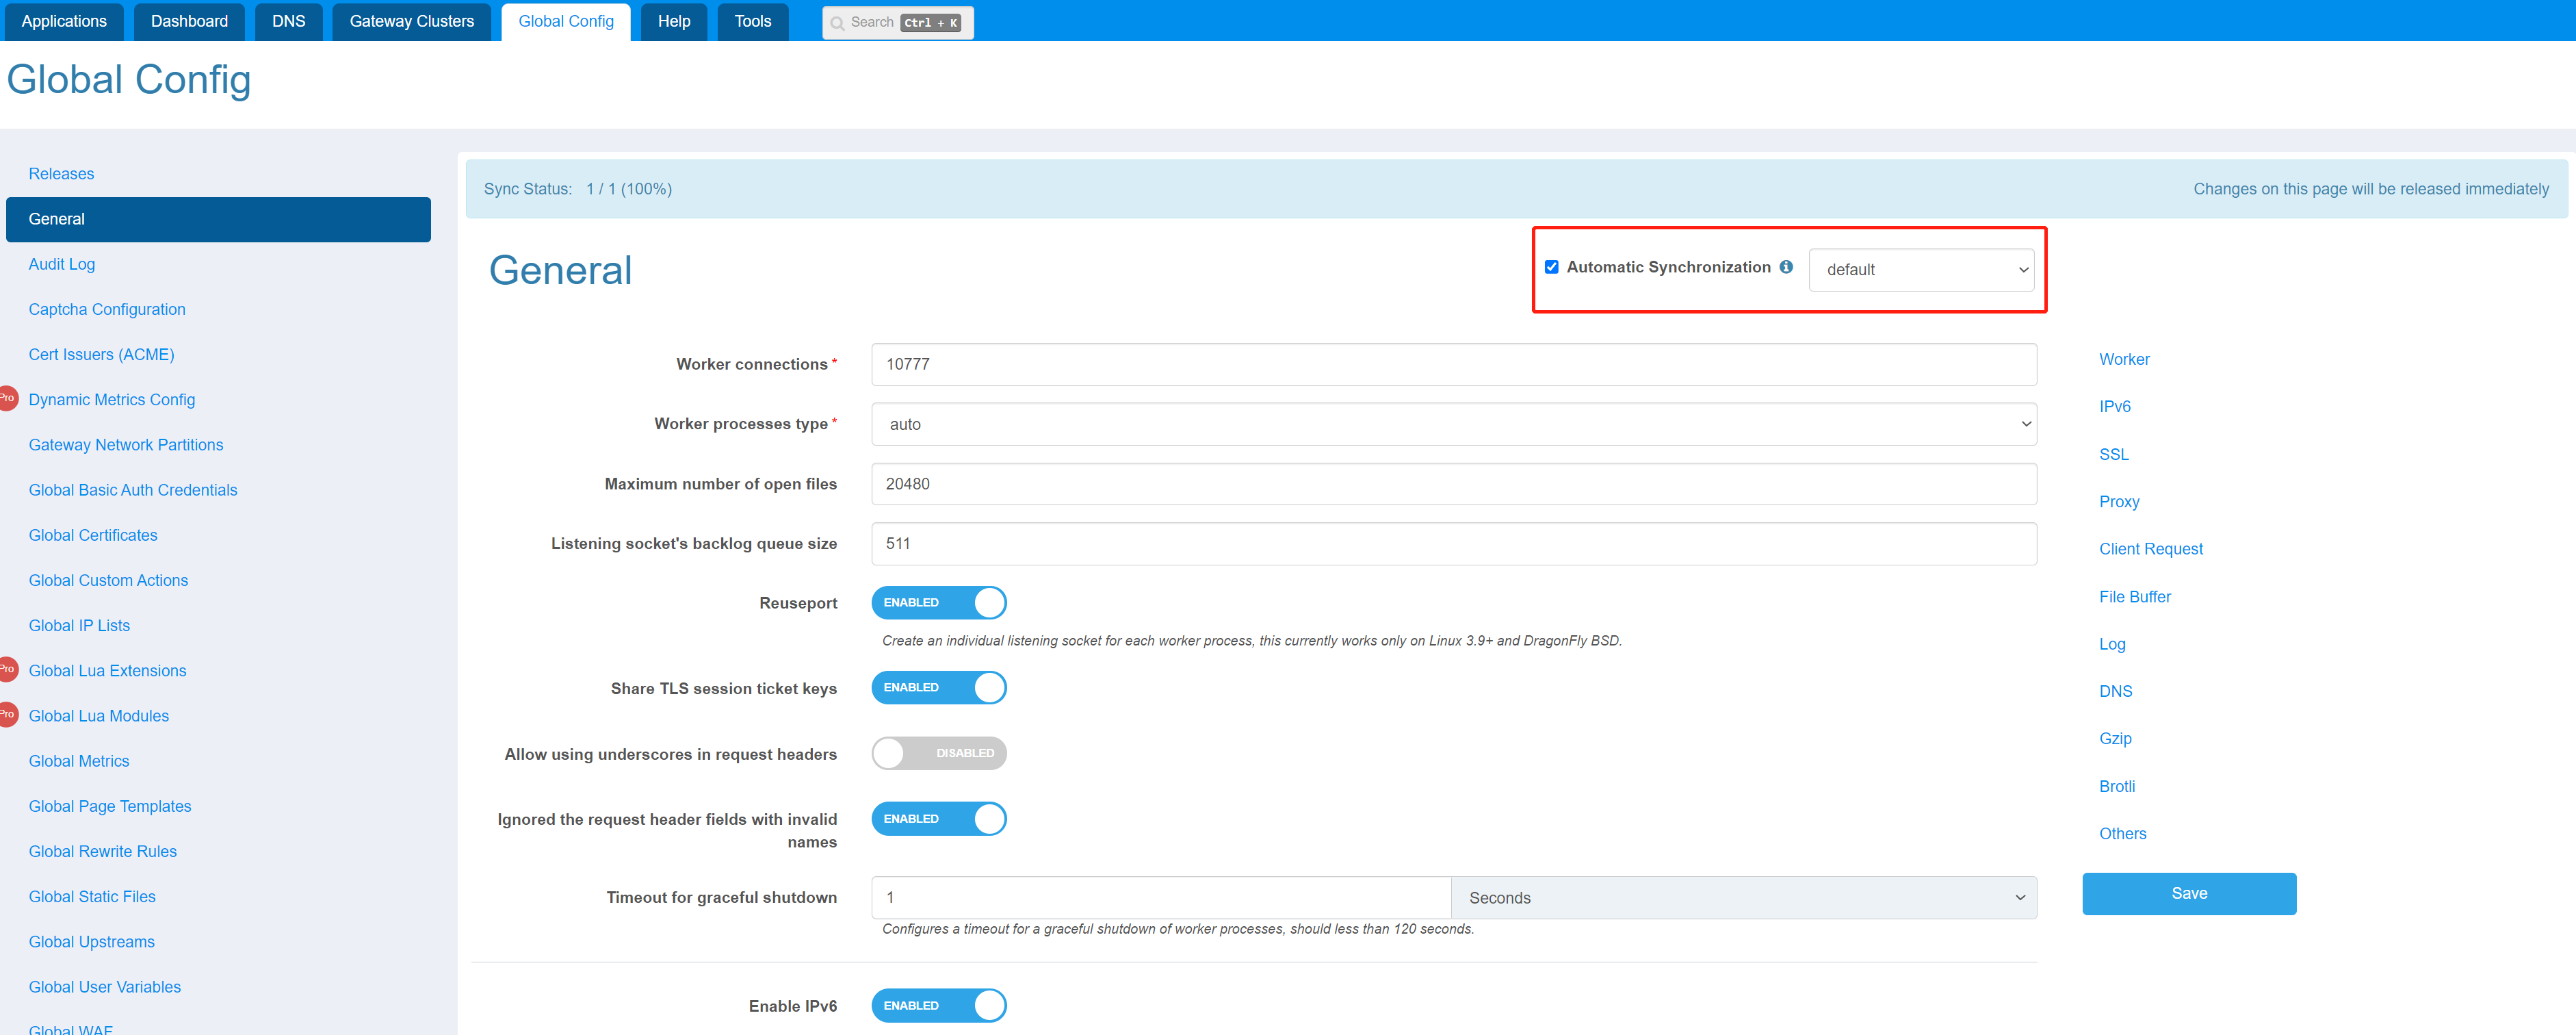
When Automatic Synchronization is checked, only the default partition is allowed to be modified.
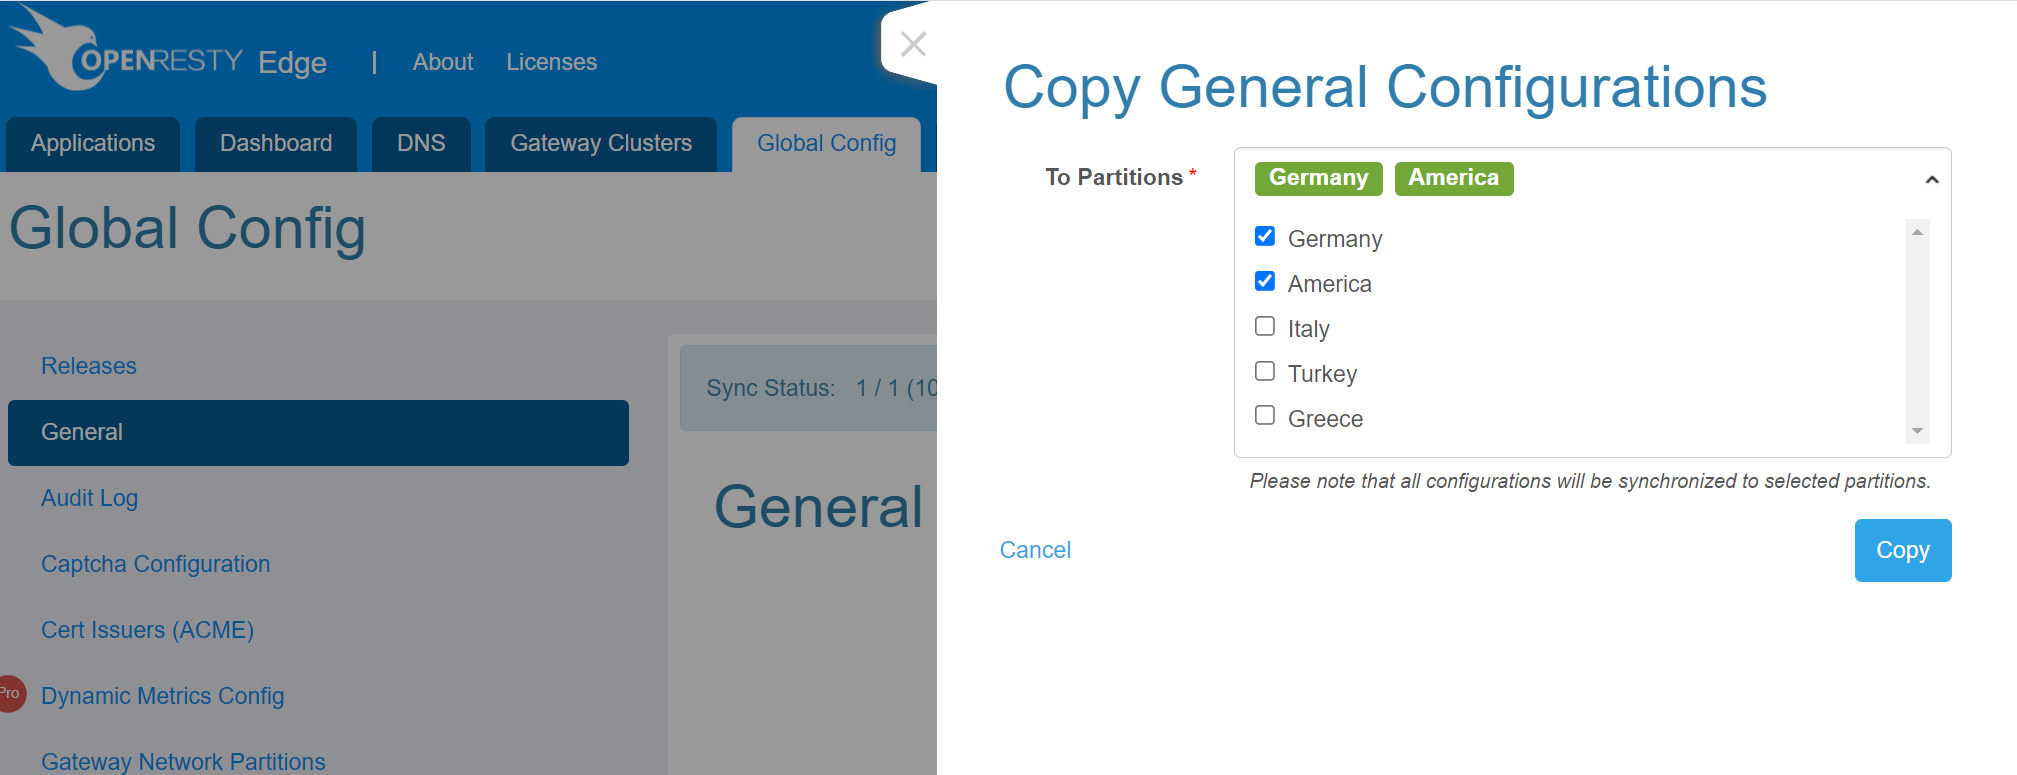
After unchecking Automatic Synchronization, the changes of each partition will not be automatically synchronized to other partitions, so if you want to synchronize the configuration of the current partition to other specified partitions, click on the option Copy to other Partitions in the upper right corner.
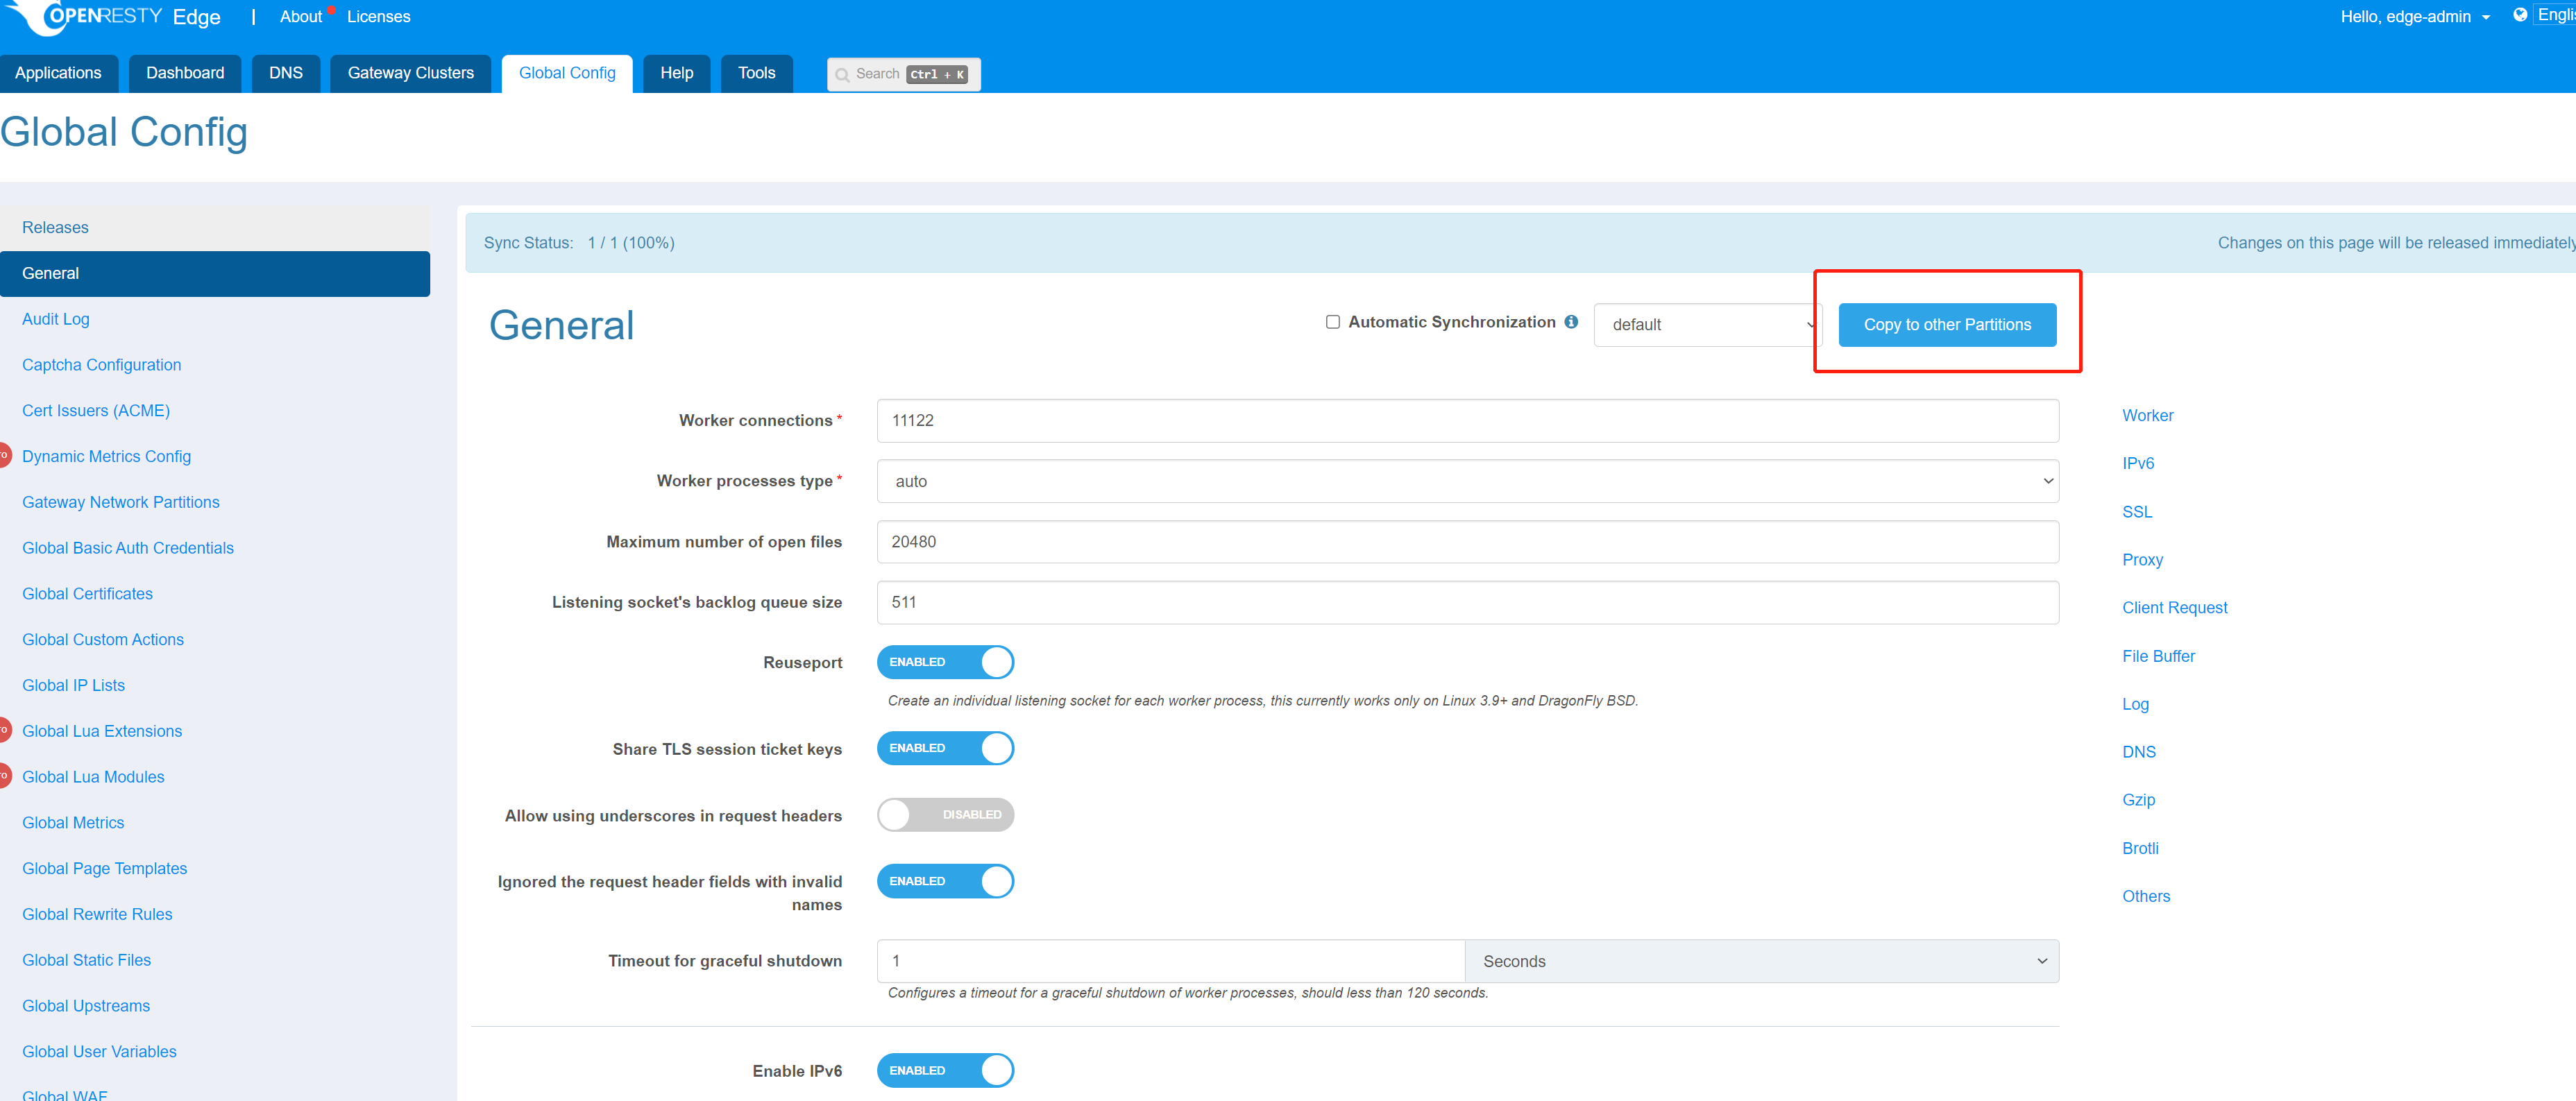
Then select the partition you want to synchronize and click copy, the configuration of the current partition will overwrite the configuration of the specified partition.