Get Started
Overview
OpenResty Edge adopts the admin + node architecture, where the node undertakes external services, and all configurations and administration are completed on the admin.
Manage node
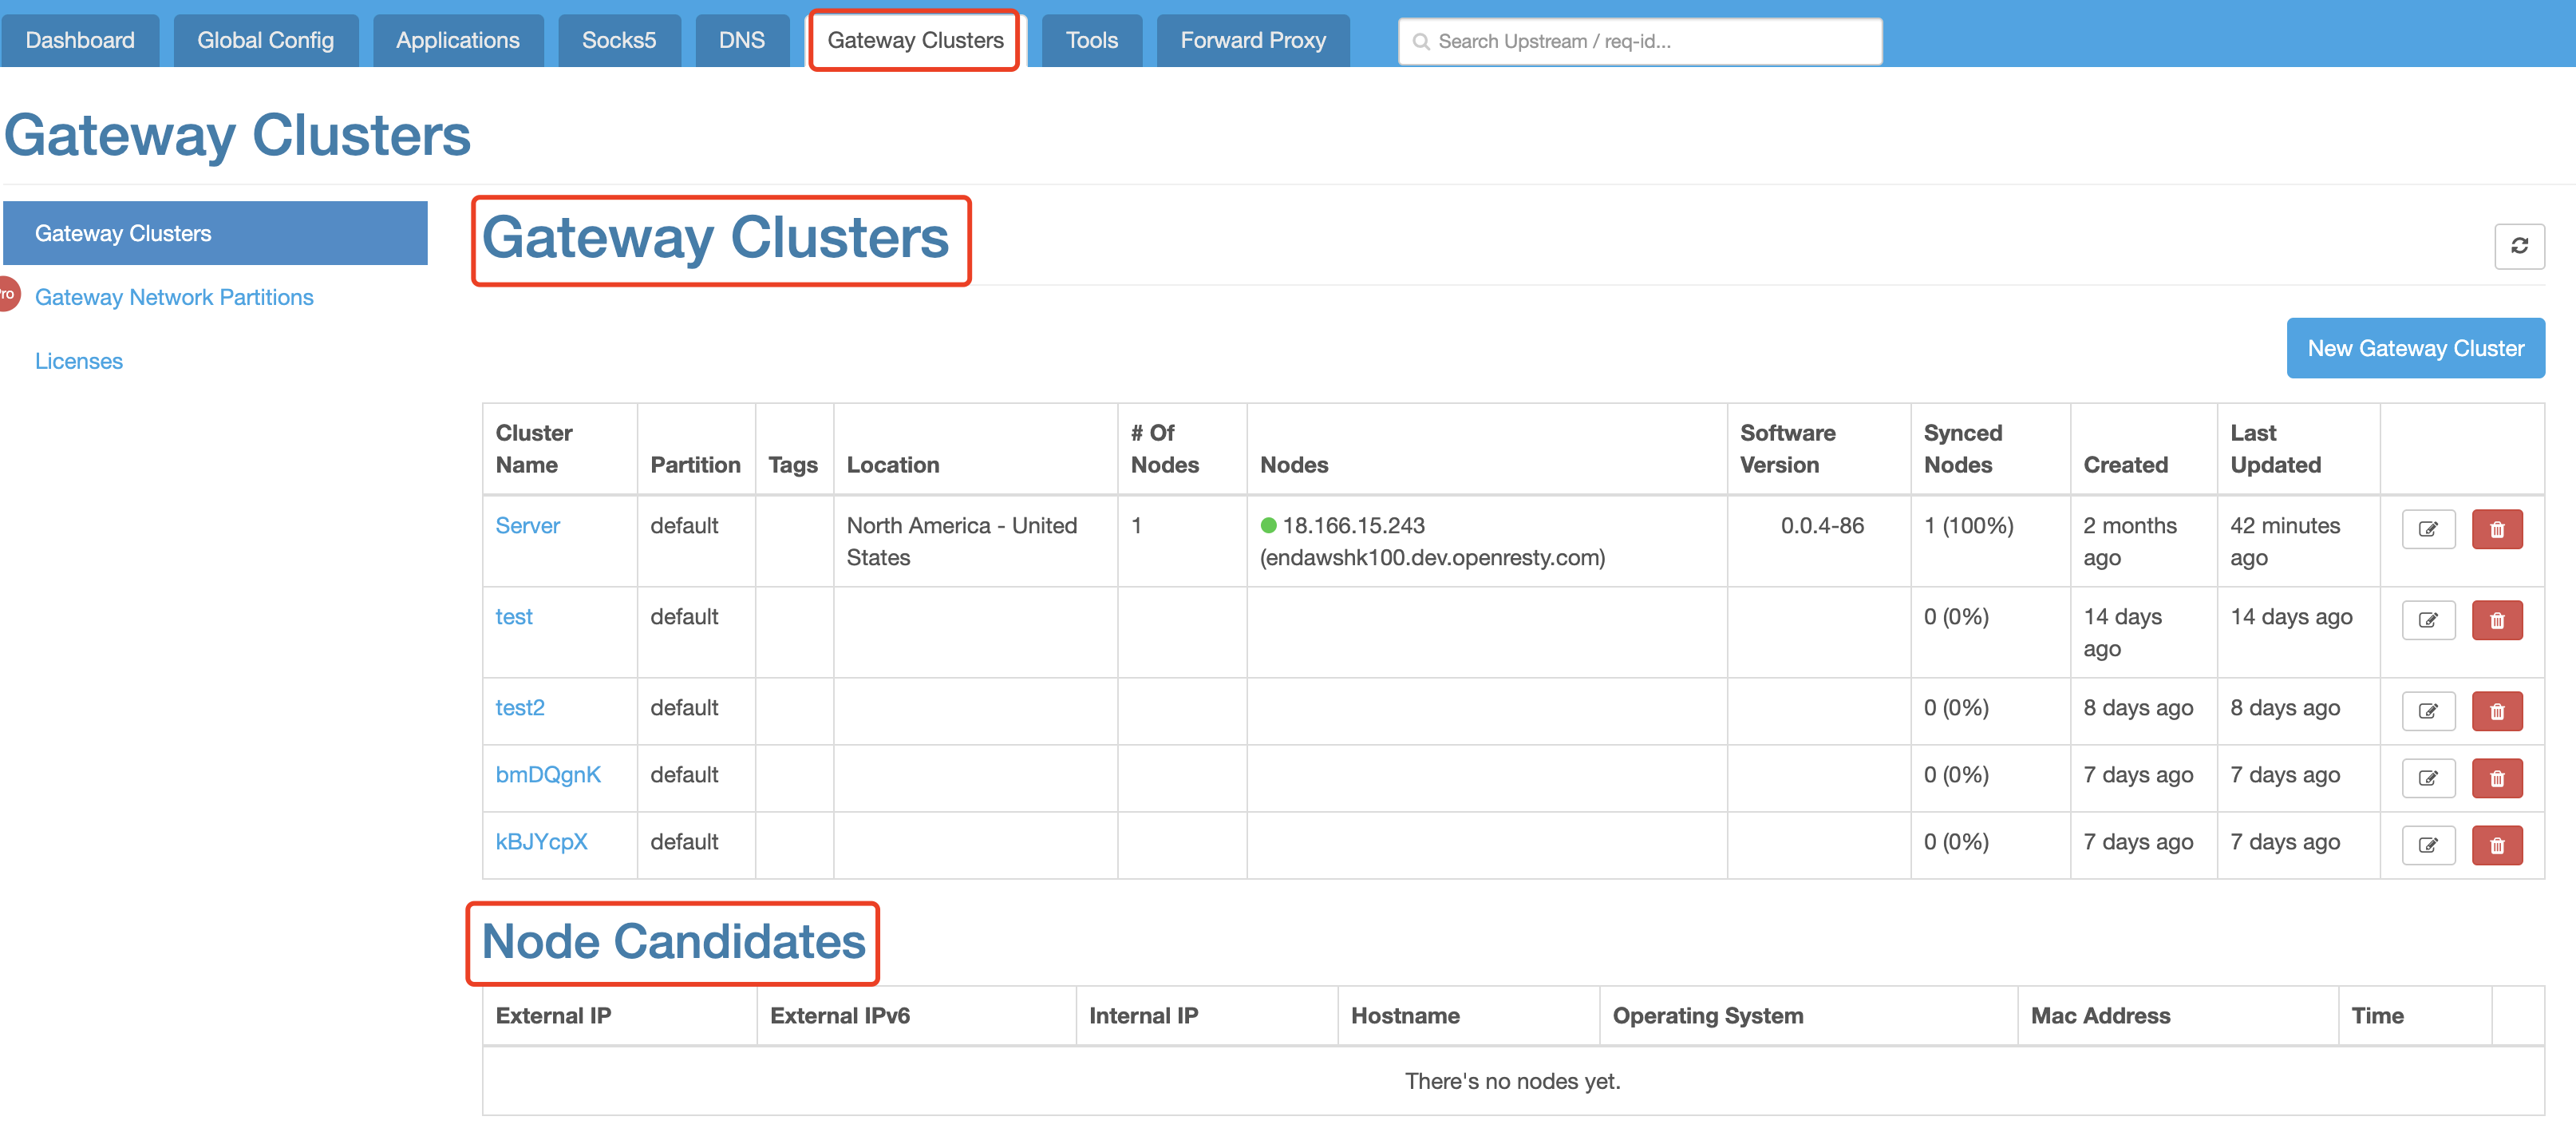
A newly installed node will appear in the [Candidate Node] list below the [Gateway Cluster]. You may choose to approve the joining of the node in a certain cluster.
Clusters are usually distinguished by region, so nodes in the same colocation will be put in the same cluster.
Create Application
You can start to create an application after Edge finishes deployments.
For example, create an application that includes foo.test.com. All behaviors of accessing nodes via the domain name can be configured in this application.
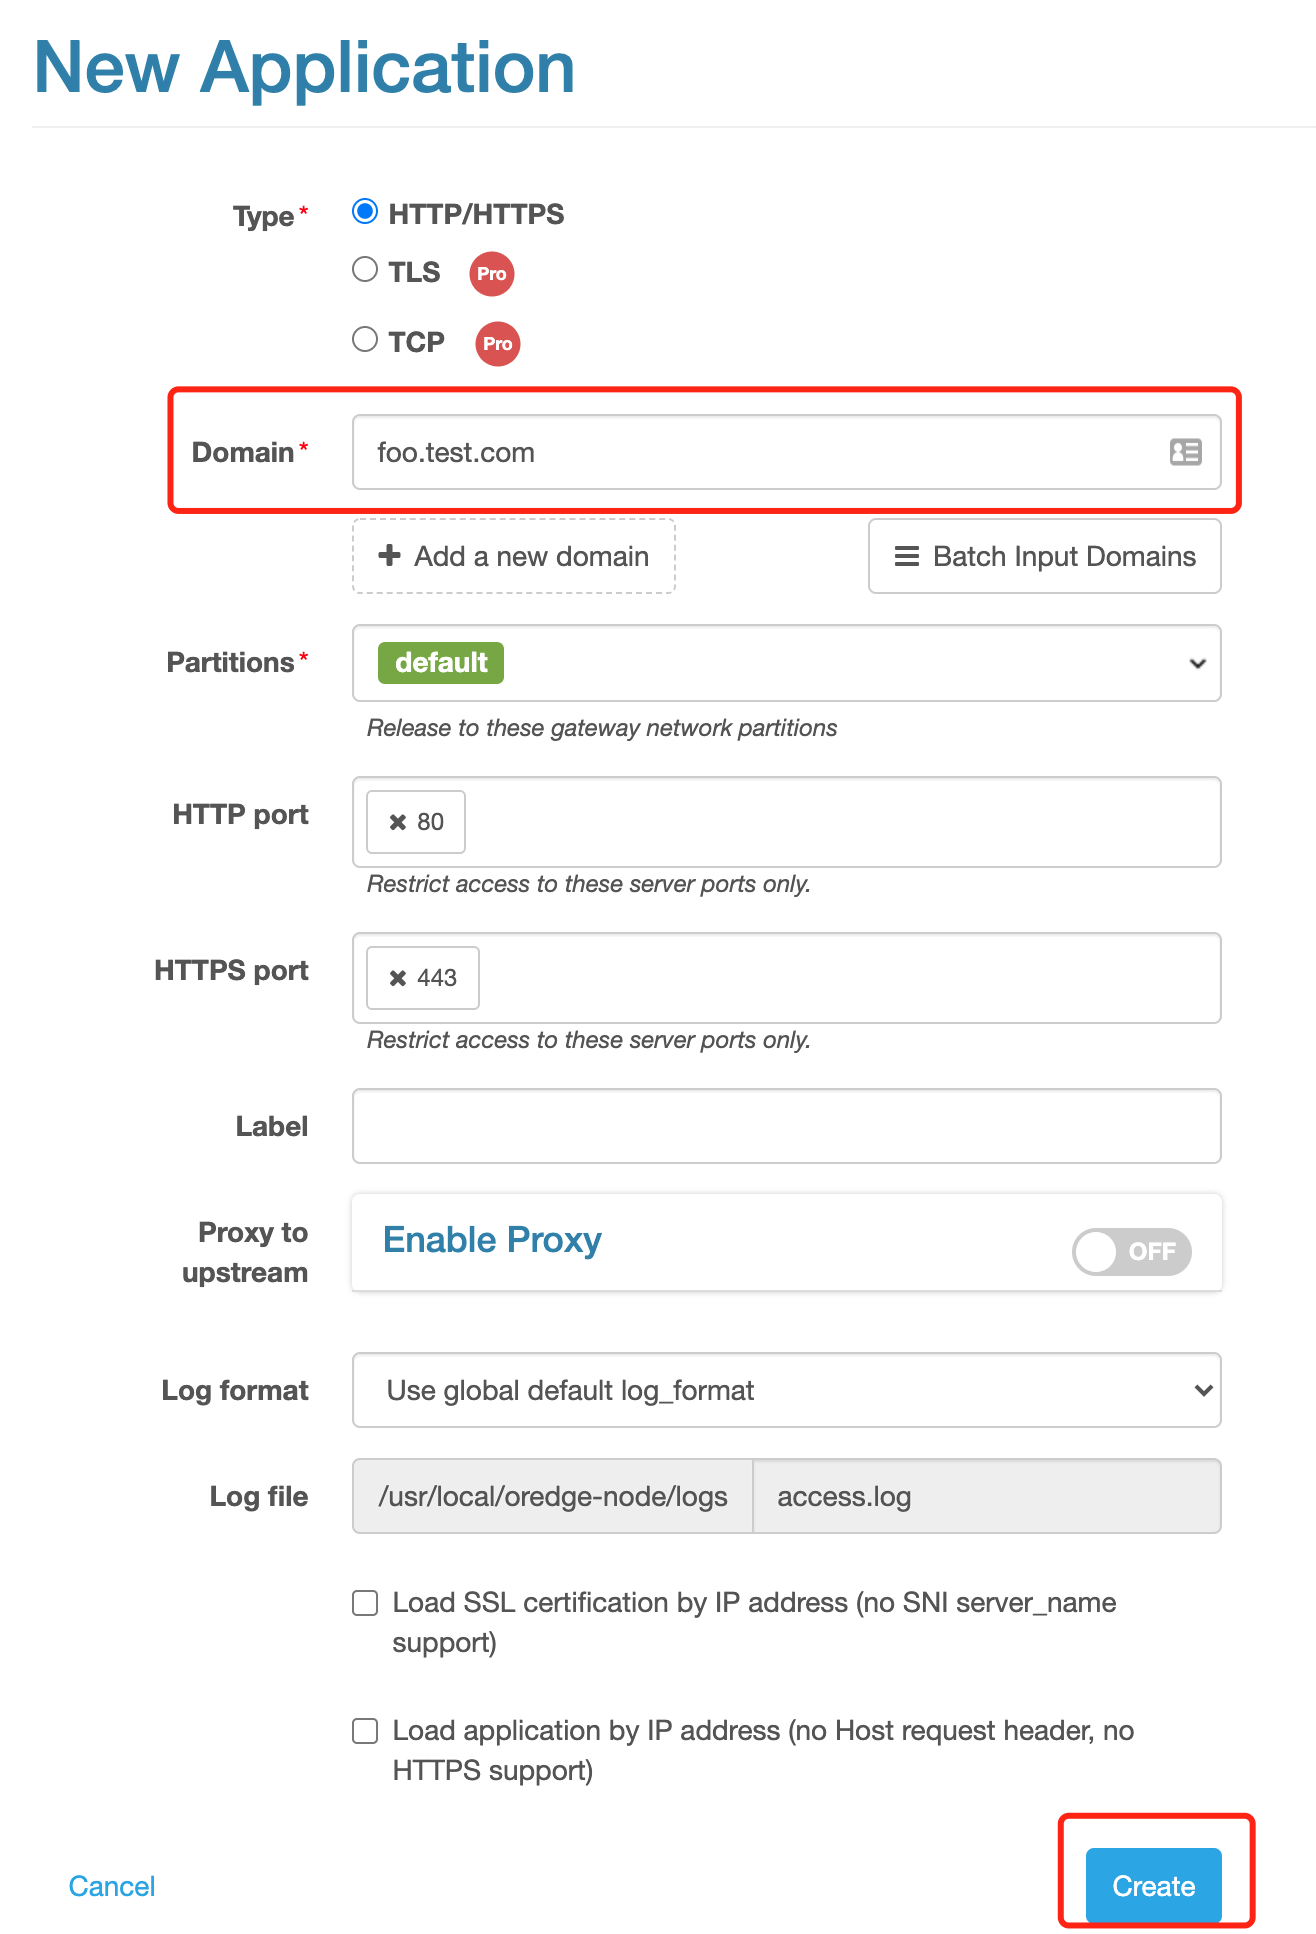
As a newly created application has no configuration, all accesses will get 404.
For example
# Assume the node IP is 47.56.103.89

$ curl -x 47.56.103.89:80 http://foo.test.com/

<html>

<head><title>404 Not Found</title></head>

<body>

<center><h1>404 Not Found</h1></center>

<hr><center>openresty</center>

</body>

</html>
Experience hello world
Main configurations inside the application are in the [Page Rules]. For instance, use Edge language to quickly achieve hello world.
Enter the followings in the edit box below the [Custom Edge language rules as this page starts]:
uri("/hello") =>

say("hello world!");
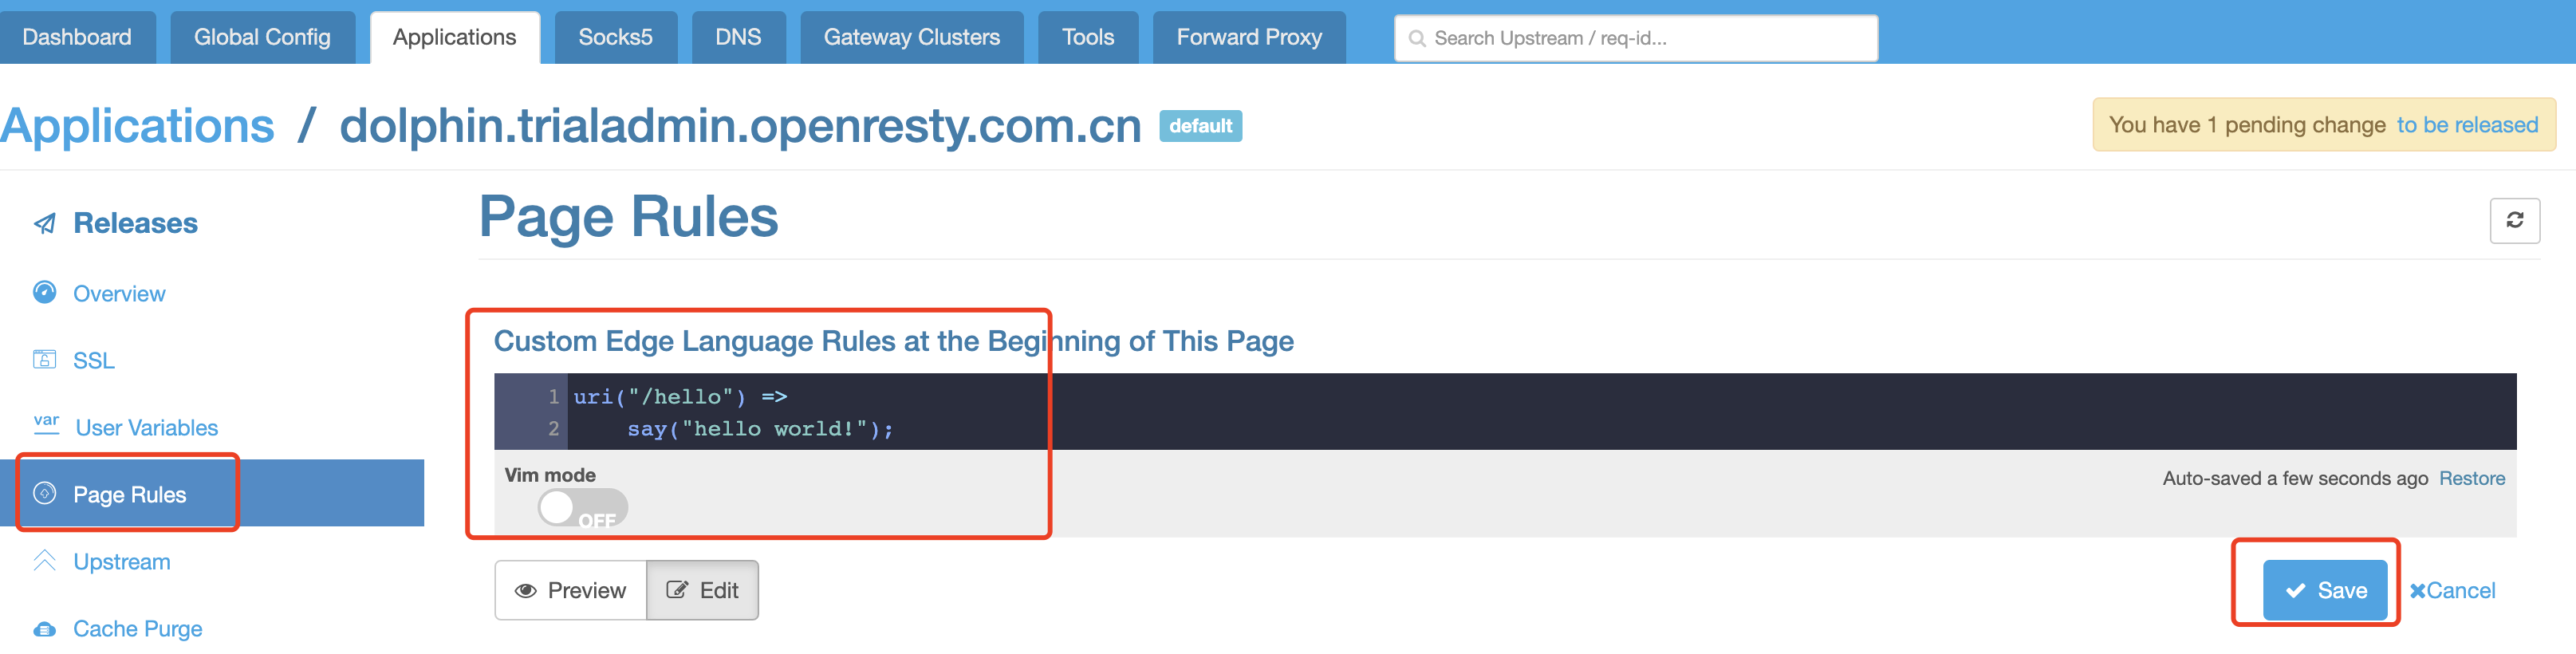
Click to save, and [You have one unreleased change to be released] will appear at the top right-hand corner. Just to be on the safe side, configuration changes in the application will not work immediately after being made, but will truly work on node after confirmed release.
Follow the [To be released] link to enter the Release page. Click to release and soon (the change may be invisible to the naked eye) you can notice the synchronization status is back to 100%, meaning that the new configuration is already synchronized to the node and works.
Now, request to the node once again and you will get the hello world!
output:
# Assume the node IP is 47.56.103.89

$ curl -x 47.56.103.89:80 http://foo.test.com/hello

hello world!
For more details about the Edge language, please refer to Edgelang User Manual
Reverse Proxy to Origin
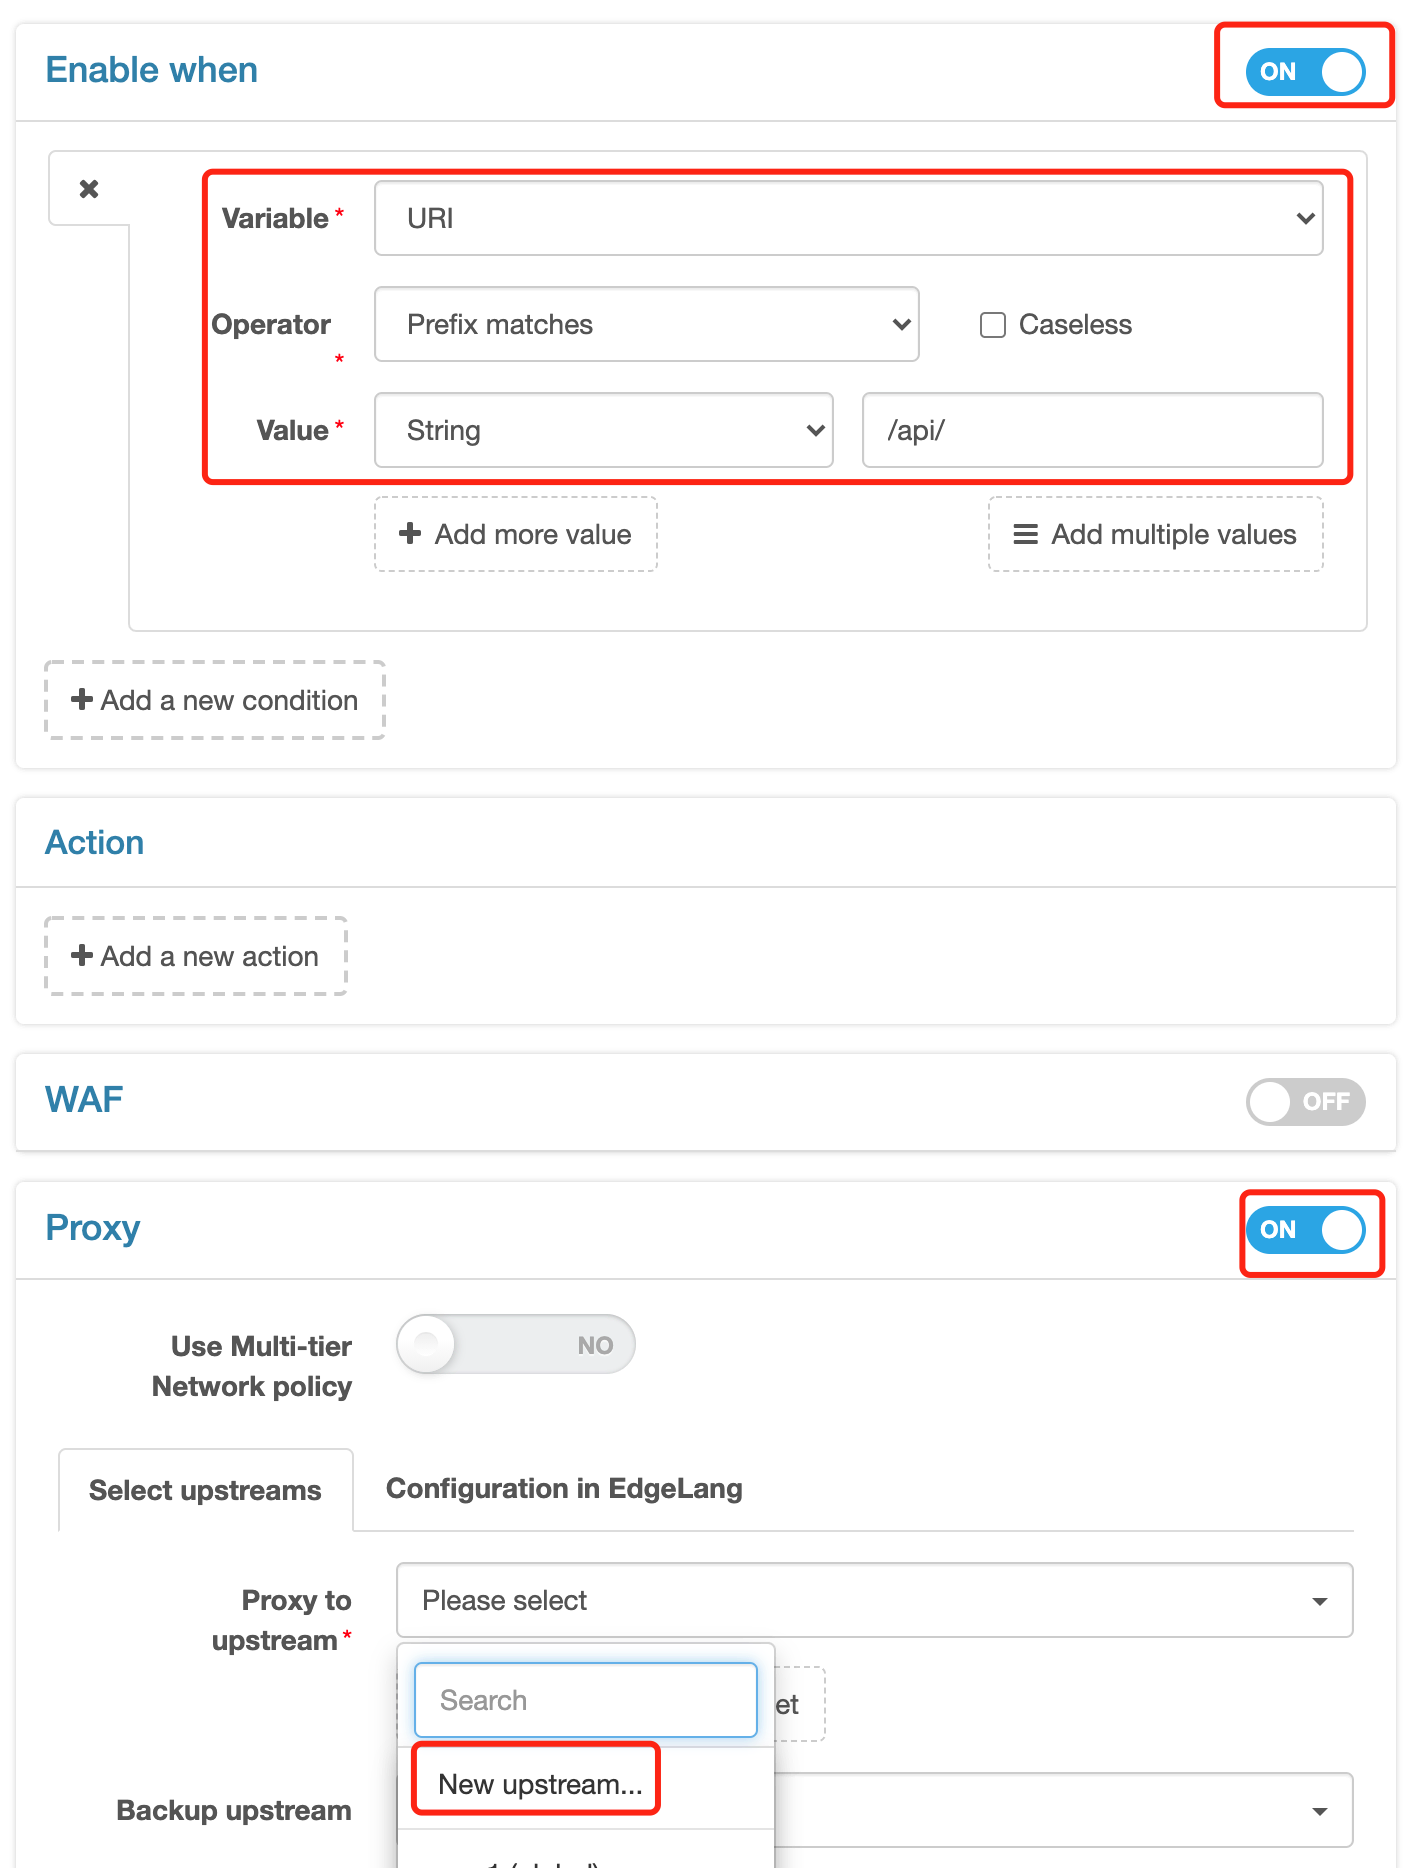
Reverse proxy is the most basic function of Edge. For instance, we can configure the following rules:
click the [New Rules] on the top right-hand side of the page
click to open the “Enable Conditions”
match character string
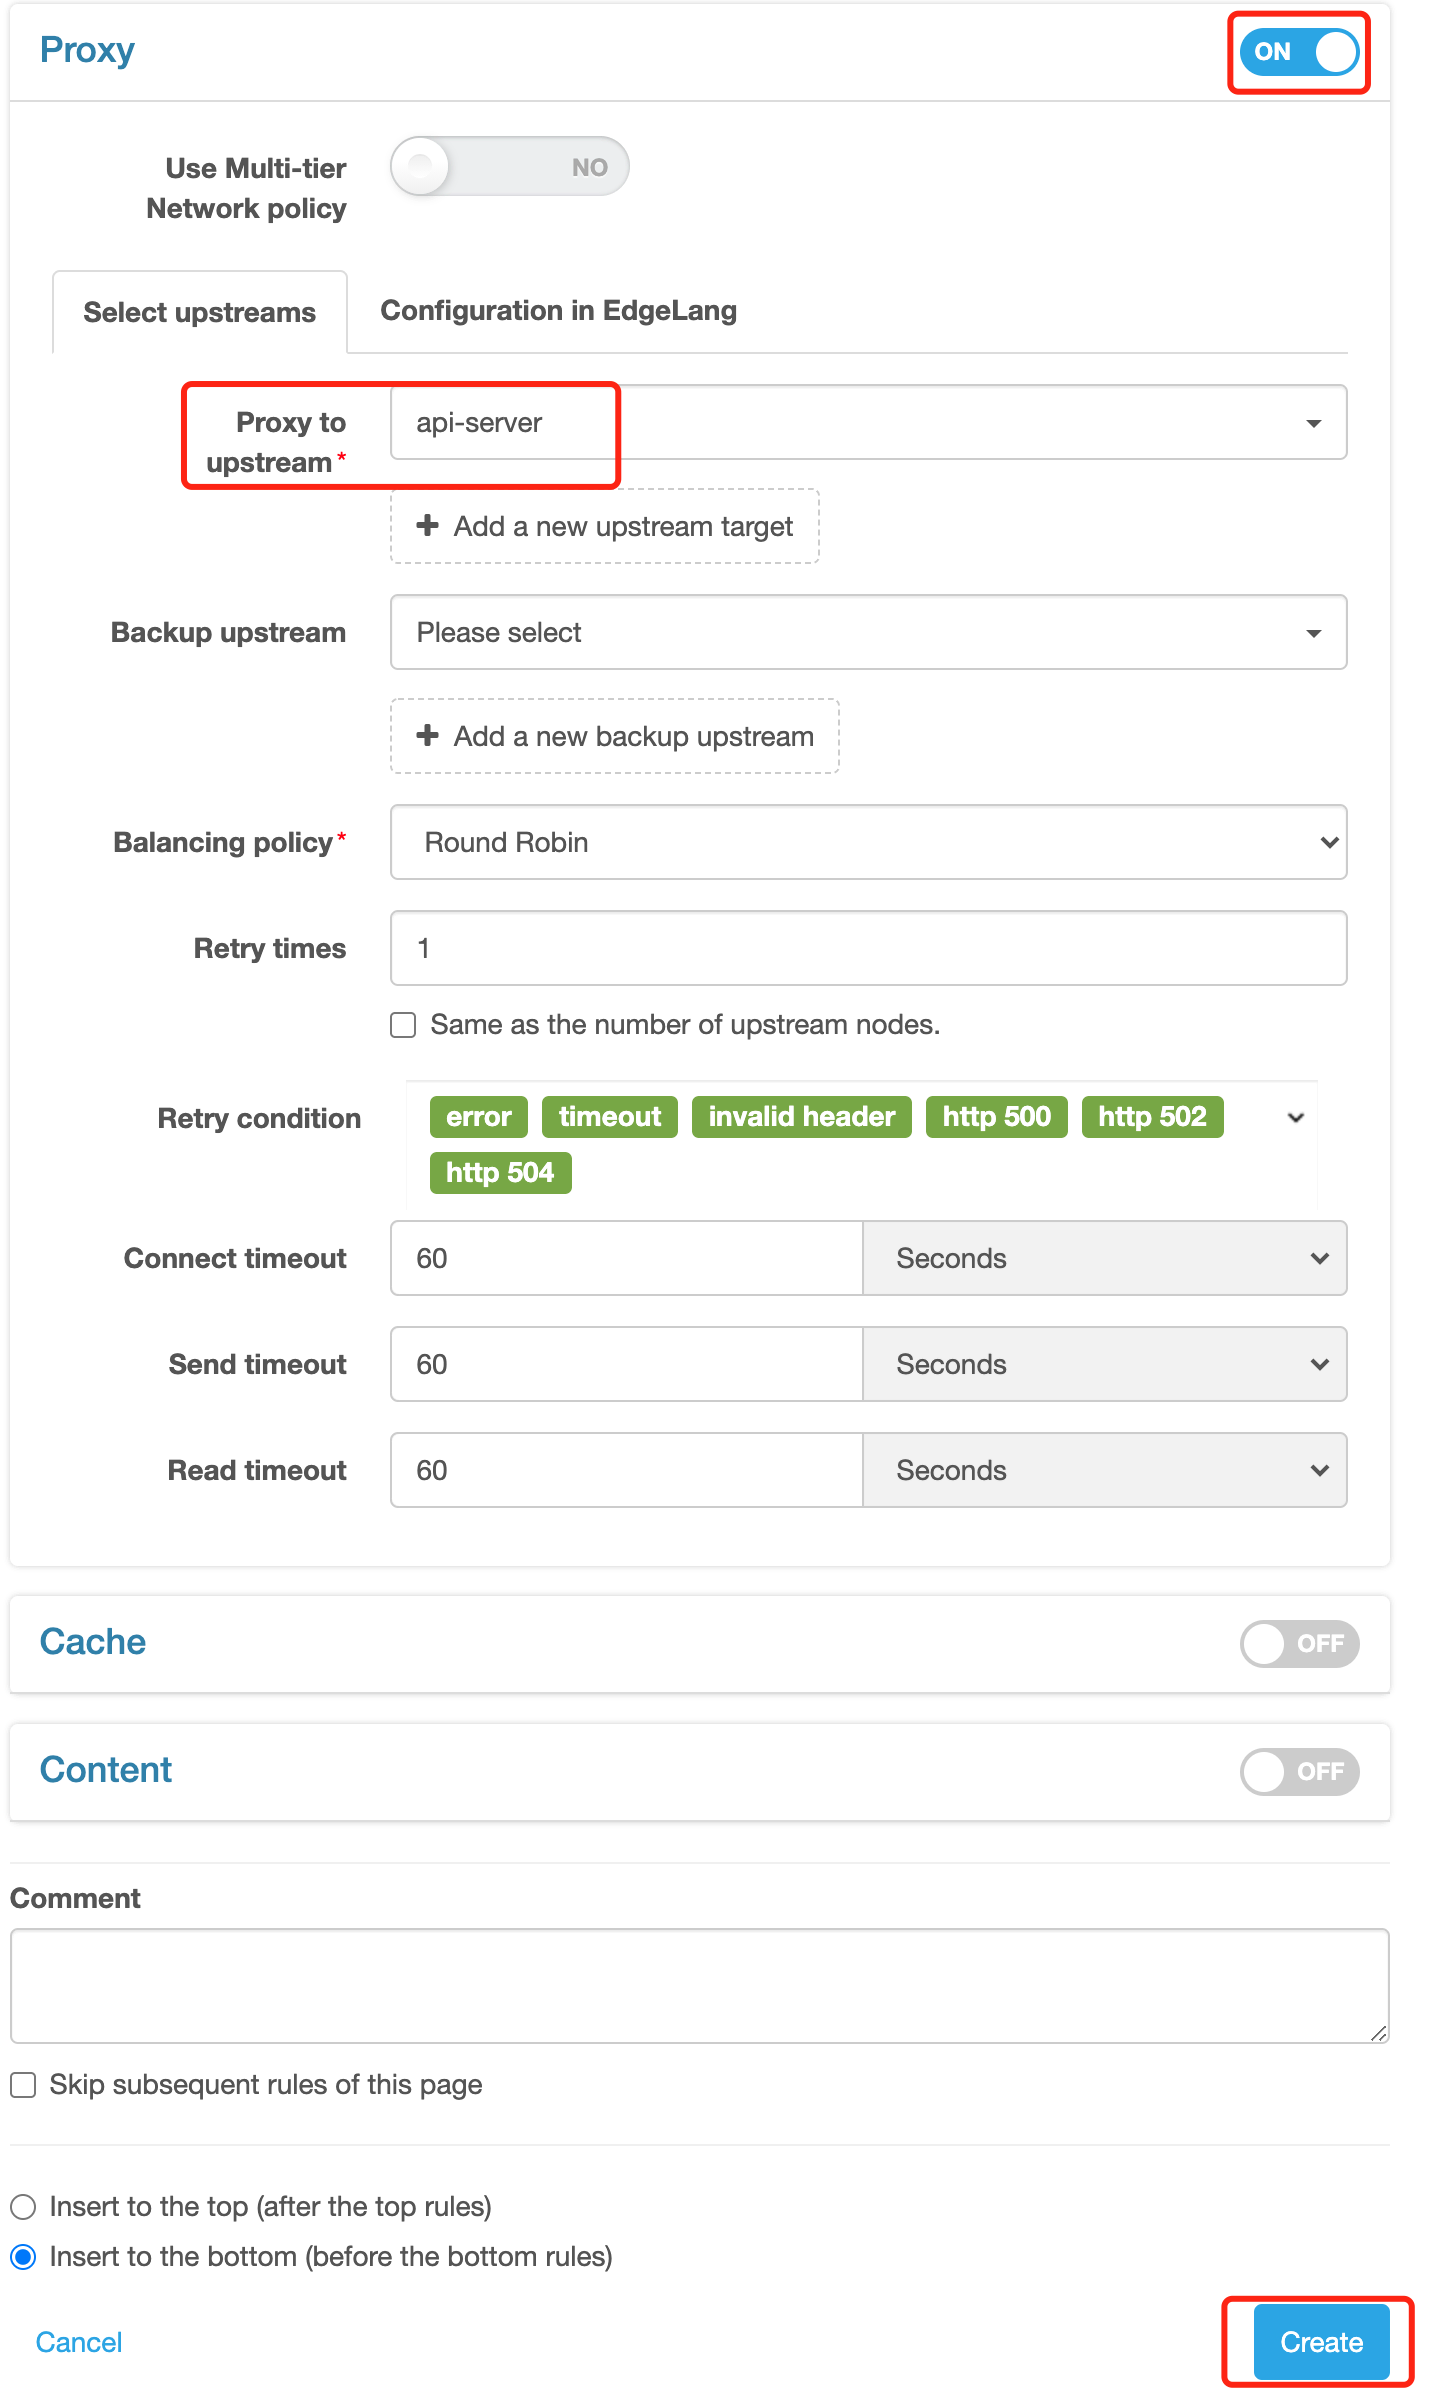
/api/to the URI prefixclick to open the [Proxy]
select proxy-to-upstream. You need to select the [New Upstream…] to create an upstream as we have not yet put upstream configuration in place
enter the upstream name:
api-serverand host name:47.91.165.147, and click to save, a new upstream being successfully configured.click the [Create] as the page has automatically returned to the New Rules interface
===»>

===»>
So, a simple reverse proxy rule is now created. Similarly, it can work after release.
This rule means requests prefixed with /api/ will get back-to-origin to
port 80 of 47.91.165.147 via the HTTP protocol. Verify it by:
$ curl -x 47.56.103.89:80 http://foo.test.com/api/xx

recevied URI: /api/xx

request from IP: 47.56.103.89

server IP: 47.91.165.147
Notes: 47.91.165.147 is an origin we created for demo.
Enable cache
By default, the cache is disabled, so a request will be directly forwarded to the origin, of which the response will be returned to the requestor.
If the cache is needed, make the following configurations:
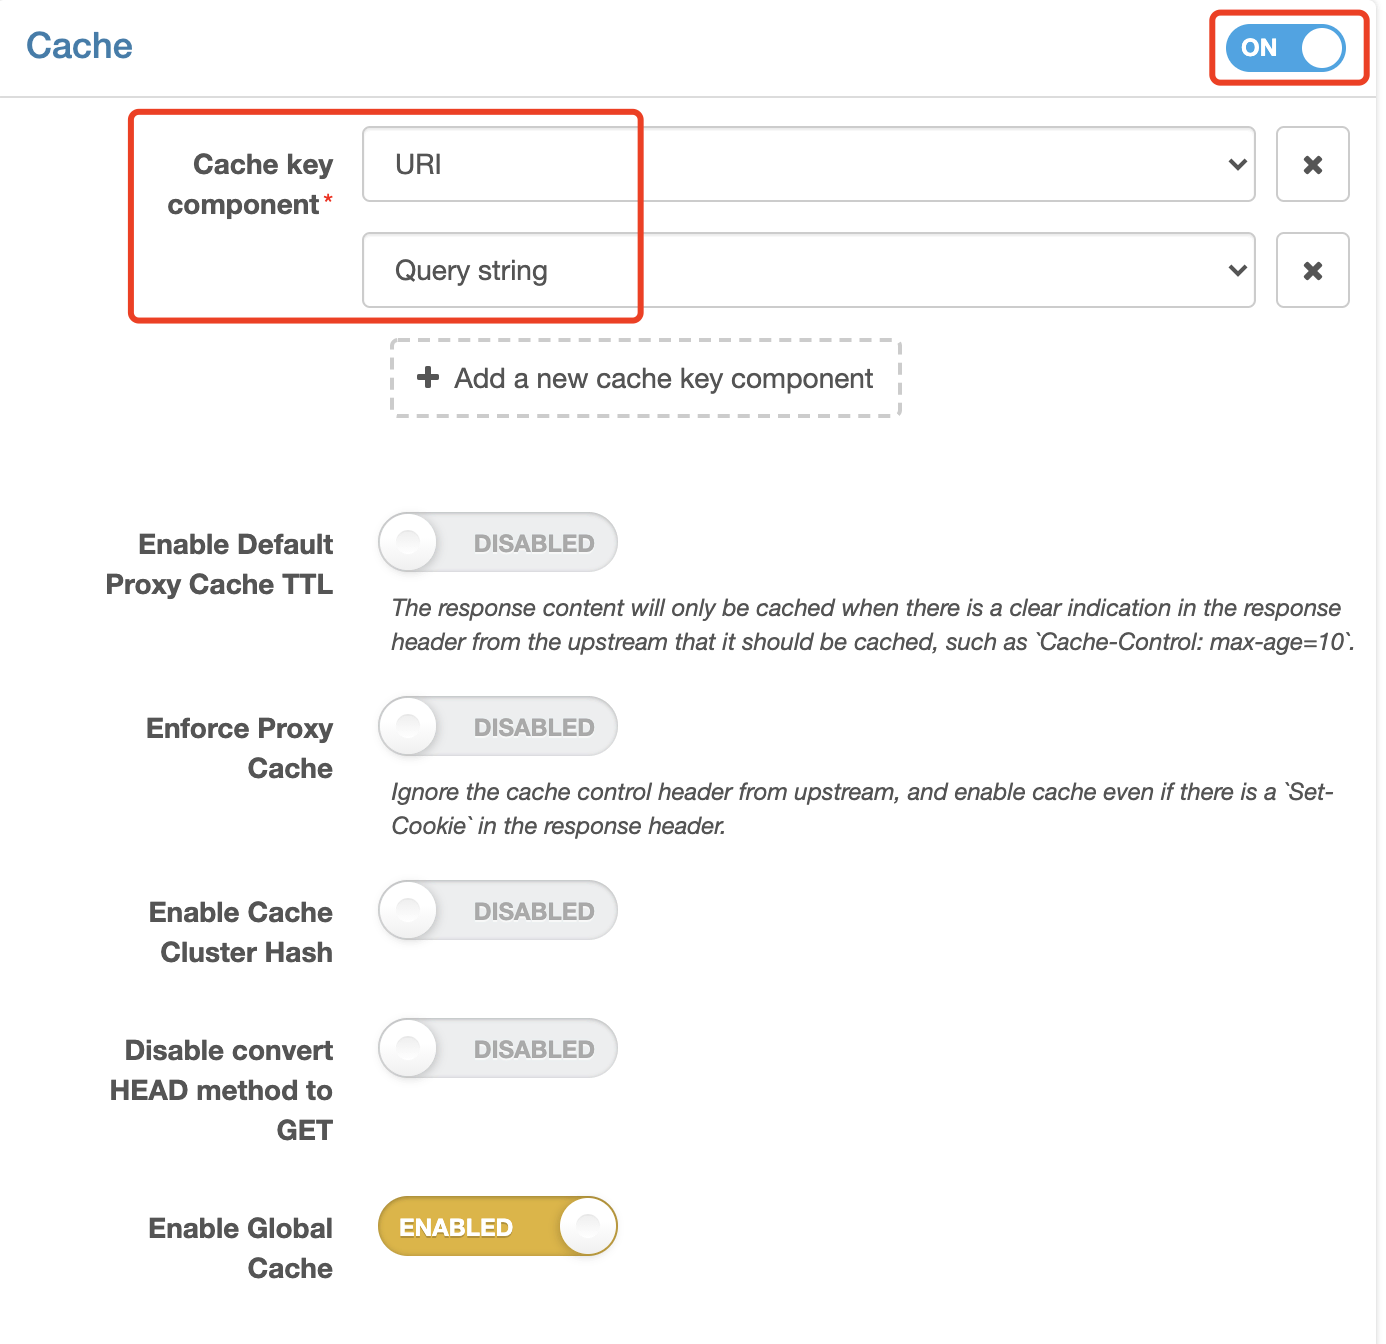
click to edit (the rule created in the previous step)
click to open the cache, and use URI + Query String as the default cache key, with no changes to the cache key and other default values
click to save
In the same way, it can work after release. Now test:
# For the first request, please note that the Cache-Status is MISS

$ curl -x 47.56.103.89:80 http://foo.test.com/api/foo -I

HTTP/1.1 200 OK

Server: openresty+

Date: Mon, 05 Aug 2019 10:04:28 GMT

Content-Type: text/plain

Connection: keep-alive

Req-ID: 0000090001ac17f42960e470

Expires: Mon, 05 Aug 2019 11:04:28 GMT

Cache-Control: max-age=3600

Cache-Status: MISS

# For the second request, please note that the Cache-Status is HIT

$ curl -x 47.56.103.89:80 http://foo.test.com/api/foo -I

HTTP/1.1 200 OK

Server: openresty+

Date: Mon, 05 Aug 2019 10:04:30 GMT

Content-Type: text/plain

Connection: keep-alive

Req-ID: 0000090001ac17f42960e470

Expires: Mon, 05 Aug 2019 11:04:28 GMT

Cache-Control: max-age=3600

Edge-Cache-Age: 2

Cache-Status: HIT
Yes, the second request has hit Cache, so it does not need to go back to origin, and the node responds directly with cache.
Enable WAF
If you hope to enable the WAF on the gateway node to guard against attacks such as SQL injection, XSS, Web server vulnerabilities and Trojan Horse, follow the configurations as below:
click to edit (same as above)
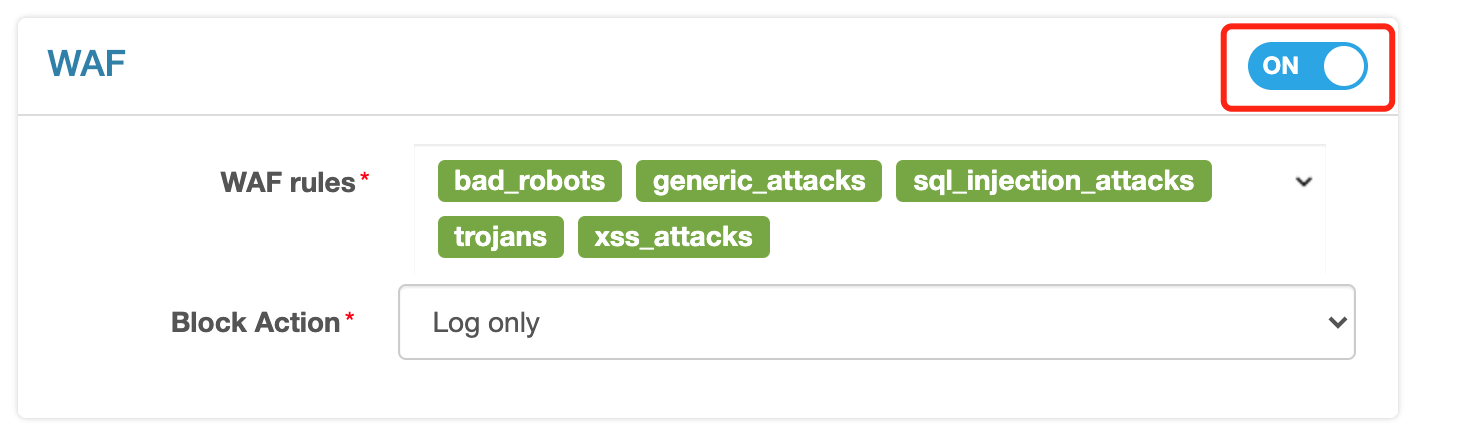
click to open WAF, where the built-in five rule sets will be enabled by default
the default interception action is the [Only Record Logs], meaning that requests found to be threatening will only be recorded but not be intercepted. This suits the debugging period.
click to save
Similarly, with the release, test again
$ curl -x 47.56.103.89:80 http://foo.test.com/api/root.exe

recevied URI: /api/root.exe

request from IP: 47.56.103.89

server IP: 47.91.165.147
Nothing seems abnormal. Then, click to open the [WAF Log] on the left side, and one suspicious request log can be seen, because the key word root.exe has been hit.
Listed above are just several of our built-in rule sets. Besides, Edge allows adding user-defined rule sets very easily, Please see more relevant documents.
More Configurations
In addition to the abovementioned basic configurations, if you need more, such as limiting rate, setting the back-to-origin request header, setting the response header, and customizing error page, select the corresponding action from the [Action] of the rules, for example:
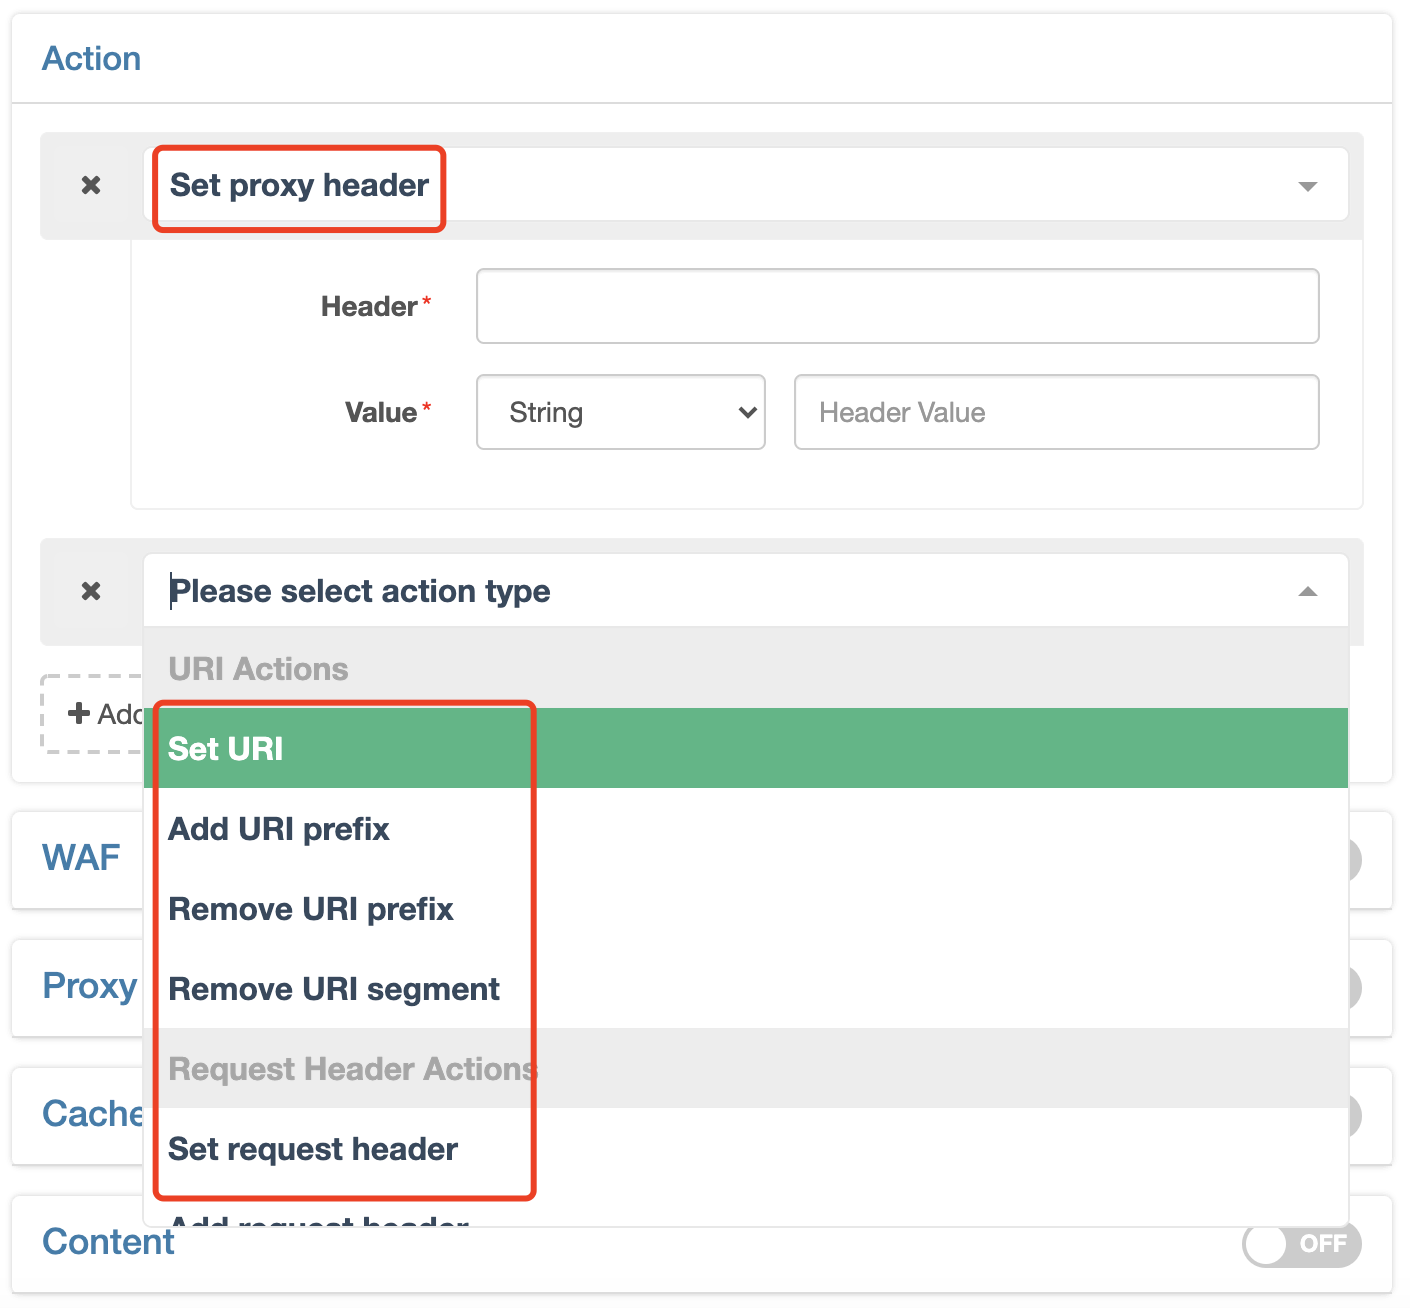
You may also refer to other relevant documents.
Multiple Rules
So far, only one rule has been configured for this test application,
that is, defining behaviors of requests prefixed with /api/.
It is common that for the same application (domain name), different request approaches correspond to different behaviors. In this case, we need to set different behaviors for different request approaches, like, back-to-origin upstream, cache strategy, and WAF strategy. Accordingly, these configurations can be done by creating rules.
What to do when conditions of multiple rules overlap?
Don’t worry. The solution is very simple, just follow one principle:
The order of display on the page represents the order of executing the rules, which are always executed in a top-down way.
If the [Bypass remaining rules of the current page] is enabled for the hit rule, the remaining rules will not continue to be executed.
In the rule list, you will clearly see:

Configure SSL Certificate
If you have noticed, we only talked about access via HTTP. In the case of access via HTTPS, SSL certificate needs to be configured.
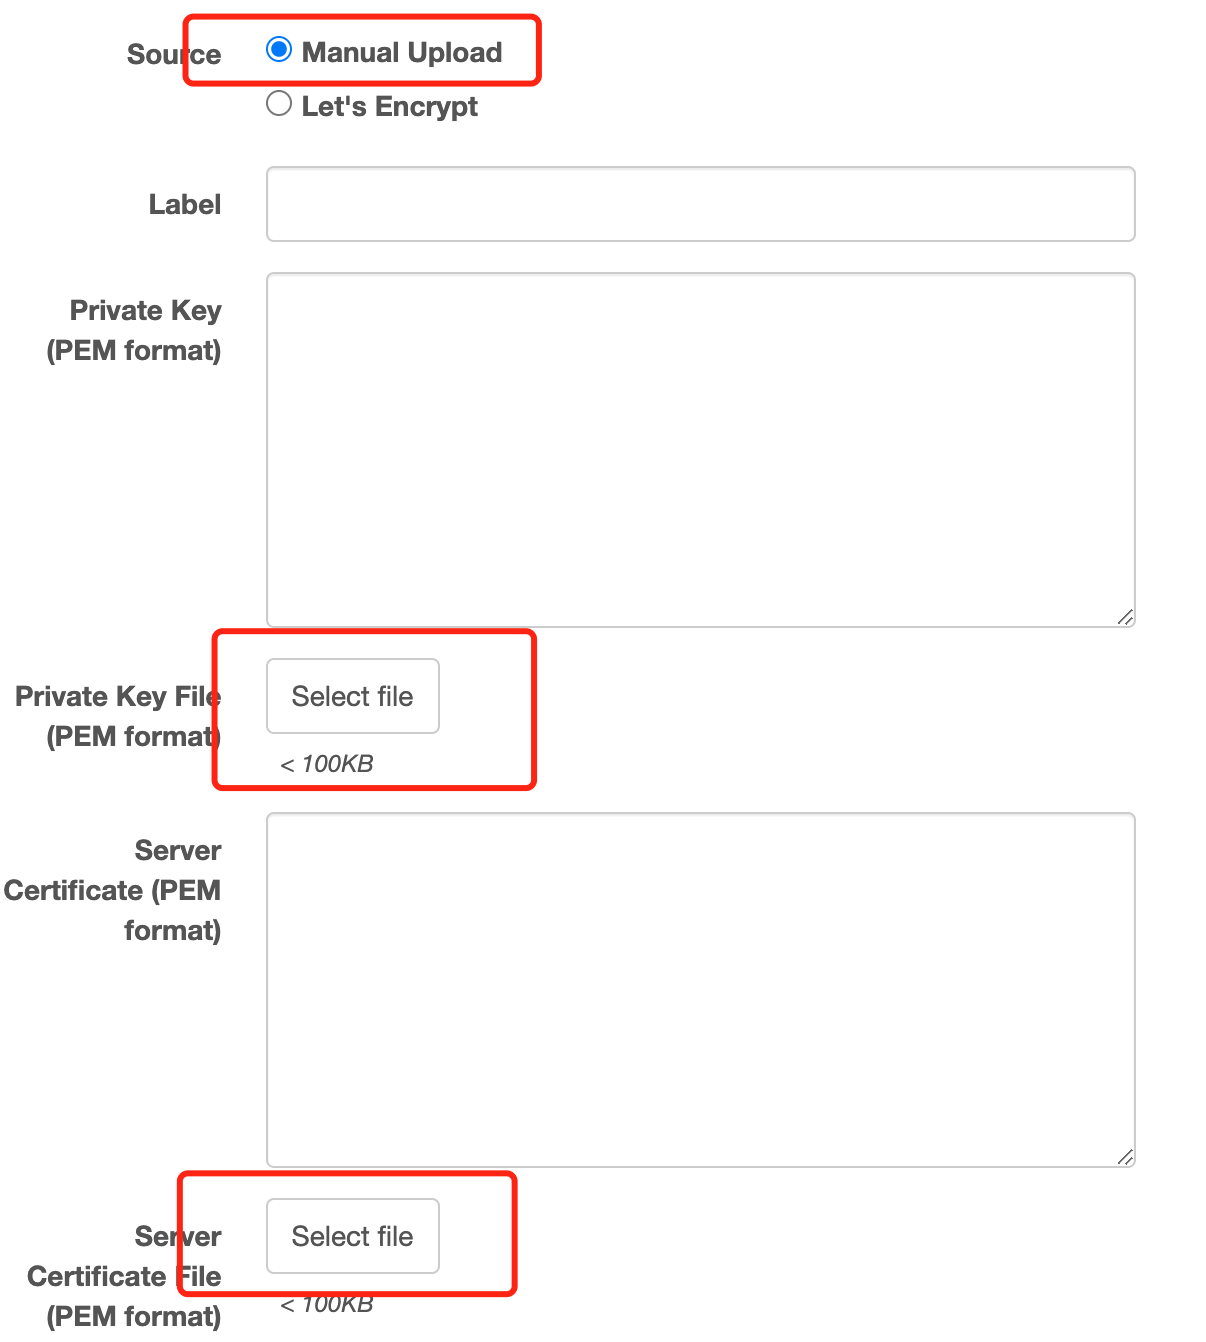
Click the [SSL] in the left-side bar, you can find three ways to configure the certificate. Try the simplest one (Manually Upload Certificate)
click the [New Certificate] at the top right-hand corner
select the [Manually Upload]
select the certificate and private key, from local files or by directly copying and inputting contents of the certificate/private key
Save
Similarly, with the release, test again
$ curl --resolve "foo.test.com:443:47.56.103.89"
https://foo.test.com/hello

hello world!
The other two methods to configure the certificate are,
automatically issuing the certificate through Let’s Encrypt integrated inside Edge
directly using the global certificate already uploaded in Global Configuration, applicable to scenarios where some wildcard certificates can be shared among applications
Please refer to more relevant documents.
Explore More Functions
Edge has more to offer than the most basic configurations we have mentioned above. It also has common basic functions such as error log, indicator statistics, cache refresh, and authority control, as well as advanced functions, including the [Multi-tier Network] back-to-origin applicable to across-the-global network, user-defined dynamic indicator statistics, and rollback configuration. You’ll discover more. If you have any questions, please refer to our documents or directly contact us.