Enable DNS Global Server Load Balancing
GSLB (Global Server Load Balancing) is a DNS-based traffic distribution feature that intelligently distributes traffic among multiple server clusters. GSLB combines server availability, distance, system load, RPS (Requests Per Second), and connection count metrics to guide user requests to the most suitable servers through DNS responses.
To enable DNS > Global Server Load Balancing, the following parameters need to be configured:
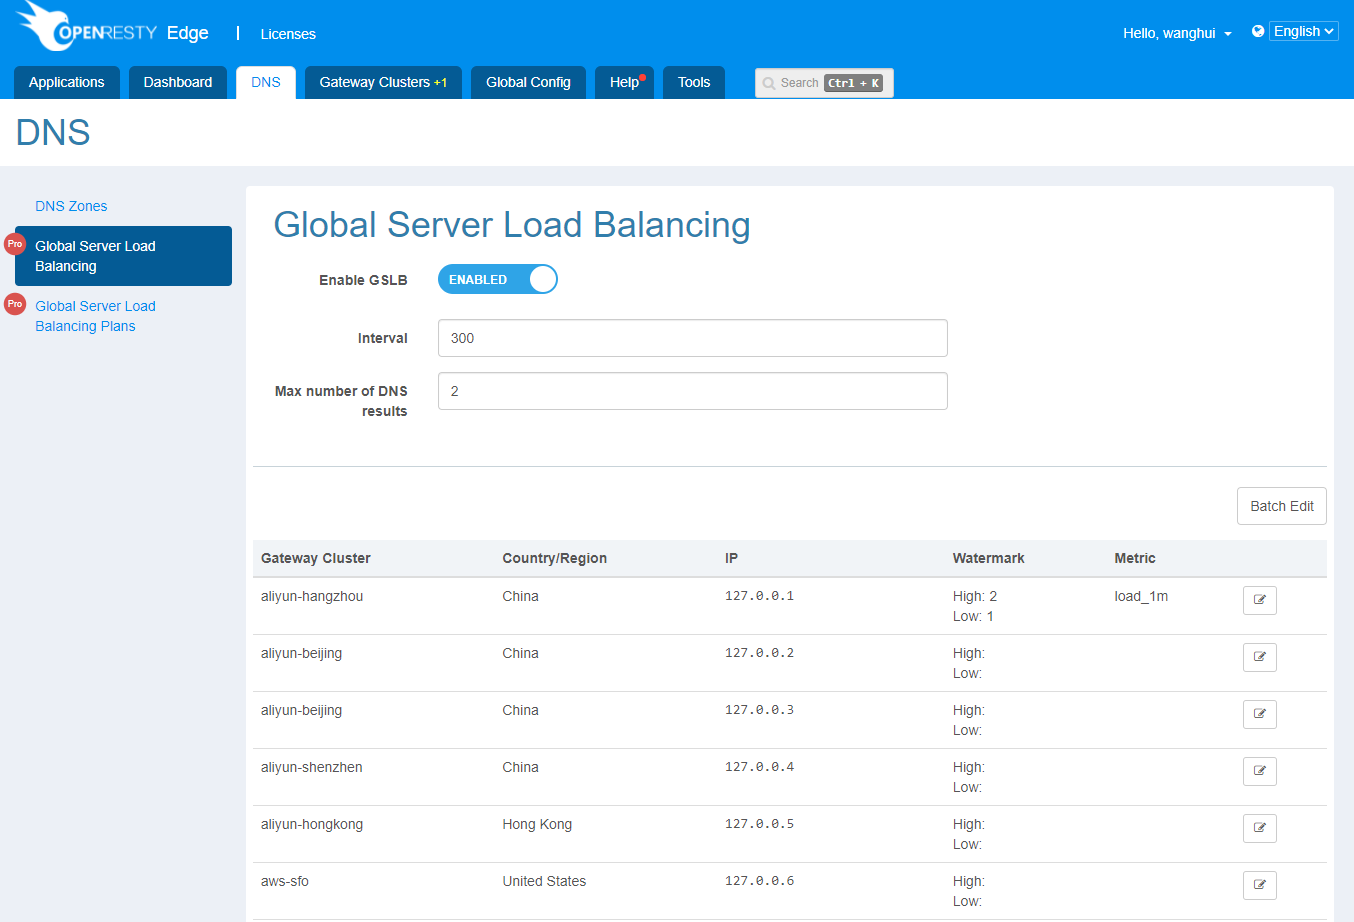
Global Configuration
- Plan update interval: The update interval for the global load balancing plan.
- Max number of DNS results: Limits the number of DNS resolution records. If the number of returned records exceeds the limit, only the records within the limit will be returned.
Node Configuration
- Low Watermark: When a node’s metrics exceed the low watermark, traffic will be probabilistically distributed to other nodes.
- High Watermark: When a node’s metrics exceed the high watermark, traffic will no longer be distributed to that node.
- Metric: Load balancing reference metrics (If no metric is selected, the DNS configuration will be used for response without intelligent redistribution).
- load_1m: Load average of the node within 1 minute. For example, for a 4-core system, the low watermark is 1 and the high watermark is 4.
- load_5m: Load average of the node within 5 minutes. For example, for a 4-core system, the low watermark is 1 and the high watermark is 4.
- load_15m: Load average of the node within 15 minutes. For example, for a 4-core system, the low watermark is 1 and the high watermark is 4.
- rps: Requests processed by the node per second. For example, for a system with a maximum RPS of 1000, the low watermark is 100 and the high watermark is 1000.
- active_conns: Active connections on the node. For example, for a system with a maximum of 10000 active connections, the low watermark is 1000 and the high watermark is 10000.
Once the above configurations are completed, Admin will generate load balancing plans based on actual node metrics at the specified update interval and distribute them to each node. The generated plans can be viewed in the plan list.
View Load Balancing Plan
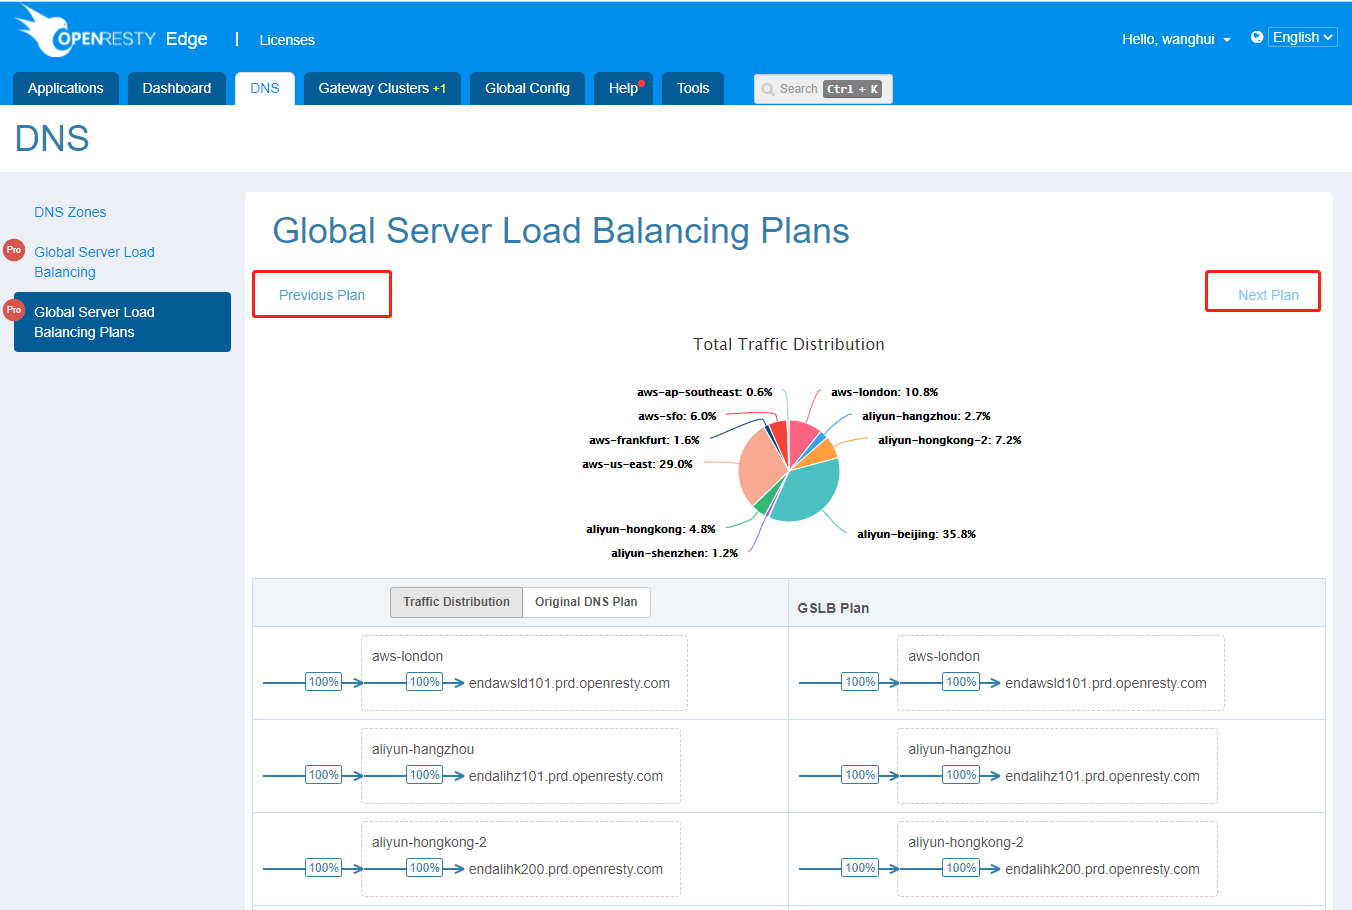
After the global load balancing plan is generated, you can see the following charts in the plan list.
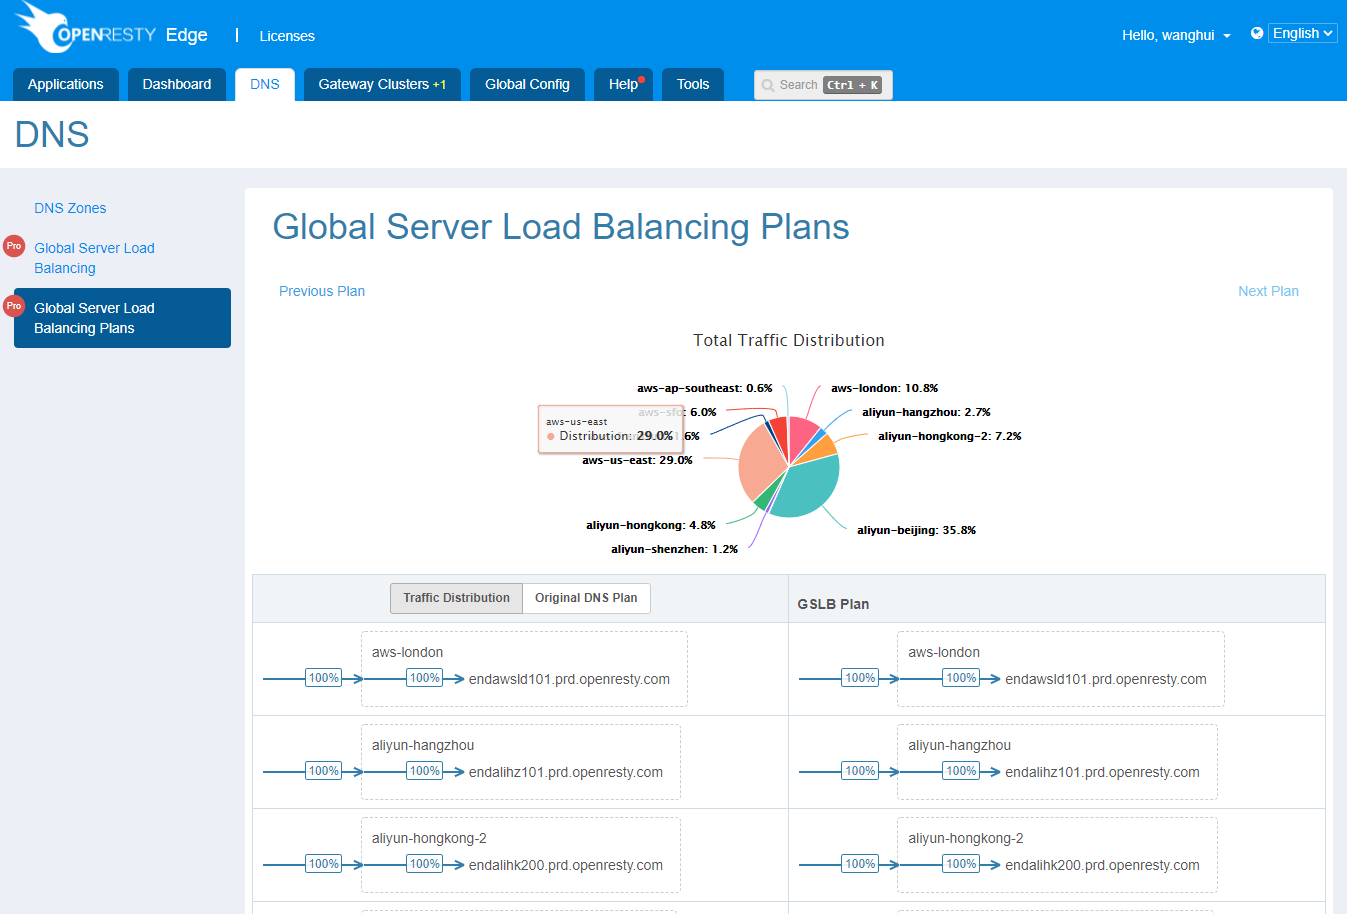
The Total Traffic Distribution chart shows the distribution of network traffic (inbound and outbound) across different cluster networks.

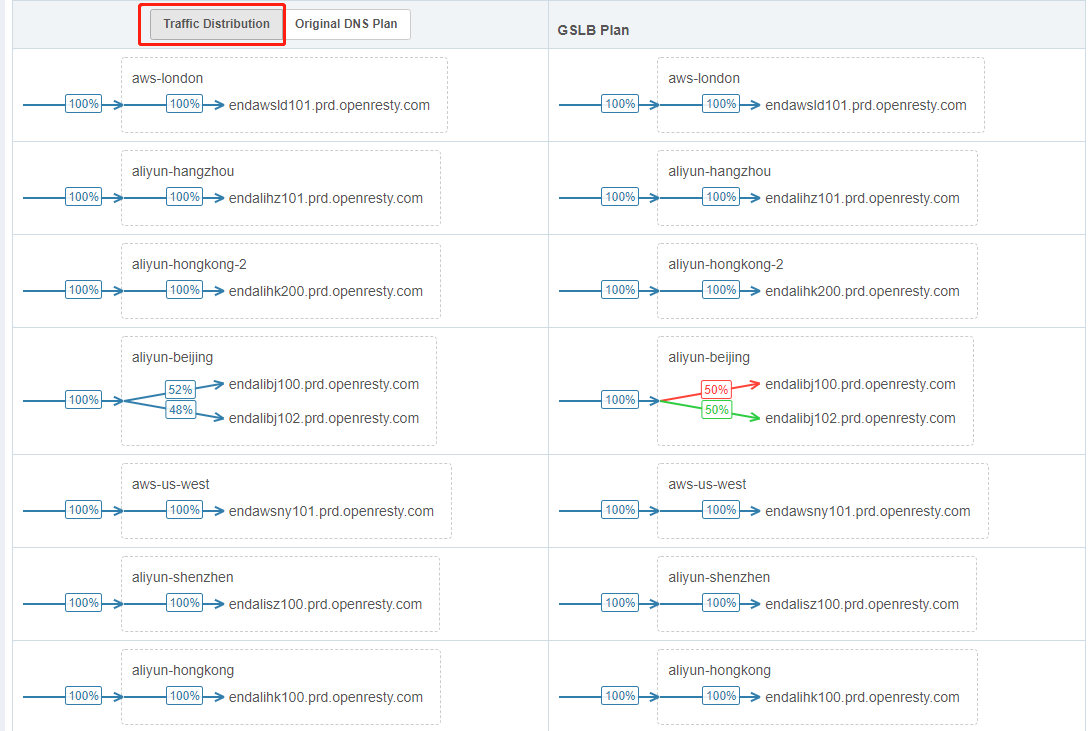
The left side contains two types of charts:
Traffic Distribution shows the real traffic distribution of each cluster node.
Original DNS Plan shows the traffic distribution based on DNS results without enabling global load balancing.
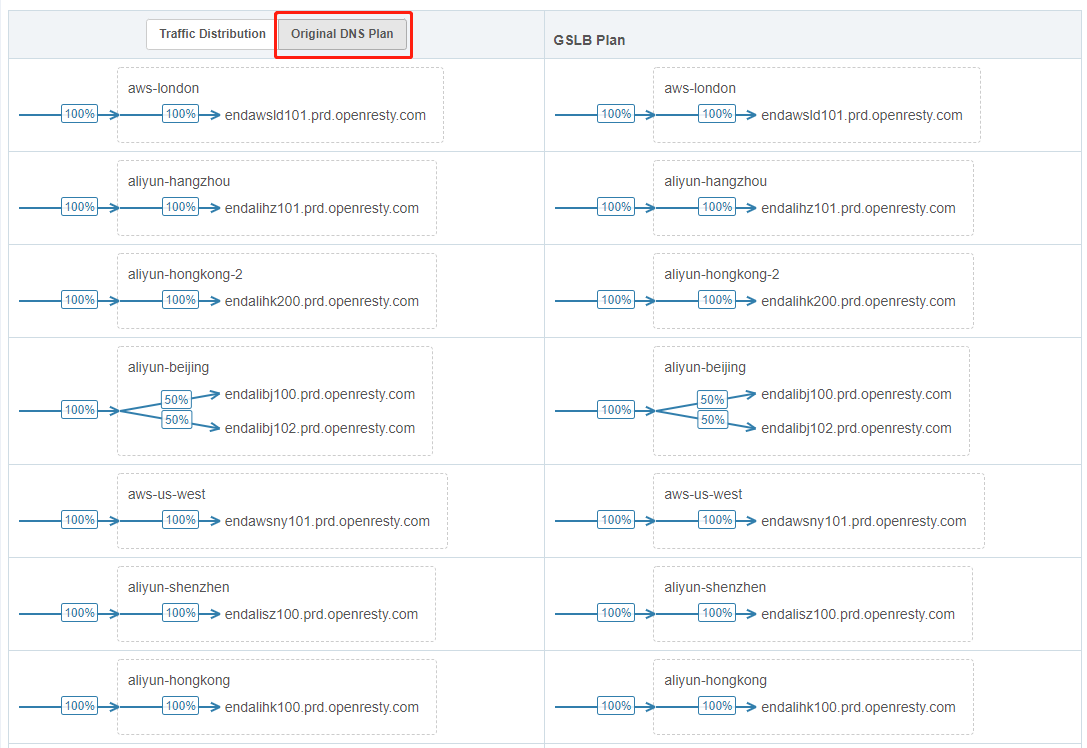
The right side displays the GSLB Plan, which shows the generated load balancing traffic distribution.
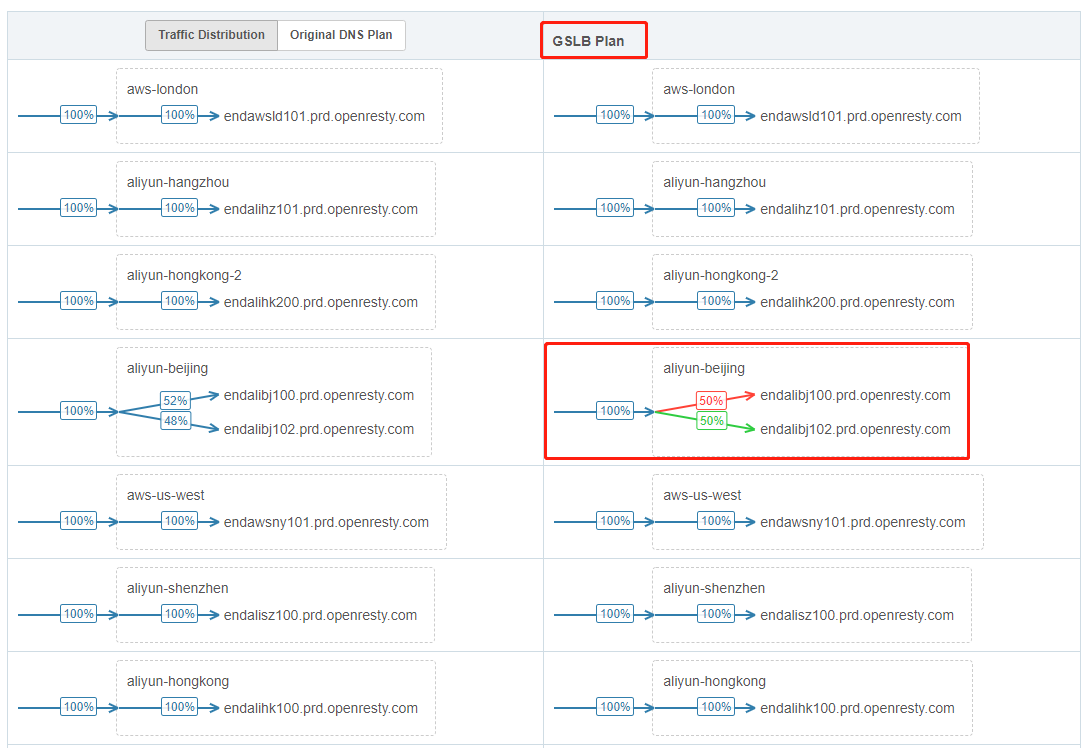
If there are differences in the traffic distribution of cluster nodes compared to the left-side charts, the arrow colors will be displayed in red or green, representing a decrease or increase in traffic flow to or from that node, respectively.
Clicking on Previous Plan and Next Plan allows you to view the previous plan history.
Example
Now, let’s take our Beijing cluster in the mini-CDN as an example. Before configuring the node metrics, the traffic distribution between the two nodes is similar.

Assuming that the performance of Beijing node 2 (127.0.0.3) is low and can only handle a small number of requests, Using Requests Per Second (RPS) as the node’s reference metric, we adjust the high watermark configuration of Beijing Node 2 to a lower value.

After waiting for the plan to update, we can observe that the load balancing has taken effect. The traffic to the second node starts to decrease, and most of the requests are distributed to Beijing node 1 (127.0.0.2) and some requests are distributed to Hangzhou node (127.0.0.1).

We add a DNS record: www.test.com, to be resolved to the Beijing gateway cluster.
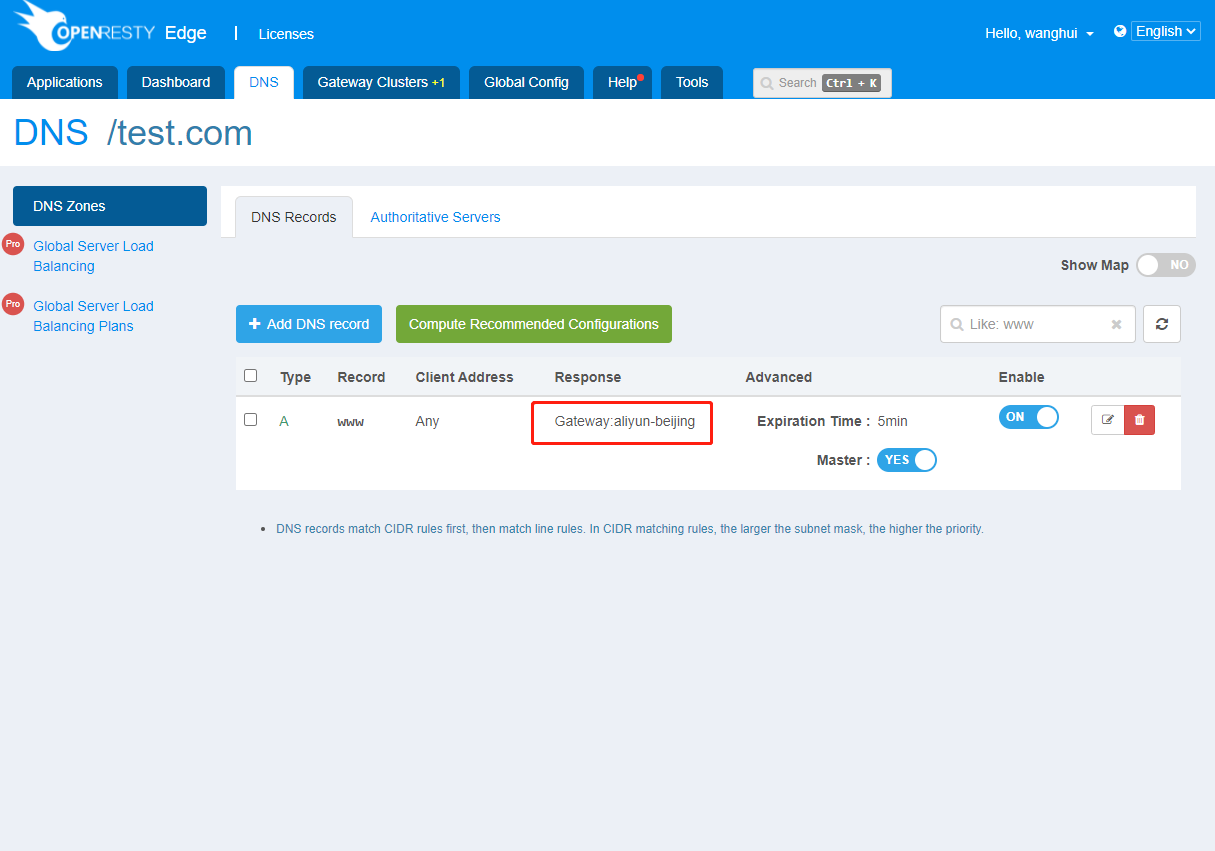
Use the dig command to requests www.test.com 1000 times, and we can see that the resolved distribution results are approximate to the results in the global server load balancing plan.
$ for i in {1..1000}; do dig www.test.com @127.0.0.1 +short; done | sort  | uniq -c
    168 127.0.0.1
    832 127.0.0.2